The Windows Subsystem for Linux (WSL) provides the ability to run the Linux environment on the Windows operating system without having the burden of a dual boot or a traditional virtual machine. Developers can make use of all the command line tools, utilities, and applications provided by WSL.
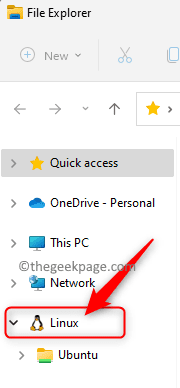
If you have installed the WSL on your Windows 11 PC, then you will notice an entry named Linux is added in the File Explorer’s navigation pane. The addition of Linux in the navigation pane makes the file systems of the distribution that is installed on your Windows PC easily accessible. This Linux entry can be removed or added from the navigation pane of your File Explorer without the need of uninstalling your Linux distribution by performing a registry operation.
If you want to add/remove the Linux entry from the File Explorer’s navigation pane on Windows 11, then read this tutorial. Here, we have detailed the steps that need to be followed in order to have the Linux entry added/removed from the File Explorer’s navigation pane.
Note: Since you will be doing a Registry operation below, make sure that you have a backup of the Registry or create a system restore point in case the registry operation creates any system issues.
Add Linux to File Explorer’s Navigation Pane
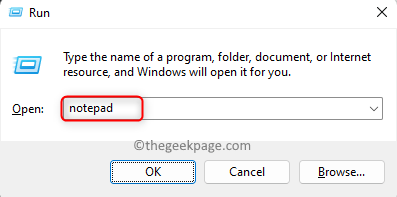
1. Just press and hold the Windows and R key combination to open the Run box.
Type notepad and hit Enter to open the Notepad application.
2. Copy and paste the code below into the Notepad editor.
Windows Registry Editor Version 5.00

[HKEY_CURRENT_USER\Software\Classes\CLSID\{B2B4A4D1-2754-4140-A2EB-9A76D9D7CDC6}]
"System.IsPinnedToNameSpaceTree"=-
3. After pasting the code into the editor, click on the File menu and choose the Save As option.
Browse and select a location to save this file onto your system.
Give a name for the file with a .reg extension. For example, you can name this file as Add_Linux_File_Explorer_Navigation_Pane.reg
Use the dropdown next to Save as type and select All Files.
Click on the Save button to save the file in the selected location.
4. Now, double-click on the .reg file that you just created above in order to add it to the Registry.
If you are prompted, then click on Run, followed by Yes (User Account Control), Yes (Registry Editor), and then on OK to confirm this Registry operation.
5. Restart the File Explorer to see if the changes have been applied.
The .reg file can be deleted if not required.
Remove Linux from File Explorer’s Navigation Pane
1. Open Notepad as mentioned above.
In the editor, copy and paste the code given below.
Windows Registry Editor Version 5.00

[HKEY_CURRENT_USER\Software\Classes\CLSID\{B2B4A4D1-2754-4140-A2EB-9A76D9D7CDC6}]
@="Linux"
"System.IsPinnedToNameSpaceTree"=dword:00000000
2. Save this file with .reg extension following the steps in Step 3 above. You can name this file as Remove_Linux_File_Explorer_Navigation_Pane.reg
3. Repeat Steps 4 and 5 above to merge the .reg file with the Registry and in turn remove the Linux entry from Navigation Pane.
That’s it!
Thanks for reading.
Did you find this article informative enough to either add or remove the Linux entry from the File Explorer’s navigation pane in Windows 11? If so, please let us know your thoughts and opinions on the same in the comments below.


