You ran the repair command everyone recommends. It crawled to 62.3%, sat there a while, then quit with error 0x800F0915.
Why This Happens
Basically? DISM went looking for replacement files and couldn’t get them.
When you run RestoreHealth, DISM compares your Windows files against a known-good list. Anything damaged, it downloads a clean copy from Microsoft. That download is the part that fails.
Sometimes it’s the servicing stack — the small piece of Windows whose entire job is installing updates. It updates itself separately from everything else. And when it falls behind the rest of the system, DISM asks for files in a format it can no longer read.
Sometimes the update cache is full of half-downloaded junk from a failed update three months ago. DISM trips over it and gives up.
And sometimes your PC just can’t reach Microsoft’s servers, because a work proxy or a VPN is quietly eating the connection. Same error code for all three. Thanks, Microsoft.
The good news is that you can hand DISM the files yourself, from a Windows ISO. That skips the download entirely, and it fixes this more often than anything else here.
Fix 1 – Clear Out the Update Cache
At first, you should try to clear out the windows update cache from your system.
1 – Press the Windows key, type cmd, right-click Command Prompt, and pick Run as administrator.
2 – Type this and press Enter:
net stop wuauserv
3 – Type this and press Enter:
net stop bits
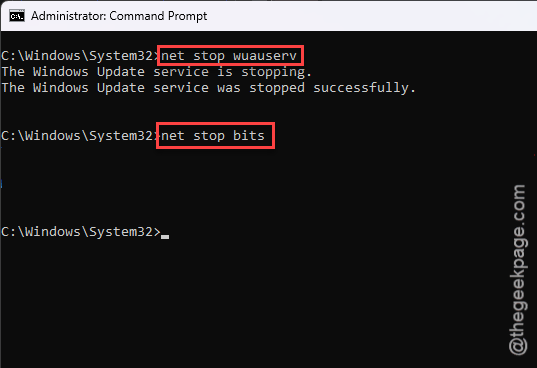
4 – Open File Explorer and go to C:\Windows\SoftwareDistribution.
5 – Select everything inside and delete it. Delete the contents, not the folder itself.
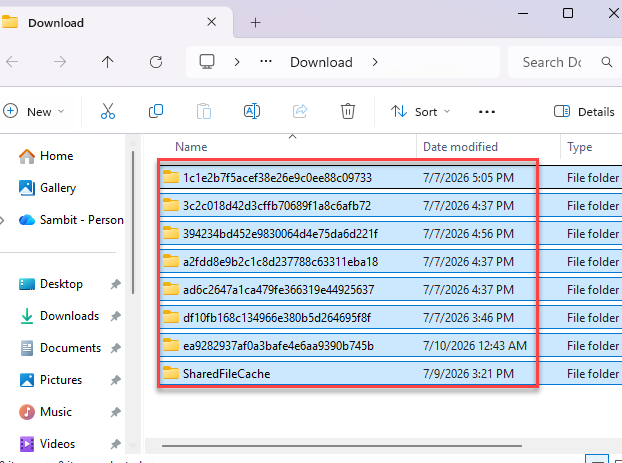
6 – Back in Command Prompt, run and these two codes.
net start wuauserv
net start bits
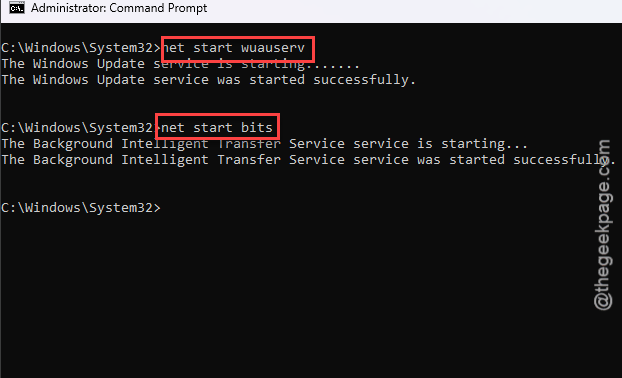
7 – Run your DISM command again.
Windows rebuilds that folder automatically. Nothing is lost.
Fix 2 – Reset the Update Engine’s Plumbing
Still failing? The signature database that verifies update files may be corrupt. Renaming it forces Windows to build a fresh one.
1 – In the same administrator Command Prompt, run:
net stop cryptsvc
2 – Then run:
ren C:\Windows\System32\catroot2 catroot2.old
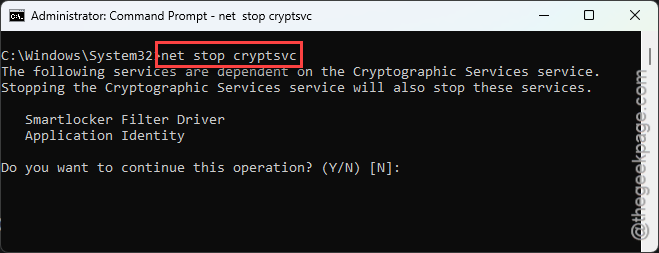
3 – Then run:
net start cryptsvc
4 – Reset your network stack with:
netsh winsock reset
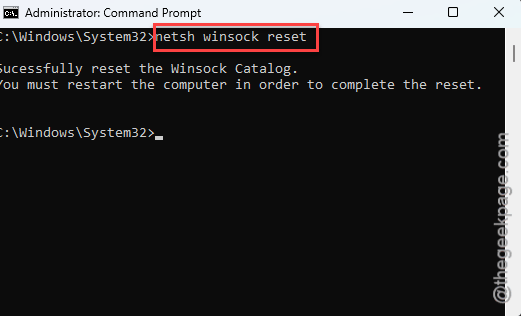
5 – Restart your PC. The winsock reset doesn’t take effect until you do.
Try DISM again after the reboot. If it gets further than 62.3% this time, you’re on the right track.
Fix 3 – Give DISM the Files Yourself
This is the one that works. Instead of letting DISM download replacements, you download a Windows 11 ISO and point the tool at it.
An ISO is just a disc image — a single file containing everything on a Windows installation disc. Windows 11 can open one without any extra software.
First, check which build you’re on.
1 – Press Windows + R, type winver, press Enter,
2 – Note the number after “OS Build“.
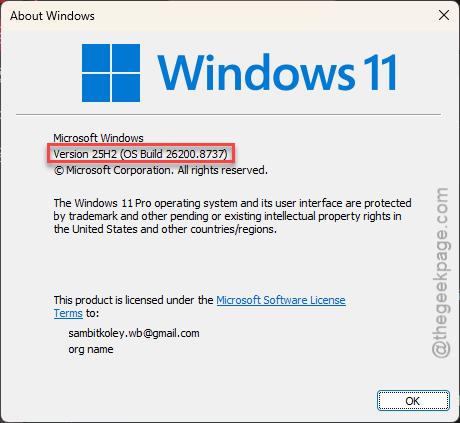
Your ISO should match that version, or be newer. An older ISO will fail with the same error you already have.
1 – Download the official Windows 11 ISO from microsoft.com. Get it from Microsoft, not a mirror site.
2 – Right-click the downloaded .iso file and choose Mount.
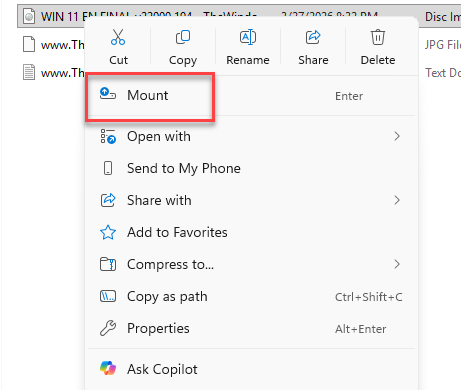
3 – Open This PC. A new drive appears, usually D: or E:. Note that letter.
4 – Open Command Prompt as administrator.
5 – Run this, swapping E: for your drive letter:
DISM /Online /Cleanup-Image /RestoreHealth /Source:WIM:E:\sources\install.wim:1 /LimitAccess
6 – Wait. It sits at 20% for several minutes and looks frozen. It isn’t. Give it up to half an hour.
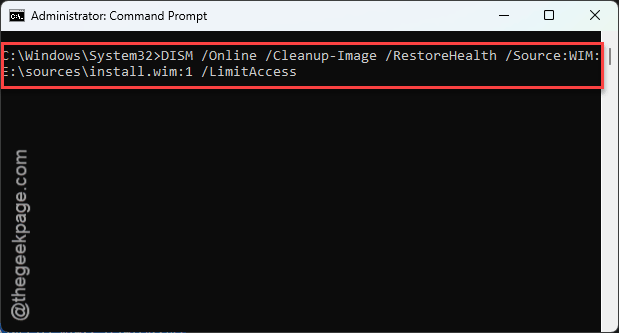
7 – Look for “The restore operation completed successfully.”
The /LimitAccess part is what stops DISM phoning home to Windows Update. Leave it out and it will try the broken download all over again.
Fix 4 – If the ISO Command Also Fails
Two things go wrong here, and both have a one-line answer.
The :1 on the end of that command means “use the first edition in the image.” But an ISO holds several editions — Home, Pro, Education — and index 1 is often Home. If you run Pro, DISM is comparing your files against the wrong version and refusing to continue.
1 – In an administrator Command Prompt, run this with your own drive letter:
dism /Get-WimInfo /WimFile:E:\sources\install.wim
2 – Read the list. Find the index number next to your edition.
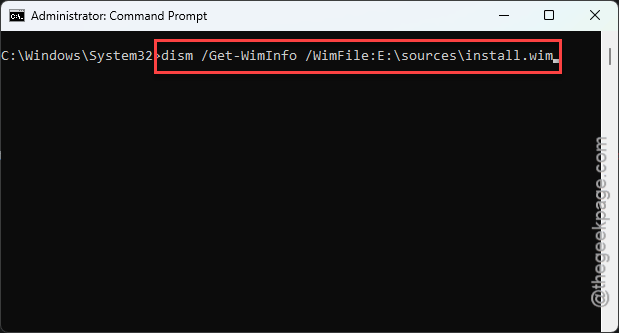
3 – Run the Fix 3 command again with that number instead of :1.
The other problem: some ISOs ship an install.esd file instead of install.wim. Open the sources folder on the mounted drive and look. If yours says esd, swap both words in the command — /Source:ESD:E:\sources\install.esd:1 — and it works the same way.
Fix 5 – Update the Servicing Stack by Hand
The servicing stack installs updates. When it’s out of date, it can’t install the update that would bring it up to date. A perfect little trap, and this is how you get out of it.
1 – Press Windows + R, type winver, press Enter, and write down the OS Build number.
2 – Go to Windows Update Catalog in your browser.
3 – Search for Servicing Stack Update followed by your Windows version, like Windows 11 25H2.
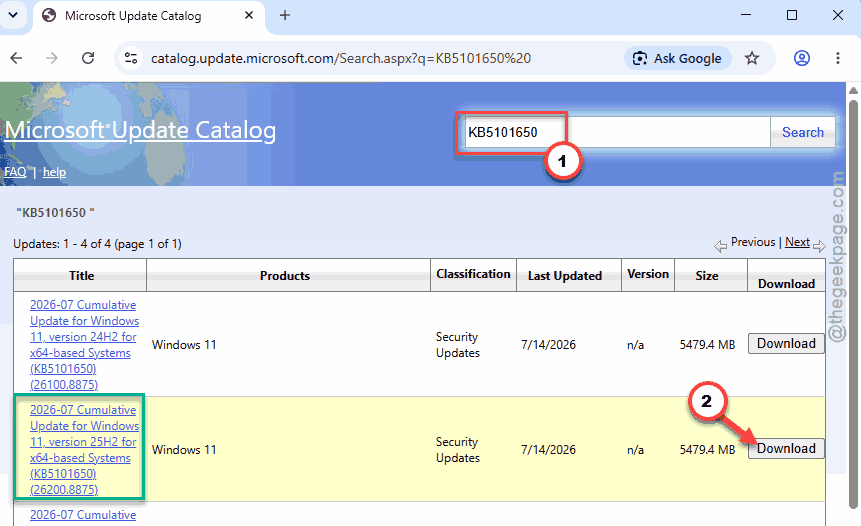
4 – Find the newest result for your version. Click Download next to the x64 file, unless you have an ARM PC — then pick ARM64.
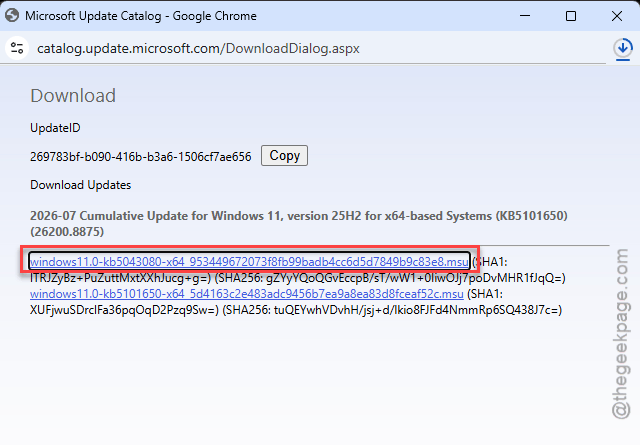
5 – Run the .msu file you downloaded. It installs on its own with no options to pick.
6 – Restart your PC.
7 – Run DISM again.
Fix 6 – Install the Stuck Update Manually
If a specific update keeps failing and taking DISM down with it, force it in through PowerShell. This skips Windows Update completely.
1 – Find the KB number of the failed update. It’s in Settings, then Windows Update, then Update history.
2 – Search that KB number on Windows Update Catalog and download the .msu file.
3 – Save it somewhere with a short path. C:\updates is ideal.
4 – Right-click the Start button and choose Terminal (Admin).
5 – Run this, with your own filename:
Add-WindowsPackage -Online -PackagePath "C:\updates\update.msu"
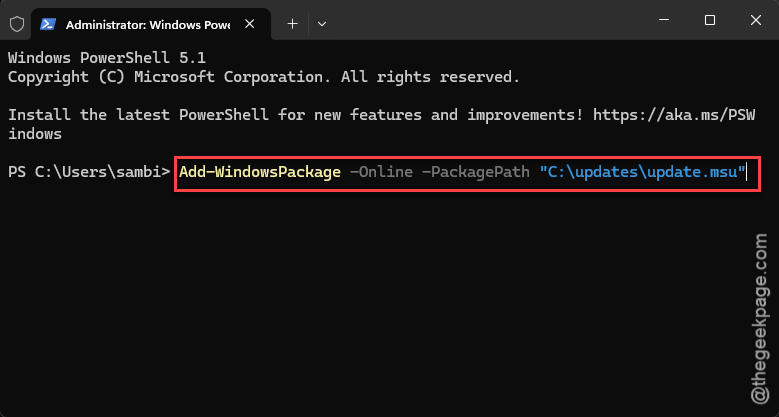
6 – Restart when it tells you to.
Fix 7 – Run SFC Afterwards
People forget this half. DISM repairs the store of clean files. It does not put them into Windows. That’s a separate tool.
Once DISM finally reports success, open an administrator Command Prompt and run sfc /scannow. It takes about ten minutes and copies good files over your damaged ones. Run it twice if the first pass says it repaired something.
How to Prevent This
– Keep an ISO for your Windows version on a spare drive. When something breaks at 11pm, you’ll be glad it’s already downloaded.
– Turn off your VPN before running DISM. It needs a clean line to Microsoft’s servers and a VPN will silently block it.
– Don’t cancel a Windows update partway through. That’s what fills SoftwareDistribution with the junk that causes this in the first place.
– Reboot when Windows asks. Half-applied updates are the single biggest source of component store corruption.
– Run DISM first, then SFC. Other order, and SFC just copies broken files over broken files.
People Also Ask
How to fix dism online cleanup image RestoreHealth not working?
Usually it can’t reach Windows Update. Turn off any VPN, clear the update cache, and reset catroot2. Still stuck? Supply the files locally from a mounted ISO with the /Source and /LimitAccess switches. And check your ISO matches the build number that winver reports.
What is DISM error 0x800f0915 when using ISO?
It means DISM can’t use the image you gave it. Most often the index number is wrong — index 1 is usually Windows Home, so Pro users need a different one. Run dism /Get-WimInfo /WimFile:E:\sources\install.wim to see the list. An ISO older than your current build fails too.