Most windows users use the basic video player that is inbuilt with the windows, which was introduced by Microsoft when released. You can play any videos, or audio files, which supports most formats like MP4, MP3, WAV, etc.
But sometimes, there might be some video files that you downloaded from the internet, be it a movie or any tutorial, where the content is rapid fast or slow. You might need to change its playback speed in order to watch and understand the video.
If you are using the windows media player and want to change its playback speed, then this article will guide you on how to do it on your Windows 11,10 PC.
How to Change Playback Speed of Video in Windows Media Payer in Windows 11,10
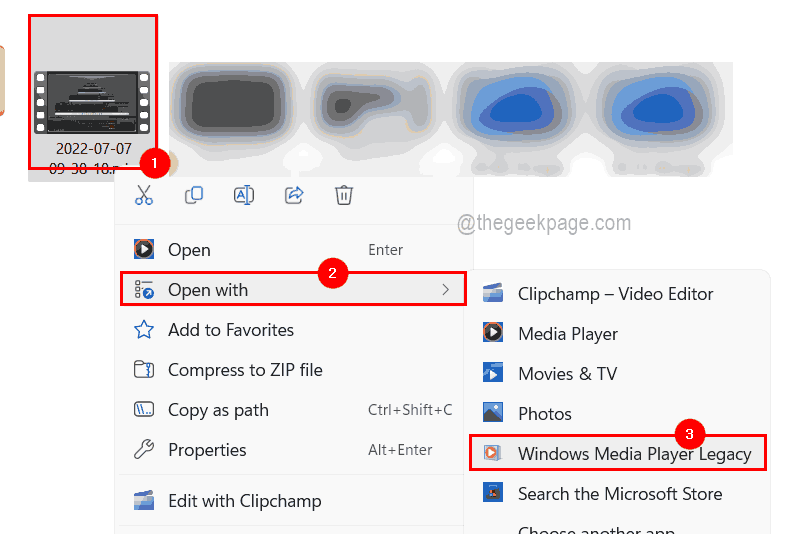
Step 1: Go to the folder where the video file present, that you want to play.
Step 2: Right-click on the video file and select Open with > Windows Media Player Legacy from its context menu as shown below.

Step 3: This opens the file in the Windows Media Player on your system.
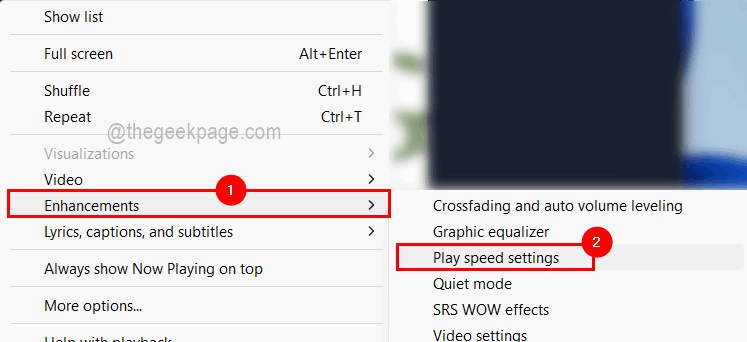
Step 4: As the video starts playing, you can right-click on the video and select Enhancements > Play speed settings from the context menu.

Step 5: Now Play speed settings small window pops up on the top left corner of the Windows media player app on the system.
Step 6: There is a slider option for changing the playback speed of the video. Please slide it to the left to make it slower or you can slide it to the right side to make the video more faster as shown in the image below.

Step 7: Once you are done, you can close the play speed settings window and this would instantly make the changes on the video and you can return to the video currently playing on windows media player app.
That’s it! This way you can change the playback speed settings of any video while playing using windows media player application on your Windows PC.