If you have recently upgraded to Windows 10, you might have found some trouble installing new softwares. That is because of a service named Software Protection Service, which runs in the Windows background. The Software Protection Service checks for the authenticity of a software when you try to install one. It also checks for the activation status of the Windows version that you have installed in your computer. If the service finds that the software you are trying to install is not legitimate, it denies you the access to install the software. This can happen even if the Software Protection Service is not running.
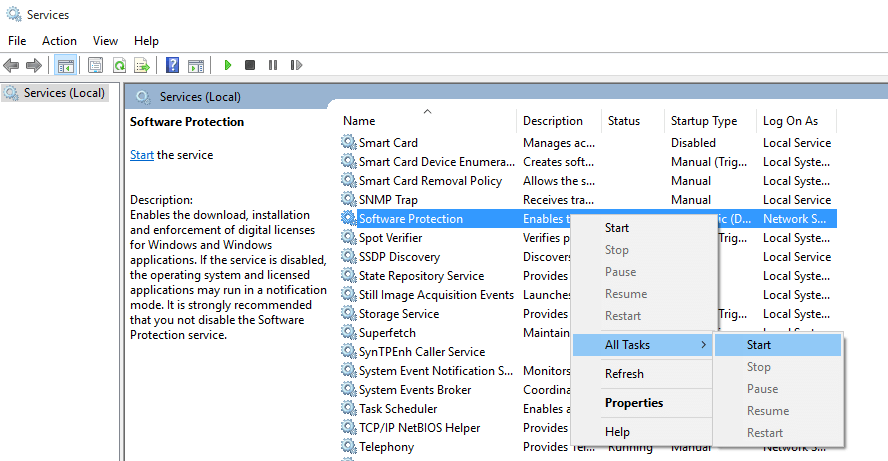
To see if your Software Protection Service is running or not, open the Run dialog by pressing Windows+R keys together. Now type in services.msc and press enter.
Find Software protection services from the list.
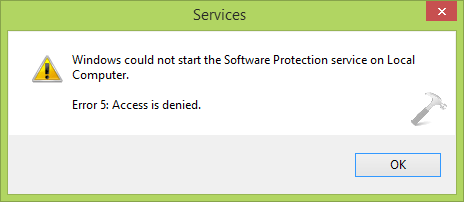
If you try to start the service manually and receive the following error, then you might want to check whether your Windows version is activated or not.

If your windows is activated and you still received the error, it could be because of some permission shortcomings. Kindly follow the steps given below to solve the issue.

Method 1
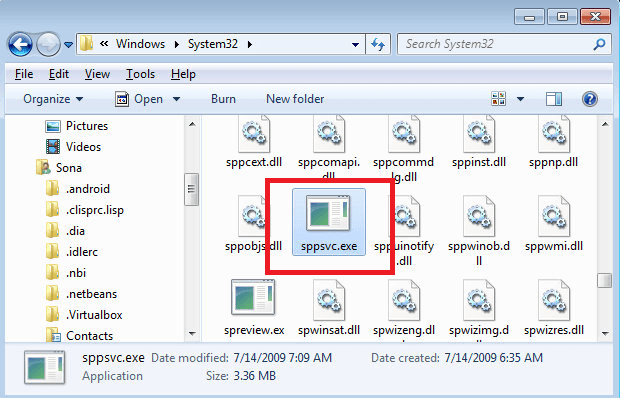
- Press Windows+E keys together to get to the navigation window. Navigate to the folder
C–> Windows–> System32 and find the file sppsvc.exe.

- Now for taking ownership of this file. This can be done by typing takeown /F “full path of file” in the command prompt opened in administrator mode.

- After taking ownership of the file sppsvc.exe, retry to start Software Protection service by opening Services, just as mentioned in the beginning. If you still can’t do it, follow the steps below.
Method 2
- Press Windows+R keys together to open the Run dialog box. Type in regedit and press OK.
- Once you are done with that, you’ll have the following window on your screen.
- Navigate to the following location to change the permission settings of the sppsvc file.
HKEY_LOCAL_MACHINE–> SOFTWARE–> Microsoft–> Windows NT–> CurrentVersion–> SoftwareProtectionPlatform.
Once you are there, right click on SoftwareProtectionPlatform and click on Permisions.

- Click on sppsvc. Allow Full Control to the sppsvc file by checking the check boxes. Click on Apply and then OK.

Now close the registry editor and reboot the machine. When the machine comes to life again, you will find that the problem no longer exists.