Is the Recycle Bin icon appearing to be greyed out on your computer? Similar problems have been reported by some Windows users recently in multiple forums including Reddit, MS forum. Deleting the Recycle Bin icon and adding the same icon from Icon Settings should help you resolve the issue. Apart from that, you can try several other solutions in the list to fix the problem.
Workarounds to try –
The basic workaround you can try is to restart the system. Restarting the system should take care of the greyed out Recycle Bin icon, given it is just a glitch.
Fix 1 – Change the Recycle Bin value
You have to manually change the Recycle Bin related value that can remove the icon from your Desktop.
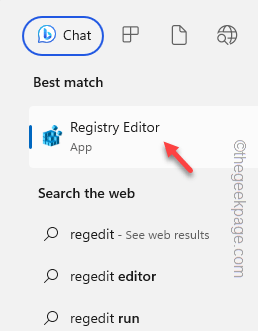
Step 1 – Open the Start Menu using the Windows key. There you have to type “regedit“.
Step 2 – Open the “Registry Editor” to open that.
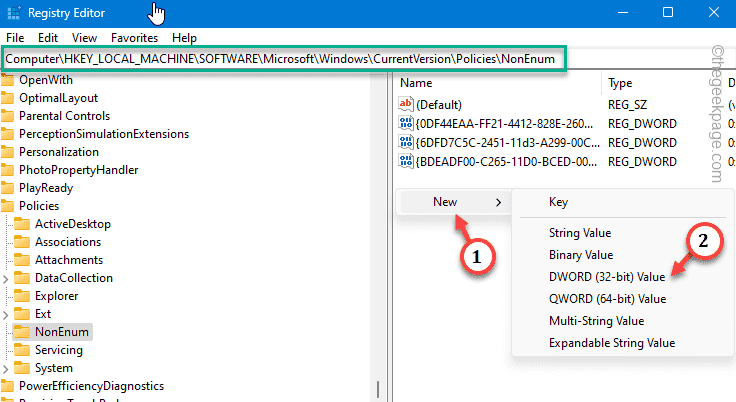
Step 3 – Go to this below-mentioned Enum value –
Computer\HKEY_LOCAL_MACHINE\SOFTWARE\Microsoft\Windows\CurrentVersion\Policies\NonEnum
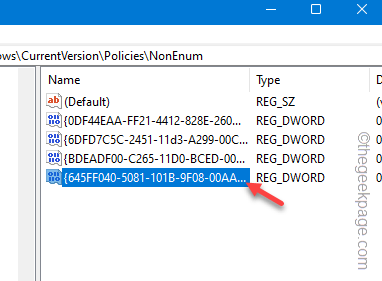
Step 4 – On the right-hand pane, you will find several values. Find the “{645FF040-5081-101B-9F08-00AA002F954E}” value.
[
If you can’t locate the specified value, follow these steps to create a new value –
a. Just right-tap on the right-hand pane and tap “New>” and click “DWORD (32-bit) Value” to create the value.
b. Just name the value “{645FF040-5081-101B-9F08-00AA002F954E}“.
]
Step 5 – Double-tap the value so that you can edit it.
Step 6 – Input “0” in the blank Value Data box.
Step 7 – After this, click “OK” to save the value change.
Quit the Registry Editor page. But you won’t see the Recycle Bin icon immediately. To notice the change, you have to restart the system.
Fix 3 – Disable the Recycle Bin group policy
There is a group policy to remove Recycle Bin icon from your Desktop. Disable that immediately.
Step 1 – Just write down this shortcut “gepdit.msc” after opening the search box.
Step 2 – Open the “gpedit.msc” option to open that.
Step 3 – Get to this point following the given path to reach the Desktop policies –
User Configuration\Administrative Templates\Desktop
Step 4 – Once you there, find the “Remove Recycle Bin icon from desktop” policy on the right-hand pane.
Step 5 – Switch to the “Not Configured” option.
Step 6 – Next, use the “Apply” and “OK“.
Quit the Local Group Policy Editor.
Restart the machine to revoke the group policy from the system.
Fix 3 – Remove the Recycle Bin icon and add it again
There is a definitive solution to this problem, where you can just put the Recycle Bin icon to the Desktop.
STAGE 1 – Remove the Recycle Bin icon
Step 1 – Directly open the Settings page.
Step 2 – There, you will find the “Personalization” settings on the left pane.
Step 3 – On the opposite side, open the “Themes” settings to open that.
Step 4 – On the same right-hand pane, if you go down, you can open the “Desktop icon settings”.
Step 5 – Open that up.
Step 6 – Untick the “Recycle Bin” box.
Step 7 – To remove the greyed out icon from your Desktop, click “Apply” and “OK“.
You will discover the Recycle Bin icon has disappeared from your Desktop page.
STAGE 2 – Enable the Recycle Bin icon
Follow these steps to re-enable Recycle Bin icon on your Desktop page.
Step 1 – You can directly open the Desktop Icon Settings. Quickly use the Win+R keys at once.
Step 2 – Paste this and click “OK“.
desk.cpl ,,5
Step 3 – Just check the “Recycle Bin” box. Next, tap “OK” to have the Recycle Bin icon on your desktop.
Go to your Desktop and test it again.
Fix 4 – Clean the Recycle Bin
If nothing so far has worked to solve the Recycle Bin greyed out issue, you should consider cleaning Recycle Bin.
Step 1 – As you can’t access the Recycle Bin, you have to do this from Settings. So, open the Settings.
Step 2 – Open the “System” settings and head on to the “Storage“.
Step 3 – Open the “Temporary files” to access it.
Wait until the system scans for all the temporary files.
Step 4 – Select the “Recycle Bin” and tap “Remove files” to remove all the files.
Step 5 – When a waring message appears, tap “Continue” to proceed.
Quit Settings.
Check whether the Recycle Bin is working or not.


