The WordPad is the quickest tool after the Notepad to jot down your colorful ideas. But, what if you can’t open the WordPad on your machine? WordPad usually works quite well and opens up very quickly. But, if there are any crucial WordPad component is missing from your system, WordPad won’t open up. Follow these sets of solution to fix the issue on your machine.
NOTE – As WordPad comes preinstalled on your Windows, you can’t directly reset or repair it like you can do any other native Store apps. So, there are just a minimal sets of solution available to fix the problem.
Fix 1 – Run the WordPad directly
You can directly run the WordPad from the installation directory and check if that helps you resolve the issue.
Step 1 – You need to open the File Explorer.
Step 2 – Go to the WordPad app, located in this directory –
C:\Program Files (x86)\Windows NT\Accessories\
Step 3 – Inside this folder, you can find the “Wordpad.exe“.
Step 4 – Right-click that and click “Run as administrator“.
WordPad will start normally. Go for the next solution, if this one have failed.
Fix 2 – Reset the WordPad registry key
Delete the Options key of the WordPad to fix the problem.
NOTE – Alteration of the system registry without a prior backup may lead to some unforeseen issues. So, it is recommended to create a registry backup following these steps.
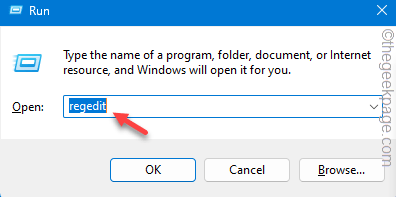
Step 1 – Hold the Windows and the R buttons together.
Step 2 – Then, type this in the blank section. Click “OK“.
regedit
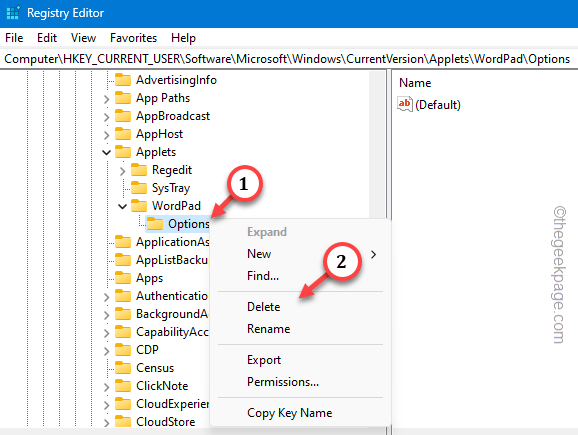
Step 3 – Travel to the WordPad key following this path –
HKEY_CURRENT_USER\SOFTWARE\Microsoft\Windows\CurrentVersion\Applets\Wordpad\Options
Step 4 – Just right-click the “Options” key and tap “Delete” to remove the key from your system.
Quit the Registry Editor. Restart your computer once.
WordPad will work just fine after the system restarts.
Fix 3 – Use the SFC codes
SFC or System File Checking scans can help you resolving the WordPad issue.
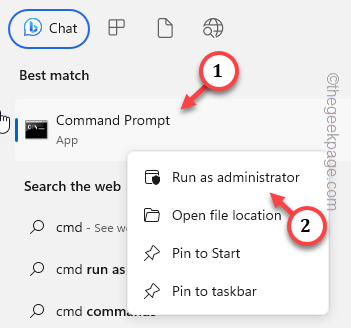
Step 1 – To do this, press the Windows key, first. Input “cmd” there.
Step 2 – Next thing you have to do is to right-tap the “Command Prompt” and choose “Run as administrator“.
Step 3 – Paste this code and press the Enter key. This will start the SFC scan on your system.
sfc /scannow
This utility scanner replaces all the corrupt files with the correct ones the system. Depending upon your system specifications, it may take just few minutes.
Patiently wait for this scanning process to be complete.
Do check the status of the WordPad. Test if this helps!
Fix 4 – Use Word or other third-party tools
If every other solutions have failed to revive the WordPad, you can use some other free lightweight word processors out there.
Feel free to try out these tools –
Apart from these tools, there is MS Word, the ultimate word processor.


