When you do a clean install you make a new account during the process, But when you upgrade Windows 10 your old account comes with you. Under certain circumstances you might want to rename a local user account on your shared Windows 10 PC. This might come handy if you use shared windows 10 PC. For this, obviously you are required to have an administrator account on the PC to make the necessary changes.A local account is defined as any account you use to log into Windows operating systems it may or may not have a combination of username and password. This is not the same as Microsoft account as it does not require Microsoft ID to log in.
You can even choose to discard the password for a user account as is it not a necessity.The local account allows complete access to the system and enables customization of features. You can even install apps and personalize setting. A percentage of consumers were not thrilled by the concept of Microsoft account that enables you to sync your various account and connect with them.
The local user account is a good option for them as it does not need a Microsoft account.Some unfortunate drawback of local user account is that you can browse the Windows store but you cannot download and install apps without a Microsoft account.You will not be able to be synchronized all of the devices you use.
Also read: – How to create Guest account in windows 10 via CMD
But with a Microsoft account there is no way to discard the sign in process as it an online account.
Change User Account Name on Windows 10
Just follow this simple step to rename the user account
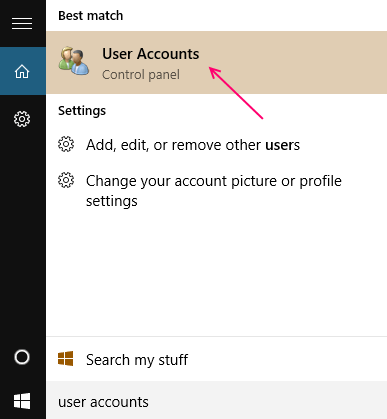
Step 1 – Click on the start menu
Step 2 – Search User account in the search box of taskbar. Click on user accounts from the search results.

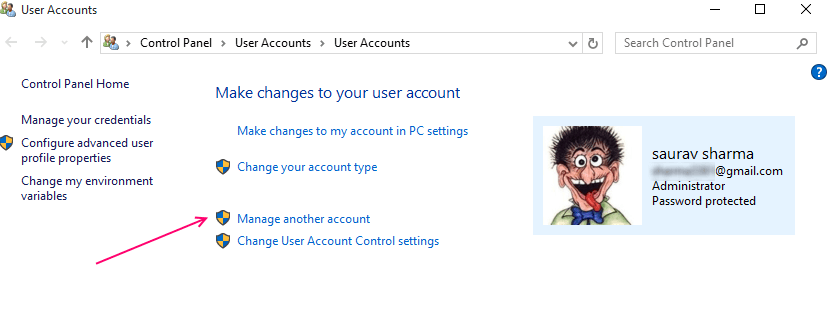
This will open up the User account section
Step 3 – Select manage another account from the section.

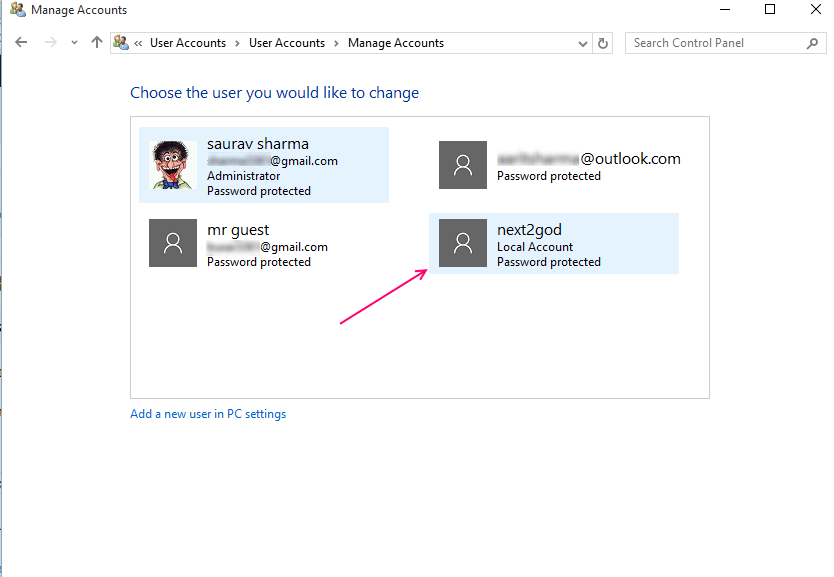
Step 4 – then select the user account you want to rename

This in turn will open a new section with several options to manage the account.
Step 5 – Select Change the account name option.

Step 6 – Enter the new name for the selected account.

This is all you need to do to successfully rename the user account. Now you can see the newly renamed account in the Manager other account section and in the log in screen.
It is great to have a local user account for children or other who does not have a Microsoft account.
In case you don’t know how to create a local user account it is quite simple.
Windows 10 does not offer an option for local account during installation but there are several advantages in having a local user account.