The problems of login from the same account might create problems in case of a shared computer (i.e. it might be shared by your family and some other people working with you). You might want to have a separate login account for each of the existing users of that computer. This will keep your privacy and it will store your files in your required manner of your account. You can have your own icons setup on your desktop and then there will be no need to worry about any misplaced files. You can create separate user (adult and child) accounts in Windows 10. If you want to restrict your kids to certain websites only, you can create Child Account. You can then also keep a check on the opened websites by your kids.
Recommended: How to create a Local Account without email in Windows 10
We can illustrate the procedure you need to follow in order to create an adult account here-
-
Open the Settings from the Start Menu.
Go to Accounts.
-
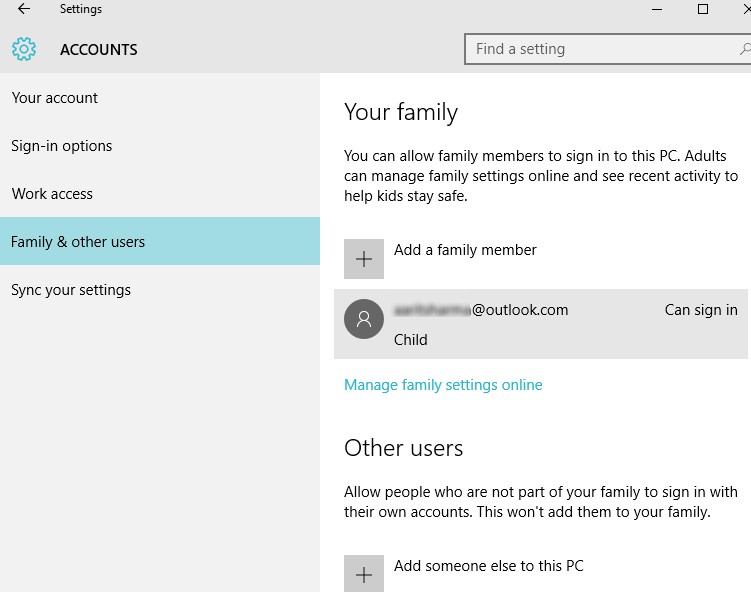
A side-menu opens up, where you can find Family & other users. Click on that to open the settings related to that.

-
If you want to create an account of your family member, you can proceed by clicking “Add a family member option” . Otherwise, you can select “Add someone else to this PC” if you want to allow people, other than your family, to sign in using different accounts. Let’s suppose we want to make a family member account. So click on Add a family Member.

-
A seperate box opens up asking whether to add a child or an adult. Here we are making account for an adult. So, mark the circle indicating “Add an adult” option.
-
Proceed with entering the Microsoft email account of the person you wish to add. If , he doesn’t have one, you’ll need to sign up.
-
Click on Next to move forward. Click on the Finish button after you’ve added the account mail of that user.
After confirming the user, an email will be sent to that user asking him/her to sign in to Microsoft. They can accept the request by clicking on the “Sign in and join” button.
If you want this user to give access in creating accounts and modifying settings on the computer, you can do so by following these steps-
1.) Search user accounts in search box of Taskbar.
2.) Under All Control Panel Items, you will find User Accounts. Click on that.
3.) Proceed by Clicking on Manage another account.
4.) Choose the user you would like to change. Select the added user from the list under this head.
5.) Find “Change the account type“. Click it.

6.) Now two options will appear- Standard and Administrator. Mark the Administrator option to ensure that the selected user can access all the files stored on the PC and can modify them. Click on the “Change Account Type” Button.

Adding the Child Account
Child account can be created when you want to restrict your kids to a certain content on the internet. This ensure their safety when they have their own accounts, and adults can have a check over the websites, games , etc. their child have an eye on. They can also limit the child’s sitting on the PC by changing the Screen Time. You can block particular websites , which you think are beyond certain age limit. You can choose which games or apps your child can play, and mark those which are above a particular age group and are not safe for your child.
You can follow the similar procedure as described above, but select Add a child. Then enter the email address of the child on Microsoft. Confirm it. An email will be sent to your child. Make him accept and then sign in.
This way you can various account set up in your PC, which not only ensures privacy but also keeps up a check on day to day proceedings of your child.

