Your USB mic used to sound crisp. Now? Muffled. Underwater. Sometimes straight-up robotic.
People on calls ask you to repeat yourself. Recordings come out distorted. And you didn’t change a thing.
Why This Happens
Basically? Windows is “fixing” your audio before it leaves your PC. And it’s making things worse.
The main offender is a feature called Voice Clarity. It’s an AI noise filter meant to clean up background hiss. But on a good USB mic, it clamps down too hard and chews up the actual frequencies of your voice. So you get that muffled, over-processed sound.
A lot of people first noticed it right after the 24H2 update. That update turned this stuff on by default.
But Voice Clarity isn’t the only thing meddling. There’s a broader set of audio “enhancements” running too. And on newer Copilot+ PCs, a dedicated AI chip can get involved and squash the audio even more. Why so many layers? No idea. Windows just really wants to touch your sound.
Fix 1 – Turn Off Voice Clarity
This is the big one. For most people, switching Voice Clarity off brings the mic straight back to normal.
1 – Press Windows + I to open Settings.
2 – Click System, then Sound.
3 – Under the Input section, click your USB microphone by name.
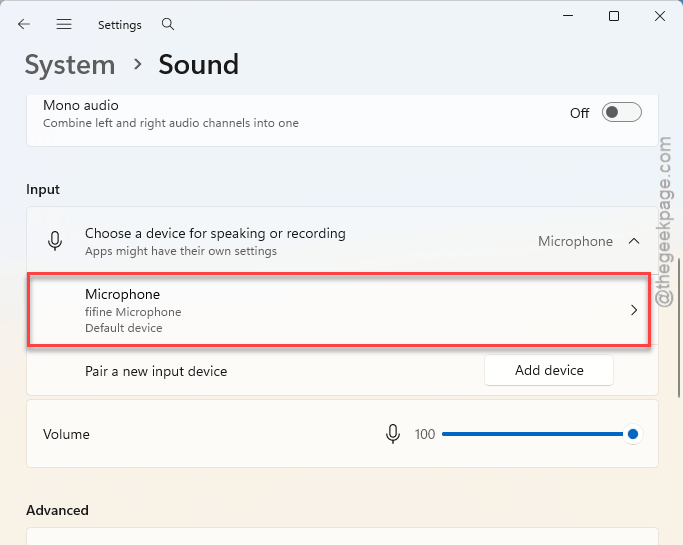
4 – Find Voice Clarity and toggle it Off.
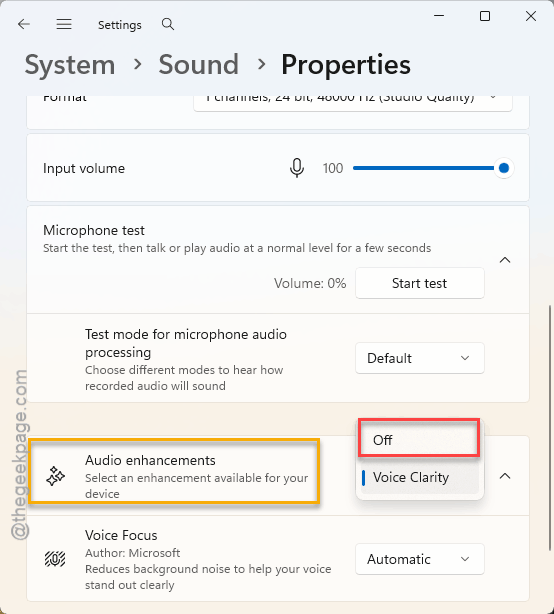
Hop on a call or record a quick test clip.
Fix 2 – Disable Audio Enhancements
Still a bit off? Windows runs other processing on top of Voice Clarity. Shut that down too.
1 – Go back to Settings > System > Sound.
2 – Click your microphone under Input.
3 – Find Audio enhancements and set it to Off.
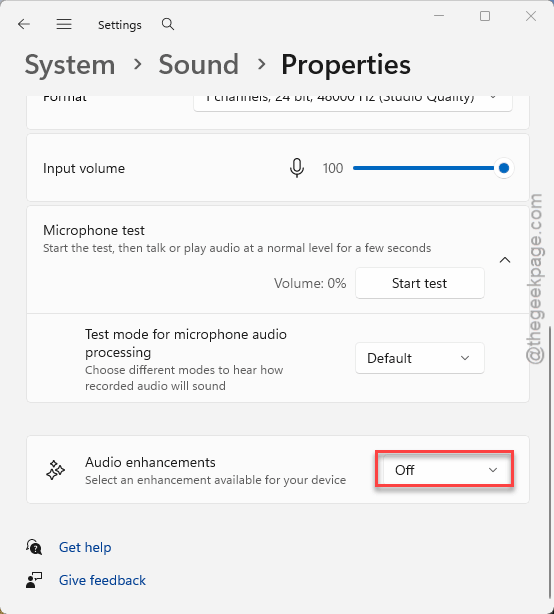
This stops Windows from applying any of its own effects to the raw feed from your mic.
Fix 3 – Stop Apps From Hijacking the Mic
There’s an old setting that lets a single app grab full control of your mic and change its behavior. Turning it off keeps things consistent across apps.
1 – Press Windows + R, to pull up a Run panel.
2 – Then, type mmsys.cpl, and press Enter.
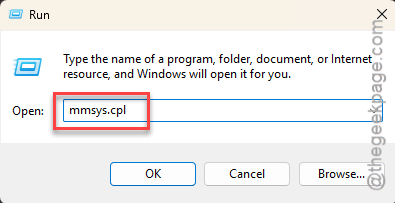
This opens the classic sound panel.
3 – Go to the Recording tab at the top.
4 – Then, right-click your microphone and choose Properties.
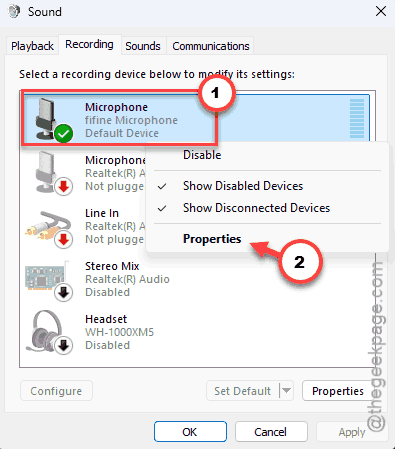
5 – Later, proceed to the Advanced tab. Then, uncheck the Allow applications to take exclusive control of this device feature.
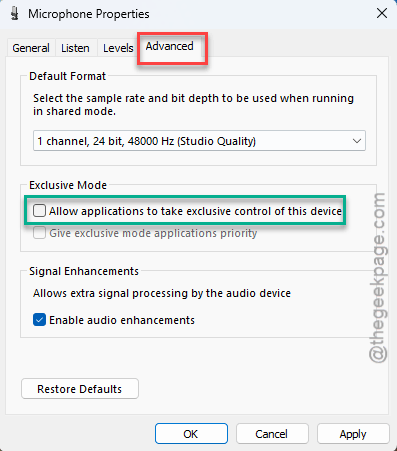
6 – Do the same for your headset or speakers under the Playback tab. Same steps, other tab.
7 – Click OK to save.
See if this resolves the muffling issue.
Fix 4 – Match the Sample Rate
Sample rate is basically how many audio snapshots per second your mic sends. If Windows and your mic disagree on that number, you get robotic, glitchy artifacts. Setting them to match clears it up.
1 – At first, hit the Windows + R buttons together.
2 – Then, type mmsys.cpl, and press Enter.
2 – On the Recording tab, double-click your microphone.
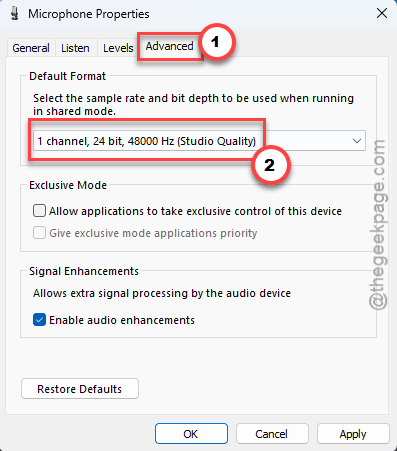
3 – Click the Advanced tab.
4 – Under Default Format, pick 24 bit, 48000 Hz (Studio Quality). It’s the safe standard most USB mics expect.
5 – Click OK.
Check if this resolves your issue.
Fix 5 – Turn Off NPU Audio Processing (Copilot+ PCs Only)
This one’s just for Copilot+ PCs — the newer machines with a built-in AI chip called an NPU. That chip can grab your audio and compress it hard.
1 – Restart your PC and enter the BIOS/UEFI. Usually you tap Delete, F2, or F10 as it powers on. The exact key flashes on the startup screen.
2 – Look under the Advanced settings for something like NPU or AI Audio Processing.
3 – Set it to Disabled.
4 – Save and exit. Your PC reboots into Windows.
Not on a Copilot+ machine? Skip this one entirely — you won’t have the option.
Fix 6 – Reinstall the Manufacturer’s Driver
Last resort. Windows sometimes swaps your mic’s proper driver for a generic one that mangles the input.
1 – To undo that, open Device Manager (right-click Start to find it),
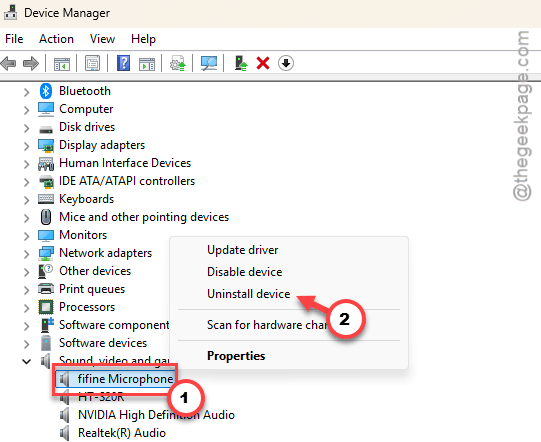
2 – Expand your audio devices, right-click your interface, and choose Uninstall device.
3 – Unplug the mic.
4 – Then grab the latest official driver from the manufacturer’s website, install it.
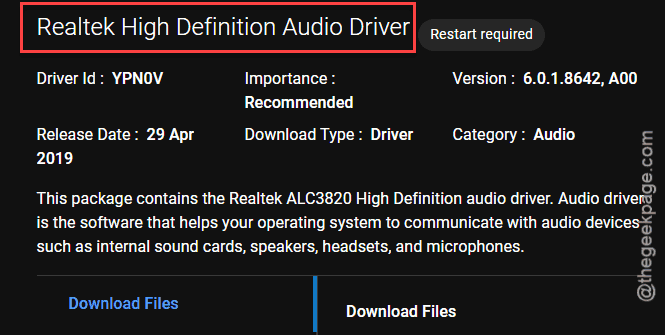
5 – Finally, plug the mic back in.
This restores the raw input path the maker intended.
How to Prevent This
– After any big Windows update, check that Voice Clarity is still off. Updates love to switch it back on.
– Keep Audio Enhancements off for any mic you actually care about. It does more harm than good on decent hardware.
– Get your mic’s driver from the manufacturer, not Windows Update. The generic one is usually the problem.
People Also Ask
Why does my mic sound muffled in Windows 11?
Most likely it’s Voice Clarity — an AI noise filter that got switched on by the 24H2 update. On a good mic it over-processes your voice into a muffled mess. Go to Settings > System > Sound, click your mic, and toggle Voice Clarity off. That fixes it for most people.
Why does my USB mic specifically sound muffled?
USB mics send a clean raw signal, so Windows’ processing has more to ruin. Voice Clarity and Audio Enhancements are the usual suspects. A mismatched sample rate can add robotic glitches on top.
How do I fix muffled audio on my PC in general?
Start by turning off all audio enhancements for the device in Sound settings. Then confirm the sample rate matches between Windows and your hardware.