Wondering what to do when no troubleshooting methods work to fix a Windows issue or when you fail to access the Windows Advanced Options from the Settings app. This is when using a bootable installation media may come to your rescue. So, whether you want to install or repair Windows 11/10, you can do it easily by creating a bootable installation media, for instance, using a USB or a DVD. Best of all, you do not lose any data in the process.
So, if your Windows 11/10 PC fails to boot normally or when no troubleshooting solution helps fix the issue, it could be due to the fact that the system hardware has gone corrupt and hence, needs to be repaired or the Windows OS needs to be freshly installed. In such a case, you can create a Windows 11/10 installation media using a USB or a DVD, easily. Let’s see how:
Method 1: Repair Windows computer using Installation Media
This method helps you to troubleshoot and repair your Wndows11/10 PC using an external media device like a USB or DVD drive. This method is especially useful for those who are unbale to boot their Windows 11/10 PC or are unable to open files. In this case, you can use the advanced recovery method to possibly fix certain complicated issues and the best part is, you end up losing no data.
Follow the below steps to repair your Windows PC using the installation media:
Download Windows ISO File
Downloading the ISO file for the same Windows version you are using on your PC is usually preferred, however, it’s not compulsory. While the Windows version is not really connected to the advanced recovery troubleshooter, it could be useful specially if and when you want to install the Windows OS freshly all over. Let’s see how:
*Note – Before you proceed to download the ISO file, make sure to check your internet connection is active, there’s enough storage on your PC, and that you have a blank USB drive handy with a minimum of 8GB storage capacity or a blank DVD.
Also, when using a DVD for the ISO file, if you come across an issue where it prompts that the disc image is too large, you need to switch to Dual Layer DVD media.
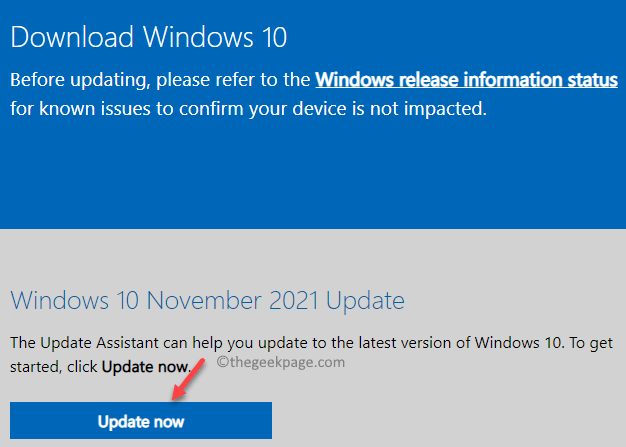
Step 1: Click on the below link to visit the official Microsoft page for the ISO download for Windows 10:
*Note – Make sure that your PC meets the basic system requirements for the installation of Windows 10 and that the processor is 64-bit or 32-bit (read here to know how to check if your PC is 32-bit or 64-bit).
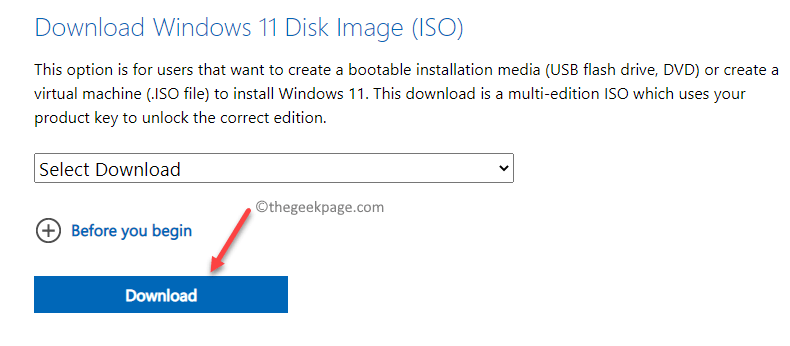
Step 2:To download Windows 11 ISO, visit the below link:
*Note – Please note that the Windows 11 ISO is currently available for only 64-bit computers, so this will be useful for only those users who already had Windows 11 installed on their 64-bit PC.
Considering that Windows 11 is not yet released for all types of systems, you must download a Windows 11 Insider preview ISO file and use the Rufus app to burn the ISO file and save it in a USB drive.
Now that you have successfully downloaded the ISO, proceed with to create the bootable USB or DVD drive.
Create Bootable USB or DVD drive
Before you proceed, make sure that you select the same language for the fresh install as you have been using previously, select the same Windows edition as it was earlier and that you use the same Microsoft Office products you have been using previously.
Now that you have the ISO file for Windows 11/10, proceed to create the bootable USB or DVD drive. While you can create the Windows 11/10 installation media using a USB or DVD drive visiting the official Microsoft page as whom above, you can also use tools like Rufus, WinToFlash, ABUSB, etc.
Since Rufus is one of the most popular Windows OS installation tool, you can refer to this article to learn how to make bootable USB for Windows11/10.
How to Boot from Installation Media and Repair your PC
As soon as you boot your PC using the USB flash drive, the Windows 11/10 installation process will begin. Avoid pressing Next on every screen as it may end up installing the Windows. So, go slow and on the first screen, click on the Repair your computer option at the bottom left.
Your Windows PC will now boot into the Advanced Recovery mode.
How to Select Startup Repair from Advanced troubleshooting
Now, you will see the Advanced troubleshooting screen. Follow the below instructions to initiate the startup repair:
Step 1: In the Troubleshoot screen, click on Advanced options.
Step 2: Next, in the Choose an option screen, click on Troubleshoot.
Step 3: Now, in the Advanced options screen, click on the Startup Repair option.
Now, follow the on-screen instructions to finish the repair process. Once done, you will see Startup Repair screen with the admin account and its name. Simply click on it and enter the admin account password that’s associated with the email address connected to it. Now, the diagnosis will begin and it will troubleshoot and fix any issues that’s preventing your PC to boot.
Once the process is over, your PC should now start up normally. The best part is, you do not lose any data during the process.
Method 2: Repair corrupted Windows 11/10 with SFC Scan and DISM
As you have seen above, you can repair the corrupt Windows PC that won’t boot up, with the help of a bootable drive, for instance, a USB flash drive. Once you have created the bootable media, you must select the boot order as USB in the BIOS screen or in the UEFI screen. This will help your PC boot up with the help of the USB flash drive.
As soon as you reach the first screen of installation, select the option – Repair your computer. You will then be directed to the Advanced Recovery options. Now, follow the below instructions to reach the Command Prompt ption:
Step 1: You will see the Troubleshoot screen.
Here, click on Advanced options.
Step 2: Next, in the Choose an option window, click on Troubleshoot.
Step 3: Now, in the Advanced options screen, click on Command Prompt.
Step 4: Next, in the Command Prompt window, run the below command and hit Enter:
DISM /Online /Cleanup-Image /RestoreHealth
This process takes a while, so wait till it gets over. It will replace any corrupt files with fresh files in the process.
Step 5: Once the above process is successfully over, execute the below command:
sfc /scannow
This is the system file checker command which will check the system files for any damage and repair them on the spot. This process also takes a while, so wait patiently till its complete.
*Note – If you wish to rebuild the BCD settings run the below commands one after another and hit Enter after each one:
bootrec /fixmbr

bootrec /fixboot

bootrec /rebuildbcd
Once done, close the Command Prompt window and restart your PC, and your PC should now boot up normally.
Method 3: Uninstall Problem Updates
Sometimes, it could be a recently installed update that may be causing an issue with the boot process of your PC. In such cases, you can uninstalling the last update through the Windows Recovery Environment and check if this helps fix the issue. Let’s see how:
Step 1: Plug in the bootable USB drive to your PC and as soon as it boots up to the first screen select Repair your computer option towards the bottom left.
Step 2: Next, you are directed to the Choose an option screen.
Here, click on Troubleshoot.
Step 3: Now, in the Troubleshoot screen, click on Advanced options.
Step 4: Once you reach the Advanced options screen, you will see a list of options again.
Here, click on the Uninstall Updates option.
Step 5: In the next screen, you will see two options – Uninstall latest quality updates and Uninstall latest feature update.
Select the appropriate option based on the kind of update you recently installed.
Step 6: Now, you will see a prompt for Uninstall latest quality updates or Uninstall latest feature update.
Here, click on the Uninstall latest quality updates or on the Uninstall latest feature update to confirm the action.
Step 7: Click on Done to finish
Your Windows 11/10 PC should now reboot normally.
Method 4: Perform a System Image Recovery
This method would work, if you have already created a backup of your system image in your Windows PC. With a system image copy, you can restore your PC when there’s hard drive crash or the PC fails to boot up. Follow the below steps to boot your PC using a system image recovery option:
Step 1: Boot your PC with the bootable USB drive you created earlier and then select the Repair your computer option right on the first screen, at the bottom.
Step 2: As your Windows PC boots into the recovery environment, select Troubleshoot in the Choose an options screen.
Step 3: Next, in the Troubleshoot screen, select Advanced options.
Step 4: Now, in the Advanced options screen, select System Image Recovery.
You will now enter the re-image screen on your PC interface.
This has the recent system image and will be select by-default.
Click Next to proceed.
*Note – Alternatively, you can also select the option – Select system image and click Next. You can then select another system mage to proceed.
Now, follow the on-screen instructions to complete the system image recovery and finally, your PC should boot up normally.
However, if none of the above method works, you can also perform a system restore. Boot your PC with the bootable USB device and then follow the Steps 1 to 3 as shown above. Once you reach the Advanced options screen, select System Restore and then perform the system restore process on Windows 11 as you would follow for Windows 10. This process takes a while so, wait patiently and once done, your system will boot up automatically and the problem should be resolved.


