Trying to edit your vacation clips in the iMovie, but continuously getting an error while exporting the final output? You will be relieved to know that you are not the only one who have faced these kinds of issues in iMovie. The exporting process of an edited footage can become tricky in iMovie. But, you can take care of that following these sets of solutions on your iPhone.
Fix 1 – Free up more storage
Exporting requires a lot of free space on your iPhone and should be greater than the video fie you are exporting. Example – If the approximate size of the edited iMovie output is 1 GB, you must have 1.5GB free space left.
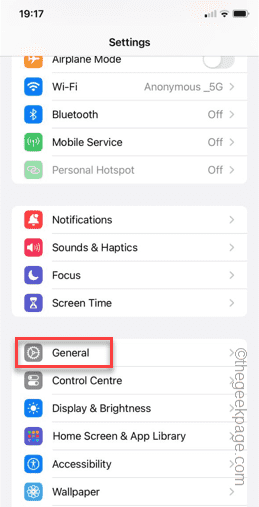
Step 1 – Start by opening the Settings.
Step 2 – Touch to open the “General” setting.
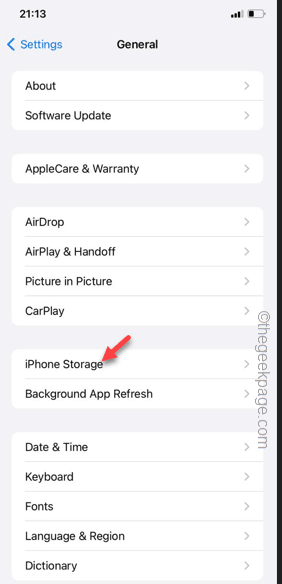
Step 3 – Among all the other settings, you will find the “iPhone Storage” option and open it up.
Step 4 – On the following page, you will get to see which apps or big files are filling up your phone storage.
Step 5 – Check which app has more AppData. Uninstall that or clear the cached data of the larger apps.
This way, clear up at least more than the size of the video output on your phone.
Now, try to export the video file in iMovie. Check if this helps.
Fix 2 – Add/remove an image and export
If you just include an image before the whole video and export that, it should work out.
Step 1 – In the iMovie, open the project.
Step 2 – In the Editor page, make sure you are at the start line of the project and tap “➕“.
Step 3 – Now, open the “Photos” folder in there.
Step 4 – Choose any picture of your choice from the list. Hold that image for a second and then tap the “➕” button to add that to the project.
Step 5 – You will see the photo has appeared at the start of the project.
Step 6 – Now, while the photo is selected, touch the “Delete” option to remove the image from there.
Step 7 – Tap “Done“.
Step 8 – Hit the “Share” button in the next page.
Step 9 – On the next prompt, tap the “Export Project” option to export the video file.
This time, you won’t find it difficult exporting the file in iMovie.
Fix 3 – Add and remove an audio effect
The more audio component you use, the more complex the export process becomes. So, you must remove any extra layer of audio tracks from the project and export it.
Step 1 – After getting to the editor of the project, look for any audio tracks that you have placed on the project.
Step 2 – The audio track line is just below the main video line. So, select the audio track from there and press the Delete button to omit that from the project.
After removing the audio track from the project, you can easily export it.
Try the next thing if this doesn’t work.
Fix 4 – Remove any extra layers/effect
There are several effects or layers you can attach with the video clips on iMovie. We recommend you try to export the final video file without any of these extra effects.
Step 1 – Open the project in iMovie.
Step 2 – Find and select any extra effects (sound effects, background, filters of any kind) in the video timeline.
Step 3 – Tap “Delete” to remove any of those from the main video.
Now try to export the video without any of these effects once more. Check if this helps!


