The Windows Installation Media is required and can be used to install or repair Windows 10. Using the method mentioned below, you will be able to legally download Windows 10 from the Microsoft’s website. We will create a bootable Windows 10 USB flash disk, using which you will be able to perform a clean Windows 10 installation and repair any Windows 10 problems. Simply follow the method mentioned below to create a Windows 10 Installation Media.
How to Create Windows Installation Media
Follow the steps to create a Windows Installation Media.
Step 1. Firstly, you will have to download the Media Creation Tool from Microsoft’s website. After Download, open it.
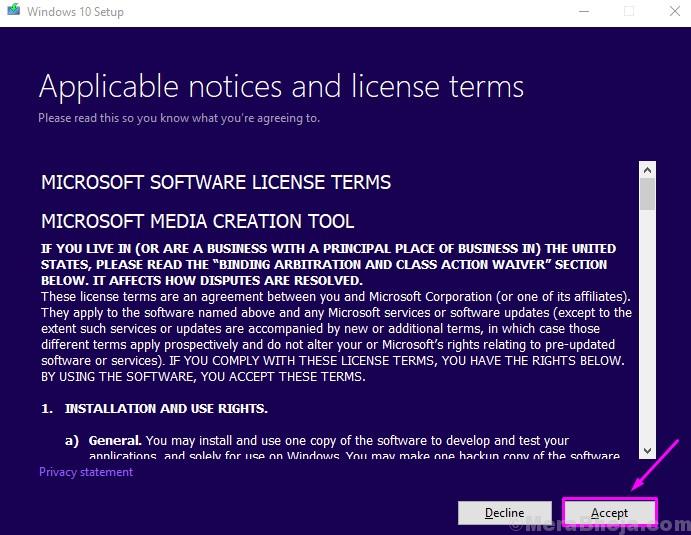
Step 2. After seeing the Getting a few things ready screen, you will be greeted with Applicable notices and license terms. Click on Accept.

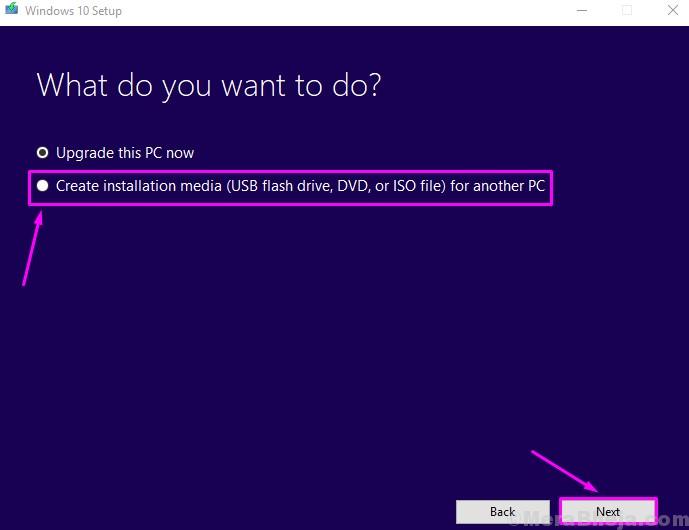
Step 3. The Media Creation Tool will take some time in getting a few things ready. After that, on the screen, select Create installation media (USB flash drive, DVD, or ISO file) for another PC, and click on Next.

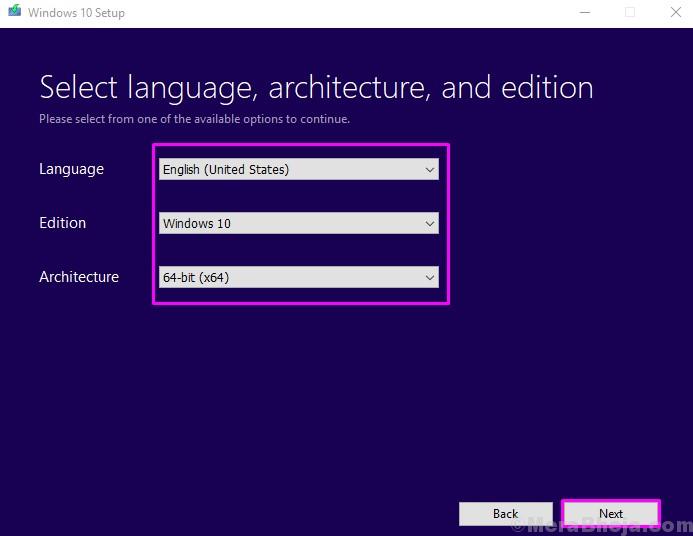
Step 4. In the next screen, you will see that the Media Creation Tool has automatically recognized the Windows 10 version you are currently using. If you want to download Windows 10 on the same computer, don’t change it. But, if you want to repair or install Windows 10 on some other computer, then simply select the Language, Edition, and Architecture, and click on Next.

Step 5. In the next step, you will have to select a USB flash drive and then click on Next.

Step 6. Now, you will have to plug an empty USB flash drive to the USB drive slot, with at least 8 GB in size, and click Next.
After the last step, the Media Creation Tool will begin downloading the Windows 10 setup files. After the completion of the download, your USB flash drive will be ready to use as Windows 10 Installation Media.
NOTE–
Once you have the DVD or USB, you will need to modify the boot preference on your computer. Follow these easy steps to do so-
Once you have adjusted the preferences, your system will boot directly from the flash drive/ CD-ROM drive.
1. Start your device.
2. Once the manufacturer’s logo appears on your screen, press the “F12“* key. The Boot Menu will appear.

[*NOTE– The exact key to enter the Boot Menu on your device may vary manufacturer to manufacturer. Please give close attention to this. ]
3. After the “BIOS” settings appear on your screen, go to the “Boot priority“.
4. Simply put the “Removable Devices” (or “CD-ROM Drive” if you have that Windows installation DVD with you) at the top to set the highest precedence.
NOTE- This term may differ PC to PC. Simply put USB/ CD-ROM Drive to the top of the Boot Menu.

If you have any questions regarding Windows Installation Media, please mention them below in the comments.