Changing the country or region on your Apple ID can be quite tricky. There are a ton of scenarios where you can’t change the region of your Apple ID. We have discussed all these conditions and their respective resolutions so that you can finally change the Apple ID on your iPhone.
Fix 1 – Cancel all the active subscriptions
Apple doesn’t permit your action of region change if you have existing active subscriptions. Usually, the apps have different subscription plans, tiers and charges (currency) in different regions.
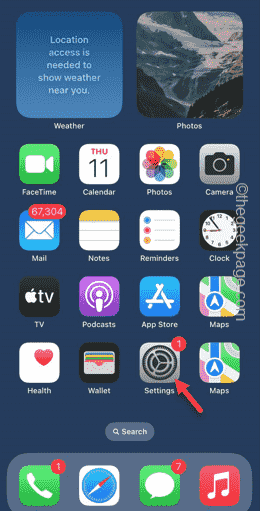
Step 1 – You have to go to the “Settings“.
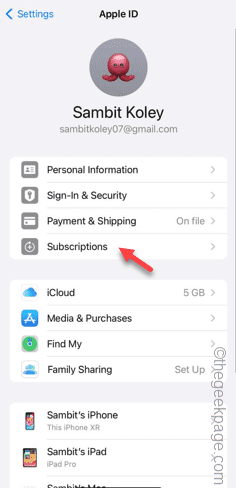
Step 2 – You will found your Apple ID at the top of the Settings page.
Step 3 – Tap that once to open it.
Step 4 – On the next page, open the “Subscriptions” menu.
Step 5 – You can see the list of subscriptions (both the Active and Inactive ones) in there.
Step 6 – You have to unsubscribe any active subscription from there.
[Don’t worry. You can start your subscriptions after changing your account region as well.]
Once you are sure that your account doesn’t have any active subscriptions, try changing the region from the Apple ID page on your iPhone.
Fix 2 – Spend all the money from Apple ID
Apple won’t accept your region change request unless you have spent most of the money in your Apple ID.
Step 1 – At first, you must open the Settings page.
Step 2 – Open the “Apple ID” at the top of the settings.
Step 3 – You must open the “Payments and Shipping” items to open it up.
Step 4 – Use your Face ID to get to the Payments page.
Step 5 – Here, in the ‘Payment Methods’, check the current “Balance” of the “Apple ID“.
You have to spend this money. You can spend this money to buy something from the App Store. Your account won’t be transferred unless the balance is completely empty.
Make sure to spent it on something useful, but do not start a new subscription plan in any of the apps. After you have exhausted the entire balance, you can shift your account to a new region without any more issues.
Fix 3 – Disable Family Sharing
If your Apple ID has Family Sharing feature enabled, the transfer of region can be done from any of the member accounts.
There are two ways of doing this. You can either choose to disable the entire Family Sharing feature or log in through the Family Organizer account, as only through that account, you can change the region.
Step 1 – After opening the Settings, open the Apple ID.
Step 2 – In your Apple ID settings tab, click to open the “Family Sharing” setting.
Step 3 – Tap the “Organizer” account to access it.
Step 4 – On the following tab, tap the “Stop Using Family Sharing” setting.
Step 5 – Hit the “Stop Using Family Sharing” feature to terminate the Family Sharing feature on your phone.
After disabling the Family Sharing feature on your Apple ID, you can change your Apple ID region from your iPhone.
Fix 4 – Wait for Store credit refunds
Apple does refund your money in case if you opt for an immediate refund. This store credit refund requests do take some time to complete. So, if you have asked for a refund against a recent purchase, you must wait a day or two before this credit refund request gets resolved.
Once the refund process is complete, you may start the region transfer process again.


