The native autocorrect/predictive text can help you fix your typos, grammatical mistakes on the go. But, when the feature doesn’t work correctly, you may end up sending messages full of mistakes. Whether you message a lot or use the phone just to keep your Office colleagues updated, you will need the autocorrect to work properly. These solutions will be helpful in your case.
Fix 1 – Turn on the predictive text
The predictive text feature must be enabled in the iPhone settings.
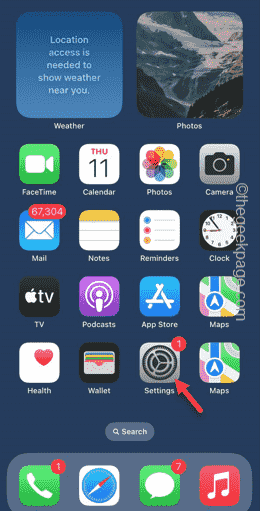
Step 1 – Touch the ⚙️ button to open the Settings.
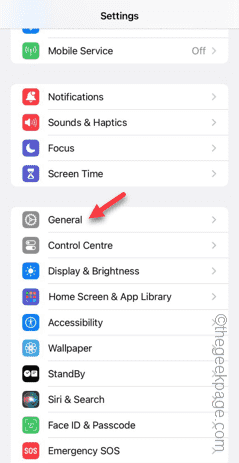
Step 2 – Tap on “General” settings.
Step 3 – Open the “Keyboard” settings.
Step 4 – In the All Keyboard settings tab, make sure of the “Auto-Correction” and the “Predictive Text” features are enabled.
Step 5 – Now, if you see both of these are enabled, disable both the “Auto-correction” and “Predictive Text” features and re-enable them.
Later, try typing something and test whether the predictive text and autocorrection features are working or not.
Fix 2 – Delete any third party keyboard
Remove any third-party keyboard from your iPhone keyboard settings.
Step 1 – At first, touch the ⚙️ icon to open the iPhone Settings.
Step 2 – Next, go to the “General” settings.
Step 3 – Next, swipe down and find the “Keyboard” settings there. Once you have found that, open that.
Step 4 – In the Keyboard settings page, tap “Keyboards” option.
Step 5 – This way, you will see the list of keyboards available on your iPhone.
Step 6 – Tap the “Edit” option to tweak the keyboard settings.
Step 7 – Slide any third-party keyboards in that list sideways and tap “Delete” to delete that keyboard from your phone.
This way, delete any third-party keyboard from your iPhone settings.
Fix 3 – Reset all the iPhone settings
Still facing issues with the autocorrect feature? Reset all the iPhone settings to the default version.
Step 1 – At first, open the Settings on your iPhone.
Step 2 – Open the “General” settings.
Step 3 – Touch the “Transfer or reset iPhone” settings to access it.
Step 4 – Next, tap the “Reset” option.
Step 5 – Now, you have to select the “Reset All Settings” from the list to reset that.
Once you are done, type something to test this out.
Hopes these fixes have help you solve the issue.


