How to Add Scan with Windows Defender to Right click menu of Windows 10: – Windows defender is Microsoft’s own antivirus software. It offers protection against malware, spyware and viruses. Windows defender has got a user-friendly interface which helps the users to easily find and remove threats against the security of the system. It doesn’t affect much on the performance of the system since it puts less burden on your system resources. Even though Defender has got many advantages it has its cons too. You cannot scan a file, folder or removable drive from the context menu. This flaw troubles the users a lot. Suppose you want to scan a removable drive after connecting it to your system for checking malware or viruses, you have to launch defender separately and from there you have to run a custom scan. We can deal with this issue by adding an option to scan the removable device or drive in the right-click menu. Read on, to learn the step by step process to scan any drive or external device from the right-click menu.
Also Read: How to add exclusion of particular files / folders / apps in windows-10
STEP 1
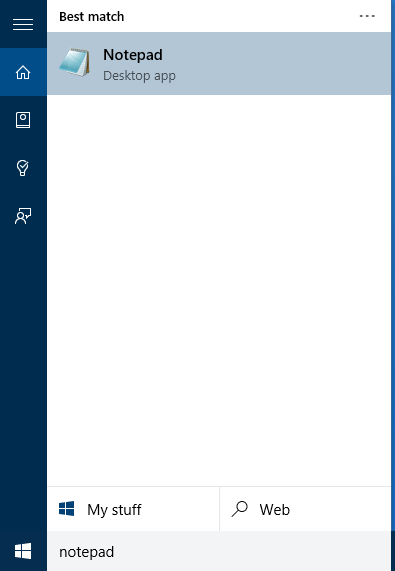
- Launch notepad by typing notepad in the search box.
STEP 2
- Now copy and paste the text given below to the notepad opened in the first step. Don’t try to modify the text. Copy the entire text.
Windows Registry Editor Version 5.00
; Folder Scan

[HKEY_CLASSES_ROOT\Folder\shell\WindowsDefender]
"Icon"="%ProgramFiles%\\\\Windows Defender\\\\EppManifest.dll"
"MUIVerb"="Scan with Windows Defender"

[HKEY_CLASSES_ROOT\Folder\shell\WindowsDefender\Command]
@="cmd.exe /s /c \"\"C:\\Program Files\\Windows Defender\\MpCmdRun.exe\" -scan -scantype 3 -SignatureUpdate -file \"%1 \"\" & pause"

; File Scan

[HKEY_CLASSES_ROOT\*\shell\WindowsDefender]
"Icon"="%ProgramFiles%\\\\Windows Defender\\\\EppManifest.dll"
"MUIVerb"="Scan with Windows Defender"

[HKEY_CLASSES_ROOT\*\shell\WindowsDefender\Command]
@="cmd.exe /s /c \"\"C:\\Program Files\\Windows Defender\\MpCmdRun.exe\" -scan -scantype 3 -SignatureUpdate -file \"%1 \"\" & pause"
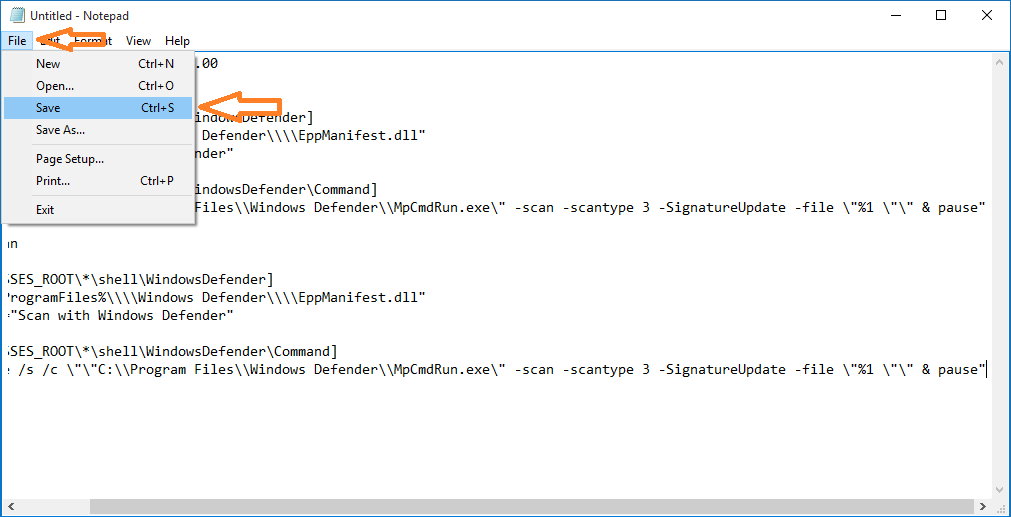
- After pasting the code, click on File thereupon Save.
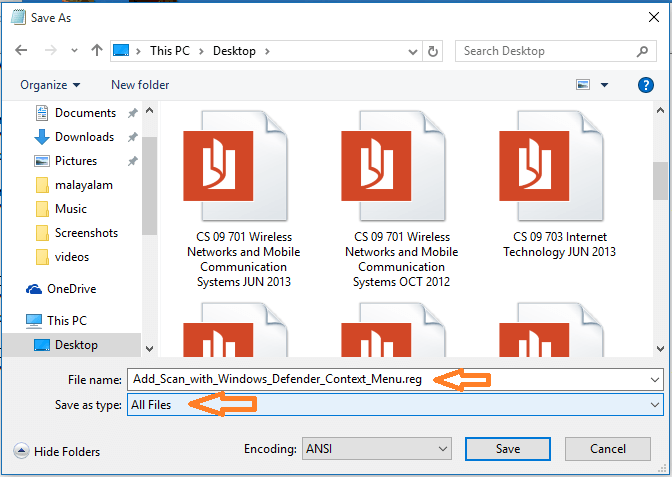
- In the saving window, select your desired location and type or copy-paste “Add_Scan_with_Windows_Defender_Context_Menu.reg” (without quotes) in the File Name field. Select All Files in the in the Save as type field. Click on Save.
STEP 3
- Now move to the location where the .reg file has been saved. Double-click on the file.
- Click Yes when a wizard prompts for the merger to happen.
STEP 4
- Now right-click on any removable drives, folders or directories of your system and select Scan with Windows Defender from the context menu.
Adding this option to the context menu improves the level of security of your system as scanning for threats is just a one click task. So if you are more concerned with the security of your system follow the steps shown above.


