We all want to cherish the moments of our lives and don’t want to loose any moments. To help cherish the moments of our lives, there are some good cloud services. Among them, the one that stands out the most is Google Photos. Google Photos is a free cloud based services that helps you store your photos and videos over the internet so whenever you go, wherever you go you always have your memories with you. Today we will show you how to make most of Google Photos.
Also read: – 52 Google tricks you should know
Google photos is available for Windows PC, Mac, iOS and Android. For smartphones there are apps available. Windows and Mac computer users can use Google Chrome for best experience. https://photos.google.com/
Feature of Google Photos
- Auto upload from all your devices
- Automatically organized and searchable
- Easy edit and share the pics with cool filters to choose from.
*For using this service, you need a Google Account.
Without wasting time, we will dig in how to use the Google Photos service. For demonstration purpose we are using an Android phone paired with Windows 10 PC. Now Follow the steps:
Step 1: Download the app to your Smartphone
Download the respective app to your smartphone from the link provided below.
Android users can download here
iOS users can download here
Note: Most of the android phones comes preinstalled with Google Photos. If you are not running a recent version, please update to latest one.
Step 2: When you open the app it asks to sign in. Signing in the app, uses your default google account associated with your phone. To help preserve your cellular data and battery, disable the “Use cellular data to back up”. Click on continue and choose High Quality for Upload size of photos and videos.
Once these settings are enabled, you are good to go. All the photos are uploaded whenever you are connected to unmetered WiFi connection. Now lets see the UI of app and its cool features.
Since the app itself is cloud based, most of the features works only when you are connected to the internet.
Features of the App
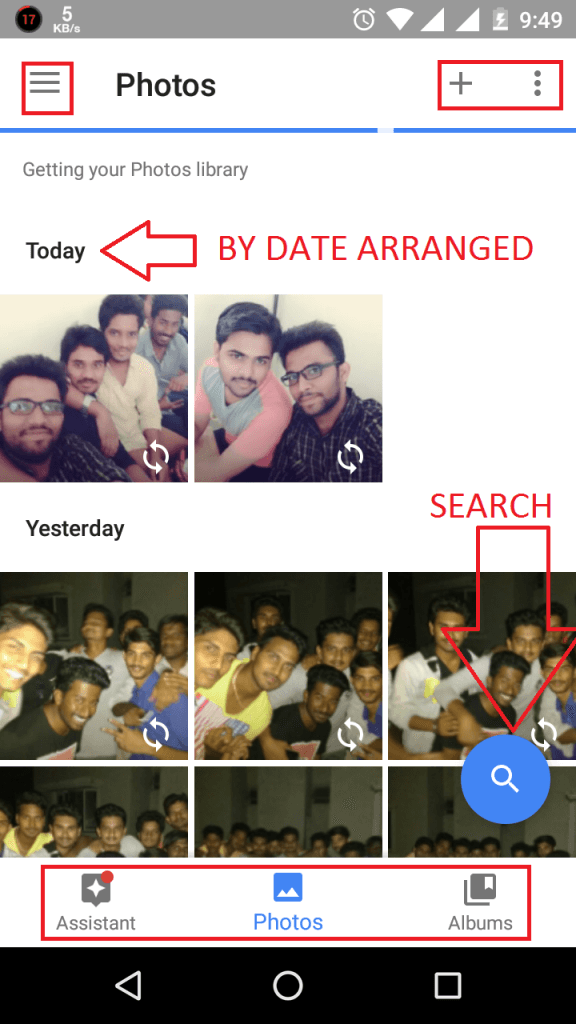
Photos: The pics are arranged by data wise. There is an intelligent search button. Your photos are now searchable by the places and things that appear in them. Looking for the cat in the house? Just search for “Cat in the house”

Assistant
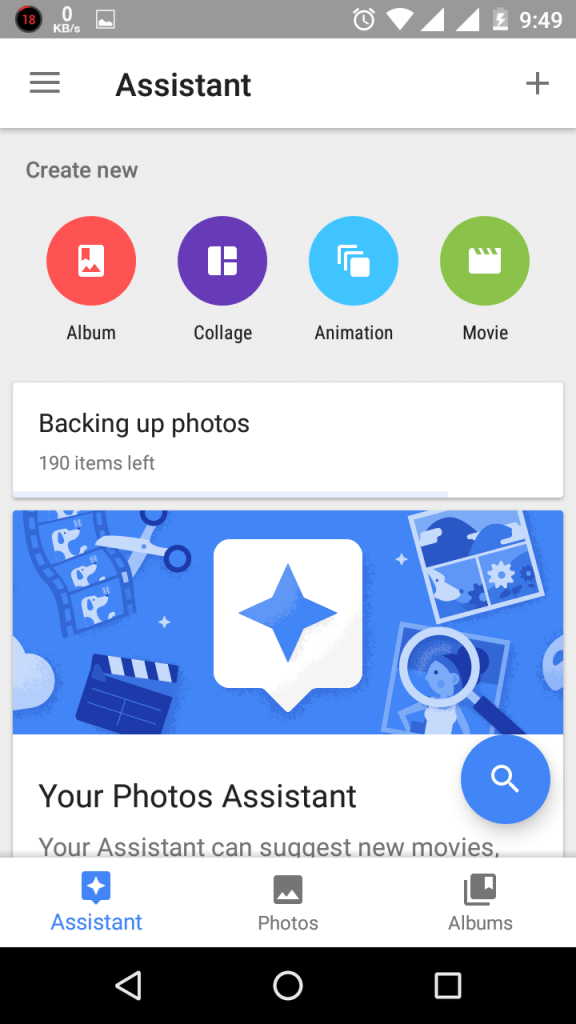
Clicking on the Assistant section, brings the Assistant menu as shown.

With assistant you can create Albums, Shared Album, Movie, Story, Collage, Animation. Note these features requires good and reliable internet connections. Once you created any of the above, these are synced across your account so that you can view it on other devices connected to your account. It can also suggest things based on your usage pattern.
Albums
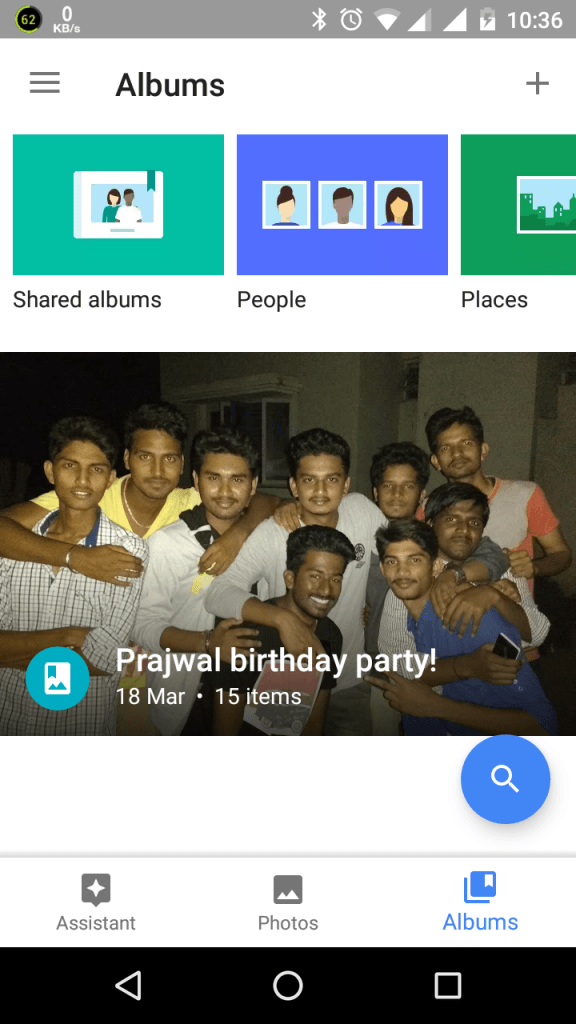
Clicking on the Albums Section, opens the Album section.
This is where you can see all your albums you created across your various devices. You can create various of albums like places, things etc. You can even share the albums to do so open the album and click on the share button. You can either create link, or send via mail / Whatsapp or others
Other features
Some other features include
- The ability to share albums, or photos. Just tap on the share button on the photo/album and select the service you want to share it on.
- You can add filter to the images. select any photo and click on the Edit icon in the bottom. The edit feature comes with some basic tools like Crop, Rotate, Trim, Light/Darken, Pop and auto correct. It also offers different effects for your photos.
- Can group similar faces. To turn this click on the hamburger menu > settings and scroll through the settings and turn this on. Google uses its image-search technology to classify the subject of a photo
Overall, Google offers an excellent service called Google Photos that helps you cherish each and every moment of your life. It helps in editing, sharing, preserving and taking with you everywhere. Thanks for reading, stay tuned for more!
