When looking for an Android emulator, the first choice for many of us is still the BlueStacks. It’s known for its user-friendly interface and the way it allows you to smoothly install Android apps, play and view them on your Windows PC.
But there may be a few features of BlueStacks that you are still not so conversant with. For instance, transferring files from BlueStacks to your Windows PC or laptop. Well, we are here to help you with this quick guide. Let’s find out.
Method 1 : Using Media manager
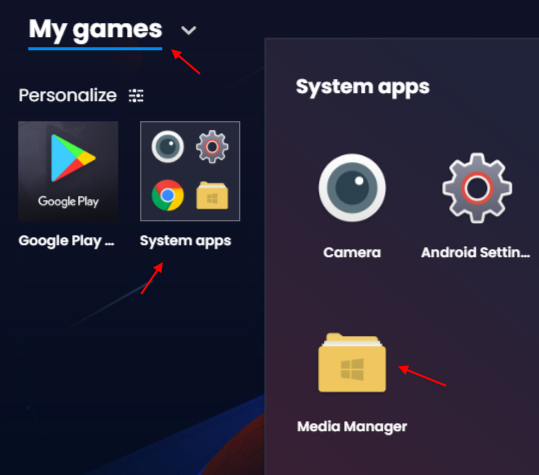
- Open BlueStacks .
- Click on My Games icon at top left
- Click on the System Apps.
- Click on Media manager.

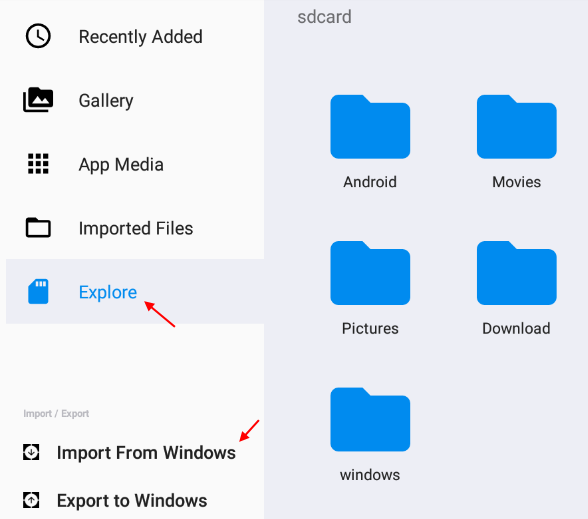
- Now, click on explore from the left menu.
- Click on Import from windows to import files from windows 10 or Windows 11 PC to bluestacks.

Method 2: Using Shared Folder in Windows
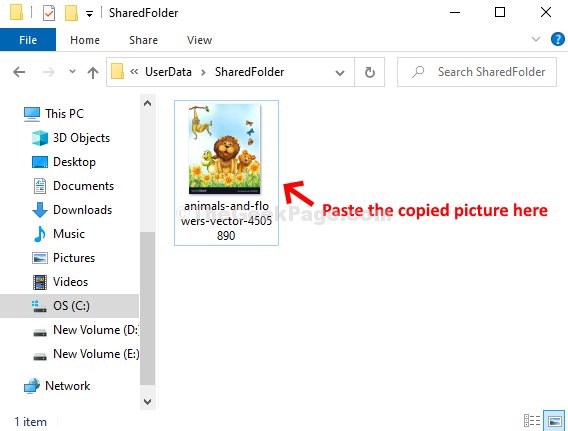
There’s a Shared Folder between BlueStacks and Windows which can be accessed from both the locations, that is, from both BlueStacks and Windows. So, all you need to do is to store your files in the Shared Folder and then you can access them from both the locations (BlueStacks and Windows).
Step 1: You will have to navigate to the Shared Folder location in your Windows PC by following the below path:
C:\ProgramData\BlueStacks\Engine\UserData\SharedFolder
Note: – If you can not find the shared folder on the location given above, you can try browsing to the path given below
- C:/ProgramData/BlueStacks/Engine/UserData/SharedFolderor
- C:/BlueStacksData/Bluestacks/UserData/SharedFolder.
Step 3: Simply copy any Windows file and paste it to the Shared Folder.
The file you paste in this folder can be easily accessed via Bluestacks.

Lets see how to access these files via Bluestacks
Step 4: Open BlueStacks .
Click on My Games icon at top left
Click on the System Apps.
Click on Media manager.

Step 5: It will open a new window for Media Manager in the BlueStacks app > Media Manager tab > click on Explore on the left > double-click on the windows folder on the right.

Step 6: Now, click on the BstSharedFolder.

So, that’s it! Here, you can access the Windows files that you have transferred.