Many users are complaining for Windows error with error code 0x80072F8F. Here are simple and 100% working fixes for this error. This error usually occurs while trying to download apps from Microsoft store. Sometimes if you have a pending update reboot, it can get fixed if you restart your pc to install the pending update. If this is not the case, just try the methods given below to fix your error.
Note: – Some users reported that, they face this error when an Windows update is pending. Please , Go to settings > Update & Security and check if you have any windows 10 update pending for reboot.
Fix 1 – wsrest
Try using wsreset to reset Microsoft store. Usually resetting Store fixes most of its errors. Resetting Store is super easy.
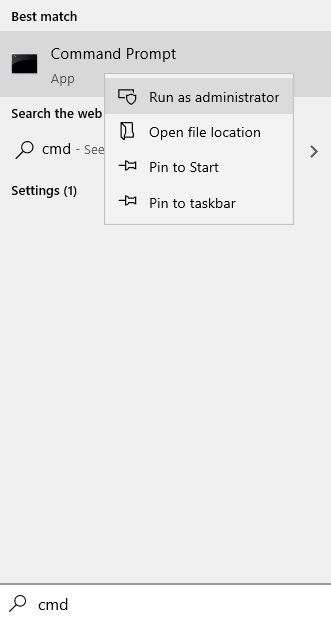
1 – Search cmd in Windows search box. Right click and choose run as administrator

2 – Type wsreset in command prompt window and hit Enter key

Wait for few seconds till it executes and Repairs Windows store. Once it fully reset the store , the Microsoft store opens up.
Fix 2 – Using Powershell
Try re-registering Microsft store default apps. For that, just Open Powershell with elevated rights. Follow the steps given below to Re-register default apps.
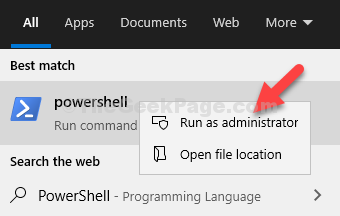
1. Search Powershell in Windows 10 Search.
2. Right click on the Powershell Icon and Run as Administrator.

3. Now, copy and paste the code given below in Powershell.
Get-AppXPackage -AllUsers -Name Microsoft.WindowsStore | Foreach {Add-AppxPackage -DisableDevelopmentMode -Register "$($_.InstallLocation)\AppXManifest.xml" -Verbose}
4. Press Enter key to execute it.
Note: The code executed above will reinstall Windows store app on Your PC. Try to Open Windows Store again and your Problem will get fixed. If it does not happen, move on to the next method.
If this does not sort the issue, try running the following command in the powershell.
wuauclt.exe /updatenow
Close the powershell window and try again.
Fix 3 – Check the time and Region settings
1. Press Windows + I key together to open settings.
2. Now, Click on Time & Language
3. Now, toggle ON Both Set time Automatically and Set time zone automatically

4. Now, click on region from the left menu and select united states in the right section from the drop-down.

For Windows 11
1 – Search Date & Time settings in search box of windows 11 and click on it to open date and time settings.

2 -Now, Check date and time and make sure they are correct.
Also, make sure the time zone is correct and

3 -Scroll down and click on Language and Region.

4 -Now, select your correct country / region from the options.

Fix 5 – Reinstall Store via Powershell
1 – Search Powershell in search box and then do a right click on the search result and then select run as administrator

2 – Copy paste the command in Powersehll window and Hit enter key
Get-AppXPackage -AllUsers -Name Microsoft.WindowsStore | Foreach {Add-AppxPackage -DisableDevelopmentMode -Register "$($_.InstallLocation)\AppXManifest.xml" -Verbose}
3 -Close the Powershell window and try again to check if it works or not
Fix 5 – Using Settings
1. Press Windows key and I key together to Open Settings.
2. Choose Apps.
3. Choose Apps and Features from Left Menu
4. Now, Scroll down and Locate Microsoft Store
5. Click on Advanced Options

6. Now, Scroll down and Click on Reset.
Follow On screen Instruction Prompt and Keep in Mind that all the Windows store data will be deleted.
Fix 6 – Run SFC / SCANNOW
1. Search CMD in windows 10 search box.
2. Now, right click and run as administrator
3. Now, run the following command given below in command prompt window.
SFC / SCANNOW
Wait for the command to get executed fully.