Why split the Huge Excel Spreadsheet?
Let us suppose you need to store data of the patients in a hospital, you will need to import a CSV file containing that many numbers of records, say over a million. But, the question here is how will you import and manage a Spreadsheet with over a million records?
The solution is to split the huge CSV file of more than a million patients into smaller multiple files so that it becomes easy for Excel to work with.
What happens when you open huge CSV files in Excel?
Ways to split Huge CSV Files
1. Use a Program to Split CSV files
We can simply use the CSV Splitter programs to split the huge CSV files. These splitters are widely used in spite of their memory issues. Use any one of the below-mentioned programs to split the files. They are available freely on the internet to download.


2. CSV Splitter
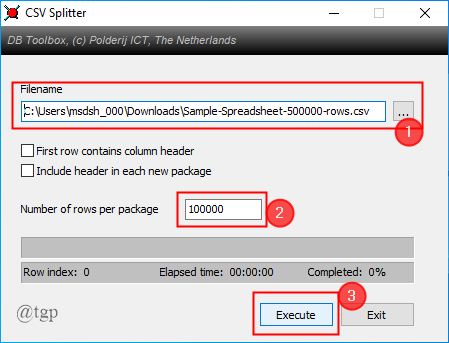
This also does the same function as the above splitter. Let us see how to split the files in this program.


2. Online Source Split CSV
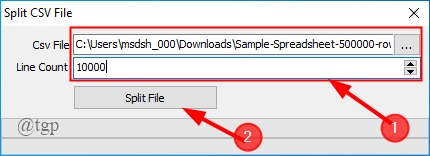
You can also break up the CSV files into smaller files using a free online source called Split CSV.
1. Open the Split CSV in your browser.

2. Upload the file you want to split.

3. Mention the line count you want the file to have.

4. Follow the on-screen steps and finally click on Split.

NOTE: Split CSV has some premium options also. To use these options you need to pay some subscription fees.
3. USe a Batch File
We can also use a batch file to split the huge CSV file into multiple files. Let us see how to create a batch file and then customize it to do the needy.
1. Open a text file ( Notepad). Write the batch code to split the CSV file (copy the code given below).
@echo off
setlocal ENABLEDELAYEDEXPANSION
REM Edit this value to change the name of the file that needs splitting. Include the extension.
SET BFN=SampleSpreadsheet.csv
REM Edit this value to change the number of lines per file.
SET LPF=2500
REM Edit this value to change the name of each short file. It will be followed by a number indicating where it is in the list.
SET SFN=ResultSplitFile
REM Do not change beyond this line.
SET SFX=%BFN:~-3%
SET /A LineNum=0
SET /A FileNum=1
For /F "delims==" %%l in (%BFN%) Do (
SET /A LineNum+=1
echo %%l >> %SFN%!FileNum!.%SFX%
if !LineNum! EQU !LPF! (
SET /A LineNum=0
SET /A FileNum+=1
)
)
endlocal
Pause
2. Now, let us look into the code and what changes do you need to make so that you can split your particular CSV file.

You will need to change the below values for the code to work for you accordingly,
SET BFN = This should be pointing to the CSV file that needs to be split. Just replace with your own CSV file path .
SET LPF = This is the number of rows you wish to open in your new file.
SET SFN = This is the new name you give to your split files.
3. Now, go to File > Save As > batch.bat file >Save.

4. Now, the file gets saved on the desktop as shown below. Double-click on the file to run in the command prompt.

NOTE: If you want to edit the code, Right-click on the batch icon and click on Edit.
5. Once, the batch program process the code, the Huge CSV file will be split into multiple smaller files based on your input.
After changing these values, please save your code as a .bat file with a new name and follow the above steps to split the CSV file.
4. Use Powershell
Powershell coding is easier and faster when compared to batch file processing. Hence, we can go with Powershell for this processing. Before going into the process, please copy the code given below into a notepad.

1. Press ” Windows+X” to open Powershell as admin.


2. Modify the code copied in the notepad according to your CSV file requirements. The modifications to be made are
- $InputFilename = Get-Content ‘C:\file\location’ :- Fill in the location of your CSV file in the system. My files are found at “C:\Users\msdsh_000\Downloads\ Sample-Spreadsheet-500000-rows”.
- $OutputFilenamePattern = ‘output_done_’ :- You can change the output name of your file in this line. My output file name is changed to ” Output-sample”.
- $LineLimit = 50000:- Here, you can limit the line count. I am limiting it to 10000.
After the changes are made, copy the entire code and paste it into the Powershell window.
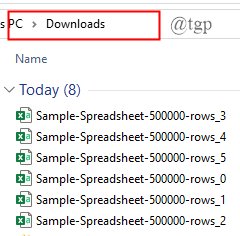
3. The code is run in the Powershell window and the output is saved as .csv files.

5. Use Power Pivot
1. Open a blank Excel Spreadsheet. Go to Data > New Query > From file > From CSV.

2. A window pops up asking you to import a CSV file.

3. Preview of the file is shown. Now, click on Load > Load to

4. Make sure you check the box against ” Add this data to the data model” and also click on the radio button ” Only create connection”. Finally, click Load.

NOTE: This step tells that we are not loading the data to an Excel sheet.
6. The entire large file gets loaded. Now, click on Manage Data.

7. The Power Pivot table will now appear on the screen, where you can add and change the columns as you need.

This method does not divide the CSV file into smaller files. You can simply manipulate the CSV in Excel, which is really useful.