If you want to scan the files on your computer using Windows Defender, but you don’t want to do it inactive hours (when you are working), this article is going to help schedule a scan in Windows Defender. Windows Defender is an efficient in-built tool of Windows 10 which scans for viruses and potential threats on your computer. But during the scan Windows Defender does consume a huge chunk of the processing power and memory of your system, making the latter slow. So, it is better to schedule the Windows Defender scan on your computer in a non-active period of time.
Schedule Windows Defender scan on your computer-
Follow these steps to schedule Windows Defender scan on your computer-
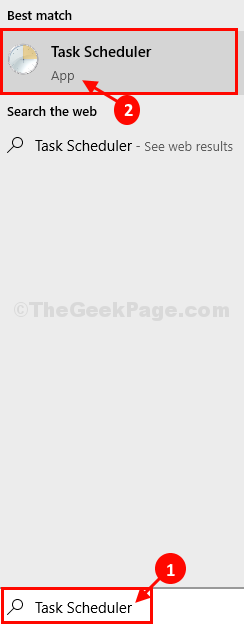
1. Search “Task Scheduler” from the search box.
2. Then, click on “Task Scheduler” to access it.

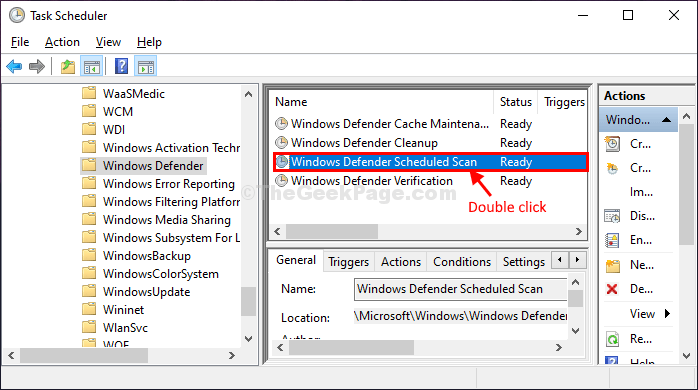
3. In Task Scheduler window, navigate to this location-
Task Scheduler -> Microsoft -> Windows -> Windows Defender
4. Now, on the right pane of Task Scheduler window, in the box, double click on “Windows Defender Scheduled Scan” to open Properties of it.

5. In Windows Defender Scheduler Scan Properties window, go to the “Triggers” tab
6. Then, you need to click on “New…“.

7. Now, in the New Trigger window, first, click on “Weekly” in the ‘Settings‘ tab to configure a weekly scan. You can easily choose “Monthly” option also.
8. Next, configure the ‘Start:‘ time, select the date, and then configure the timing of the scan also.
9. Now, choose a particular date on which the scan will take place.
10. Finally, click on “Enabled” and then click on “OK” to save the changes on your computer.

11. Coming back to the Windows Defender Scheduler Scan Properties window, go to the “Actions” tab and then click on “Edit…“.

12. In the Edit Actions window, you can modify the “Add arguments (optional):” according to your need.
Scan -ScheduleJob is for Quick Scan
Scan -ScheduleJob -ScanType 2 is for Full Scan
13. Simply, copy any of these arguments( in bold font) according to your need and paste it in the box beside “Add arguments (optional):“.
14. Click on “OK” to save the changes.

15. Again coming back to the Windows Defender Scheduler Scan Properties window, go to the “Conditions” tab.
16. In the Power Options tab, modify the settings as follows-
Check the box beside the option “Start the task only if the computer is on AC power“.
Now, if you are doing this on a laptop, we suggest you check the option “Stop if the computer switches to battery power” also to save battery power.
In case if you think you will put your computer to sleep mode, check the option “Wake the computer to run this task” which will awake Windows to perform the scan.
17. Now, click on “OK” to save the changes on your computer.

That’s it! You have successfully completed configuring an autonomous Windows Defender scan on your system which will scan the files on your computer for potential threats and viruses.