The main context button on the Windows 11 doesn’t have the refresh button by default. Refreshing the screen items on the latest version of Windows take 3 clicks, instead of the usual two-click easy approach. But, you can say goodbye to that tedious process as we are going to explain the exact procedure of how to switch back to the Windows 10 refresh option. The entire process is very easy and should not take a more minute or two to follow.
How to switch back to Windows 10 refresh option in Windows 11
You can easily restore the older two-click refresh button on your system with just a simple registry tweak. Now, there are two ways you can do these –
Create and run a registry script
Download the registry script and run it
Follow the method that suits you the best.
Create and run the registry script
Build a registry script using the code from here and run that same registry script on your machine. This will return the classic context menu (along with the two-click refresh option) on your machine.
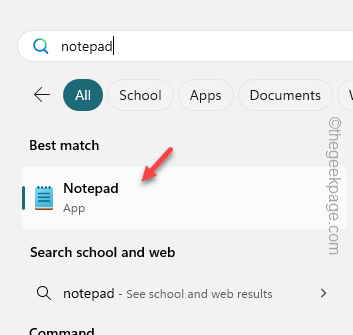
Step 1 – Start a search for “Notepad“.
Step 2 – Next, open the “Notepad” to open it up.
Step 3 – This should open up a blank instance of Notepad on your system.
Step 4 – Paste this entire registry code in there –
Windows Registry Editor Version 5.00
[HKEY_LOCAL_MACHINE\SYSTEM\CurrentControlSet\Control\FeatureManagement\Overrides6118283]
"EnabledState"=dword:00000001
"EnabledStateOptions"=dword:00000001
"Variant"=dword:00000000
"VariantPayload"=dword:00000000
"VariantPayloadKind"=dword:00000000
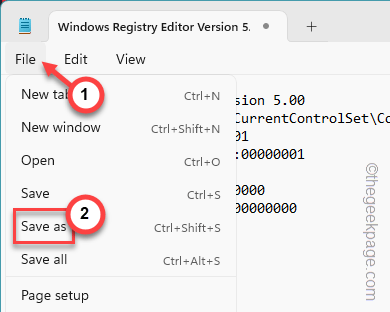
Step 5 – Now, you must save the text file on your device. So, click the “File” button.
Step 6 – Then, use the “Save As” option.
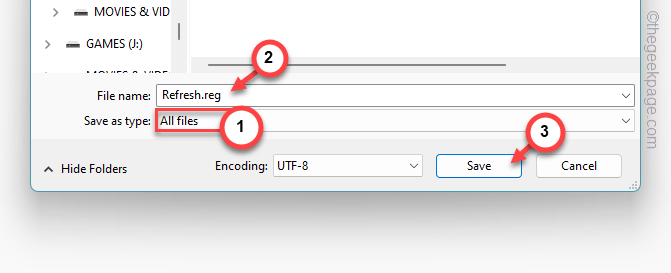
Step 7 – Before you do anything else, set the ‘Save As type:’ to “All” mode.
Step 8 – Next, write the name of the registry script “Refresh.reg“.
Step 9 – Choose an easily accessible location and save the file there.
Once you are done, quit the Notepad page.
Step 10 – Locate the “Refresh.reg” file that you have just created.
Step 11 – Directly, right-click the “Refresh.reg” file and choose “Open“.
Whenever you attempt to run a registry script on a Windows device, it shows up a statutory warning message that reads like this –
Adding information can unintentionally change or delete values and cause components to stop working correctly.
Step 12 – Ignore that and click “Yes“.
This will change particular keys and values in your system registry, allowing the change in the refresh menu on your computer.
But, this change will take effect when you restart your device.
Download and run the registry file
Don’t want to get into the hassle of creating the registry file? You can download the registry file and run the registry script directly on your system.
Step 1 – Get the Refresh.zip from here. This compressed file contains the script.
Step 2 – Next, extract the zip file in a preferred location.
Step 3 – Later, select the registry script, right-tap that and tap “Open“.
Step 4 – Ignore the prompt it throws up and tap “Continue“.
As the registry gets updated on your device, you will get the classic version of refresh back on your computer.
But, for the change to come into effect, restart the device.
You will get back the older refresh option back in Windows 11.


