Most of the issues faced by Windows users are caused because of device driver issues. If you are facing any issues with your audio devices, you could try restarting the audio driver once. There is a high probability that your issue will be resolved by just doing that. Read on, to learn how you can restart the audio driver in your Windows 11.
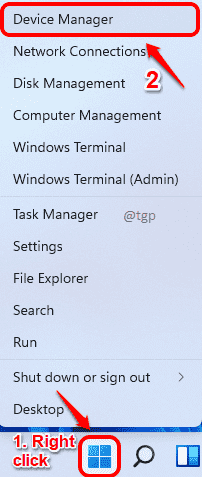
Step 1: Right click on Windows icon in the taskbar and then click on Device Manager from the menu that expands out.
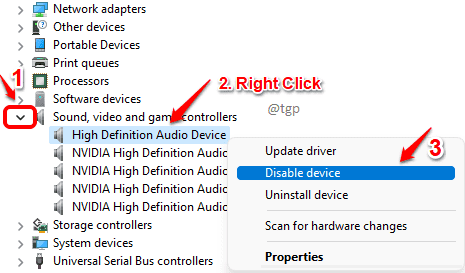
Step 2: Click on the down arrow associated with the section Sound, video and game controllers.
Now right click on your audio driver. Then click on the option Disable device.
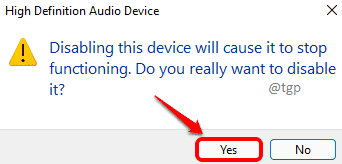
Step 3: A disable confirmation window will now pop up. Click Yes to confirm.
Step 4: The System Settings Change window will now prompt you for a system restart. If you have any important work unsaved, save it and then click on the Yes button. This will restart your machine.
Step 5: Once the system restarts, right click on Windows icon and click on Device Manager again to launch it.
Step 6: This time, right click on the audio driver and click on the Enable device option to enable your audio driver.
Hope re-starting the audio driver fixed the issue you were facing. If it is still not resolved, you can try reinstalling your audio driver. You can find the steps to re-install the audio driver here.


