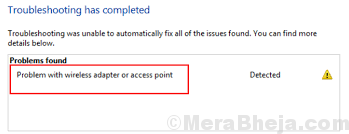
Whenever user face issues with network connectivity in Windows 10, one of the first recommendations is to use the Windows Network Diagnostics troubleshooter. However, at times, after running, the troubleshooter, it gives the following error:
Problem with wireless adapter or access point.
Cause
As the statement of the error suggests, the issue would be with the receiving hardware on the system or the router itself. It could also be with the drivers and services in the system.
Before anything else, check if other devices connected to the internet through the router are able to access the internet properly or not. If yes, the router itself might be fine, the problem could be with your system.
Try the following solutions sequentially to resolve the issue:
Solution 1 – Running set of Network commands
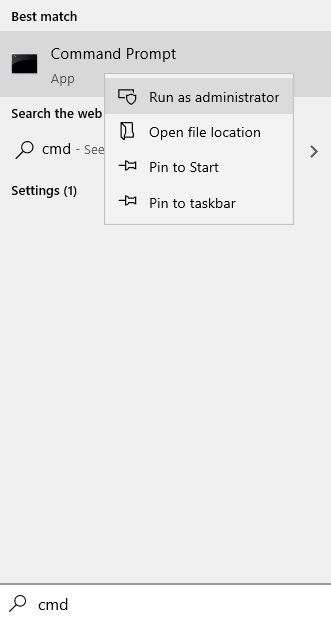
1 -Search cmd in search box of Windows.
2 – Now, right click and choose run as administrator

3 – Now, copy, paste the following commands one by one.
netsh winsock reset
netsh int ip reset
ipconfig /release
ipconfig /renew
ipconfig /flushdns
Now, close the cmd window and try again.
Solution 2] Update WiFi driver-
Updating the WiFi driver will fix the issue on your computer.
1. Press Windows Key+R, to launch Run window.
2. Now, type “ncpa.cpl” and hit Enter to open Network Connections window.

3. Now, in the list of the adapters, right click on the network adapter you are using and then click on “Properties“.

4. Now, click on “Configure“.

5. In Properties window, click on “Update driver“.

6. When you will asked ‘How do you want to search for drivers?‘, click on “Browse my computer for driver software“.

7. Now, click on “Let me pick from a list of available drivers on my computer“.

8. Now, in this window you will notice some network drivers, choose appropriate adapter driver.
9. Now, click on “Next” to install the latest driver.

Wait for a while as the graphics driver will be installed on your computer.
10. Click on “Close” to close the update driver window.

Close Network Connections window.
Reboot your computer.
After rebooting try to connect to the network again.
Solution 3] Uninstall the adapter driver and reboot-
1. Press Windows Key+R, to launch Run window .
2. Now, type “ncpa.cpl” and hit Enter to open Network Connections window.

3. Now, in the list of the adapters, right click on the network adapter you are using and then click on “Properties“.

4. Now, click on “Configure“.

5. In Properties window, click on “Uninstall device“.

6. Again, click on “Uninstall” to uninstall the driver from your computer.

Reboot your computer.
At the time of booting up, the missing driver will be installed by Windows itself.
After rebooting your computer, you will be able to connect with the WiFi network without any more issues.
Solution 4] Power-cycle the modem-router-computer in case of APIPA
1] Press Win + R to open the Run window and type the command cmd. Press Enter to open the Command Prompt window.
2] Type the command ipconfig and press Enter. It would display a set of information.
3] From the set of information, check the value of the IPv4 address. If it is 169.254.***.*** something, it indicates a condition called APIPA where the system assigns itself an IP address.
4] To resolve the condition, we would have to power-cycle the modem-router-computer.
- Switch OFF all the 3 devices.
- Switch ON the modem.
- Wait till all lights are up and stable.
- Then switch ON the ROUTER.
- Wait till all lights are up and stable.
- Finally, boot your system and check if it able to connect to the network.
Solution 5] Update the network drivers
You could try connecting your system to the network hard wired to update the drivers. If that doesn’t work either, we could still uninstall the current drivers and restart the system to reinstall them. Here is the procedure to update the drivers in Windows 10.
In case the drivers you need have to be downloaded from the internet and you are totally unable to connect to the network by either means, you could download the drivers from Intel’s downloadcenter and transfer it to the system using a USB drive or something. The drivers could also be downloaded from the manufacturer’s website.
Solution 6] Disable your antivirus temporarily
Many users have reported that the issue occurs while using the free version of McAfee anti virus. It might be the case with other anti virus programs as well. Disable your anti virus program temporarily to isolate the issue. Check if it helps with network connectivity.
Solution 7] Disable the IP helper service
1] Press Win + R to open the Run window and type the command services.msc. Press Enter to open the Service manager window.
2] In the list of services which is ordered alphabetically, locate the IP helper service.
3] Right-click on the service and select Properties.
4] Change the Startup type to Disabled. Apply and save the settings.
5] Reboot the system.
Solution 8] Reset Network profile
1] Search for Command Prompt in the Windows search bar and right-click on the icon. Select Run as administrator.
2] In the administrative Command prompt window, type the following command and press Enter to execute it:
netsh wlan delete profile name=”WirelessProfileName”
Where WirelessProfileName is whatever name you wish to give to the new wireless profile.
4] Restart the system.
