Are you facing issues with the printhead in your HP Printer on your computer? Normally, the accumulation of dust particles in the printhead or any other item blocking the normal action of the printhead can cite this violation message. So, you should start the troubleshooting process from the inspection of the printhead. So, we have built this guide covering all the possible solutions that will help you troubleshoot this problem with the printhead.
Fix 1 – Clean the printhead
There are two ways of clearing the clogged printhead in the HP printer.
Using Software
You have to use the Printer Control Panel to analyze and clean the printhead on your computer.
Step 1 – Add some clean pages to the paper tray on the HP Printer slot.
Step 2 – After this, go to the Printer Control Panel from the display on your printer.
Step 3 – There, open the “Setup” to load the printer setup.
Step 4 – Slide down through the touch panel till you see the Printer Maintenance term. Tap to select that.
Step 5 – Now, use the “Clean Printhead” to clear the printhead.
Finally, you can run a test on the printer by printing a test page using the printer.
Manual mode
If the printer is still showing the same problem with the printhead, clear the printhead manually.
Step 1 – First, switch off the HP printer and unplug it from the connection.
Step 2 – Don’t touch the printer for one whole minute. Later, open the cartridge door of the printer.
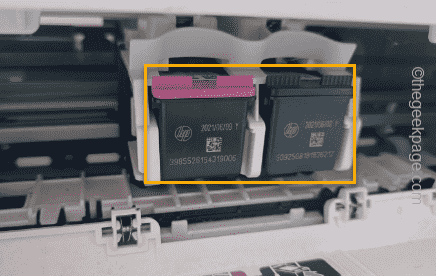
Step 3 – Remove the cartridges from the printer one by one.
Step 4 – After this, pull the latch handle on the printer carriage until everything comes back to normal.
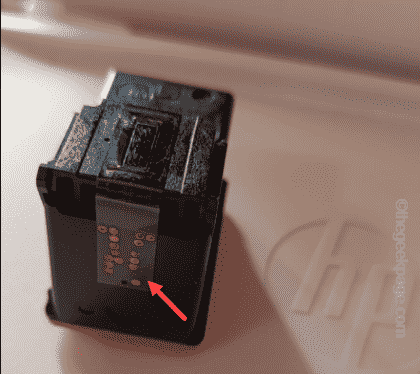
Step 5 – Next, clear the print cartridges with a clean cloth. Make sure to wipe out any dust accumulated in the contact portion of the cartridge.
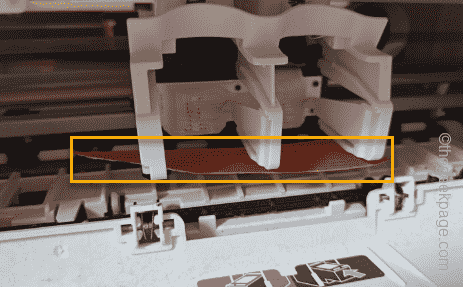
Step 6 – Check the carriageway and remove any obstructions present there.
Step 7 – Finally, put the cartridges back in their respective slots and close the printer latch.
After this, turn the printer on and print a test page.
Fix 2 – Run the HP Print and Scan Doctor
HP has the proprietary HP Print and Scan Doctor tool to take care of these issues.
Step 1 – Download the HP Print and Scan Doctor. Just tap the download icon.
Step 2 – Now, run the “HPPSdr” application package.
This is a portable version. So, there is no need to install the tool. Just confirm the agreement and proceed.
Step 3 – Tap the “Start” icon to start the repair process.
Step 4 – Click “Next“.
The rest of the process is autonomous, which means, the printer will perform some maintenance checks and fix itself automatically.
So, wait until it concludes the initial checks and the rest of the process.
Step 4 – Later, tap “Test print” to test the working condition of the printer.
Check whether you are getting the same error with the printhead or not.
Fix 3 – Reset the printer
Resetting the printer can be helpful in this troubleshooting step.
Step 1 – At first, switch off the printer. When it is in the off condition, unplug it from the power socket.
Step 2 – Later, unplug the printer from the power socket.
Step 3 – Wait for a minute or two.
Step 4 – Then, plug the power cable into the printer.
Step 5 – Turn the printer on.
Now, just print a test page and check.
Fix 4 – Install the appropriate printer driver
The HP printer you are using needs to be installed on your system for the printer to function properly.
Step 1 – You need to know which HP printer you are using. Just search your printer to find the actual model of the HP Printer.
Step 2 – Once you have got that, go to the HP Printer Downloads Center.
Step 3 – In the Let’s identify your printer box, type the name/model number of the printer.
Step 4 – Tap to open the Printer driver settings.
Step 5 – This will get you to the list of the latest printer drivers in the browser.
Step 6 – Expand the “Installation Software and Driver-includes print, scan, latest features” option and tap “Download” to download the HPEasy Start Printer software.
Strep 7 – Toggle the “Software-Utility” tab. Now, click the “Download” button to download the latest printer driver on your computer.
Step 8 – Now, you can install the HPEasy Start utility on your computer.
Step 9 – Following the same way, run the exe file to install the latest printer driver on your system.
This way, after updating to the latest printer driver, you won’t ge t the same problem the printhead on your HP Printer again.
Hope this works!


