Are you seeing “No JVM could be found on your system (Exe4j_Java_Home)” error message while trying to run an application or game which uses Java library functions? This kind of error occurs when a user tries to install DbVisualizer while accessing an exe4j executable file. Installing a compatible version of DbVisualiser or adding a new environmental variable connecting the path of Java SDK will solve the issue.
Note: This error occurs due to incompatibility between java (64 bit OR 32 bit) on your PC and the Software you are trying to install. For solving this you can choose to install both JDK tool-kits x64 and x32 in your PC.
Fix-1 Install the correct version of DbVisualiser-
Installing the congenial version of the DbVisuaiser should fix the issue.
1. Go to this link on your computer.
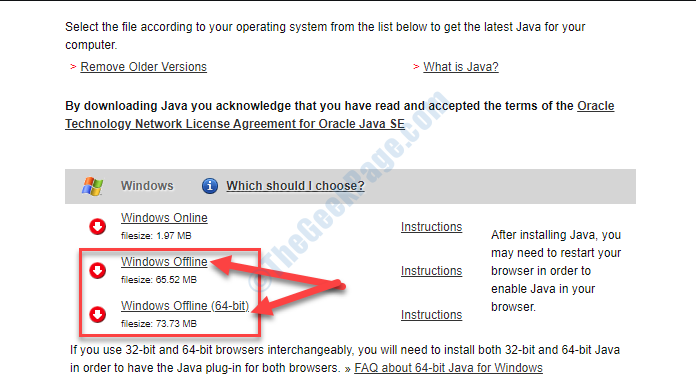
2. Now, click on “Windows Offline” if you are using a 32-bit PC.
If you are working on a 64-bit PC, click on “Windows Offline (64-bit)“.

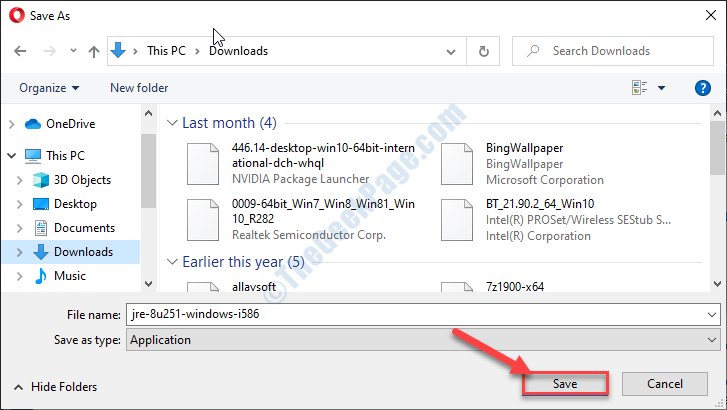
3. Choose a location on your computer to store the installer.
4. Click on “Save” to initiate the downloading process.

Once the downloading process is complete, close the browser window.
5. Go to the download location on your computer.
6. Double-click on the “jre-8u251-windows-i586“.

7. When Java Setup appears on your screen, click on “Install“.

In case if the Setup detects any older or obsolete version of Java already installed on your system it will uninstall it-
Restart your computer.
After rebooting your computer, try to run the application or the task you were facing this trouble with.
Fix-2 Add a new Java environmental variable-
Adding a new environmental variable may fix this issue.
1. Press Windows key+E to open the File Explorer window.
2. In the File Explorer window, on the left-hand side, click on “This PC“.

3. On the right-hand side of the window, navigate to here-
Local Disk (C:) > Program Files > Java

4. Now, double click on the “jdk1.8.0_251” folder to access it.
(NOTE– The actual name of the JDK folder may be different on your computer as it depends upon the version of the Java installed on your system.)

5. Then, double click on the “bin” folder.

6. Then, right-click on the address bar and then click on “Cut” in the bin folder,.
7. You need to click on the “This PC“.

8– Press Windows key + R together to open run.
9 – Write sysdm.cpl in it and click OK.

10. Then click on the “Advanced“.
11. To add the variable, click on the “Environment Variables“.

12. Then, click on “New…“.

13. At first, set the ‘Variable name:‘ as “Path“.
14. Paste the location of the bin folder in the ‘Variable value:‘ section.
15. Click on “OK“.

16. Click on “OK“.

17. You need to click on “Apply” and then on “OK“.

Close File Explorer window.
Reboot your computer.
After rebooting your computer, repeat the same feat in which you were facing the problem. This time the error message won’t appear.
Fix-3 Uninstall and install Java-
If nothing is working out for you, uninstalling and installing Java on your computer.
1. Press Windows key+R to open Run window.
2. In Run window, type or copy-paste “appwiz.cpl” and then hit Enter.

3. In the Program and Features window, scroll down and right-click on any application related to Java and then click on “Uninstall“.

4. Now, click on “Yes” if a box appears to confirm the removal.

5. Repeat the same effort for any other Java-related application on the list.
Once done, close the Program and Features window.
Now install the latest version of Java SE on your computer following the steps explained in Fix-1.
After installing it, reboot your computer.
This should solve your issue.