Many Office 365 users have reported seeing “NO INTERNET CONNECTION” error in Office applications like Word, Excel, Outlook, PowerPoint, One Note. In most cases, the Office 365 apps are used Offline and this error will not even be noticed. But at times, this error can be very annoying say, when you have to upload a file to OneDrive. Although the internet is up and running, you see this error message stating ” No Internet Connection”. This error can be seen because of the following reasons:
- Using third party VPN service
- Issues with Ethernet Adapter
- Network related services
- Corrupted System Files
- Corrupt Office 365 app
In this article, let us discuss different ways to fix the “No Internet Connection ” error in Office 365
Fix 1: Turn-Off the VPN service
If you are using any third-party VPN service, then try turning the VPN service Off. Check if this fixes the issue.
Fix 2: Disable IPv4 Checksum Offload
Many users have reported that this fix helped them
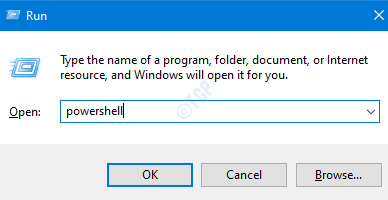
Step 1: Hold the key Windows+R at the same time
Step 2: In the Run Dialog, type powershell and hit Ctrl+Shift+Enter

Step 3: In the Window type the following command,
For Ethernet Adapters:
Set-NetAdapterAdvancedProperty Eth* -DisplayName "IPv4 Checksum Offload" -DisplayValue "Disabled"
NOTE: You might see that the connection is down for few seconds.

Fix 3 : Change to a Public DNS
Some users said that changing to a public dns seem to solved the issue. Lets see, how to change to a Public DNS like Google.
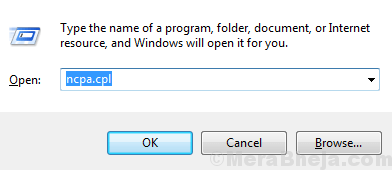
1. Press Windows key + R to open run.
2. Now, write ncpa.cpl in it and click OK.

3. Now, right click on your network adapter and choose Properties.
4. Double, click on Internet Protocol version 4 IPv4
5. Check use the following DNS server address and enter the dns address given below.
8.8.8.8
8.8.4.4

Fix 4: Restart the Network Services
Step 1: Open Run Dialog (Windows+r)
Step 2: Type services.msc and hit OK

Step 3: In the Services window, locate the following services :
- Network List service
- Network Location Awareness
Step 4: Double click on the services one by one and if they are not running just click on start to start the services.

If they are already running , just restart the services.

Step 5: Close and Re-open Office 365 apps and check if it is working fine.
In case the error is seen, try the next fix.
Fix 5: Disable and Enable the Network Adapter
Step 1: Hold the Keys Window+R
Step 2: In the run dialog, type ncpa.cpl and press Enter

Step 3: Right-click on the network adapter from which you are connected and choose disable.

Step 4: Now, again right click on it and choose enable.
Try if this fixes the issue. If not, try the next fix.
Fix 6: Resetting the IP Address
In most cases, renewing the IP address of the system has fixed the issue.
Step 1: To open the Run window, hold the keys Windows+r at the same time
Step 2: Type cmd and press Ctrl+Shift+Enter together. This opens command prompt with Administrator Privileges.

Step 3: In the UAC that shos up asking for permissions, click on Yes
Step 4: In the command prompt window, type the commands
ipconfig /release
ipconfig /renew
With these commands, a new IP address will be assigned to the system. If the issue is no resolved yet, try the below fix.
Fix 7: Flushing DNS and Resetting Winsock
Step 1: Open Command Prompt with Admin rights ( Refer Step 1, 2 from Fix 4)
Step 2: In the command prompt type the following commands one after the other
ipconfig /flushdns
ipconfig /registerdns
NETSH winsock reset catalog
NETSH int ipv4 reset reset.log
NETSH int ipv6 reset reset.log
exit
Restart your system for the changes to take effect.
Now see if the issue resolves, if not try out the next fix.
Fix 8: Repair Office 365
Step 1: Hold the buttons Windows+r together
Step 2: In the Run window, type appwiz.cpl, and click on the Enter button

Step 3: In the Program and Features window that opens, locate Microsoft 365. Right-click on it and select Change

Step 4: If the UAC pops up asking for permissions, click on Yes
Step 5: In the appearing dialog, click on Quick Repair.
Step 6: Click on the Repair button

Step 7: Follow the instructions shown and repair the Office programs.
Step 8: If the issue is encountered due to a corrupted Office 365 application, this fix will resolve the issue.
Step 9: Restart the application and check if the issue has fixed. If not, try choosing Online Repair (instead of Quick Repair as in Step 6) to repair the Office apps.
Step 10: Restart the application and check if the error has been fixed.
That’s All. We hope this has been informative. Kindly comment and let us know which of the above fix helped you.
Thank you for Reading.