Diagnostic Policy Service(DPS) helps in troubleshooting issues with windows components within Windows Operating System. Many users have reported seeing the below error –
Diagnostic Policy Service Cannot Start.Acess is Denied – Error 5
This error is mostly seen when you are troubleshooting your network or internet connection. When you see the error like above, it means that the DPS has some issues and without DPS one will not be able to troubleshoot and fix system issues in Windows OS. In this article, let us discover different ways to overcome the above error and get Diagnostic Policy Service to work again. Make sure to try the fixes in the same order as given below.
Fix 1: Add Network and Local service to Admin group
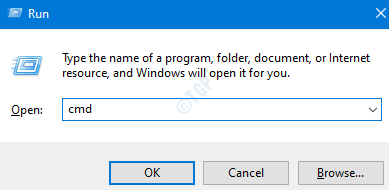
Step 1: In the Run dialog, type cmd and hit Ctrl+Shift+Enter to open Command Prompt with Admin rights.

Step 2: Click on Yes in the User Account Control window.
Step 3: In the command prompt, run the below commands. Make sure to hit Enter key after each command.
net localgroup Administrators /add networkservice
net localgroup Administrators /add localservice

Step 4: Restart the system
Mostly, this should fix the issue. If not, try the next fix.
Fix 2: Modify the Registry Permissions for DPS
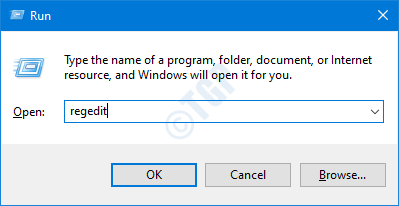
Step 1: Open run window holding Windows+r
Step 2: Enter regedit and press Enter

Step 3: If you see the User Account Control window popping up, click on the Yes button
NOTE: Registry editing can have an adverse effect on the system even with the slightest mistake. It is advised to take the backup of the registry before proceeding. To take a backup, In the Registry Editor–> Go to File –> Export –> Save your Backup file.
Step 4: In the top bar, copy-paste the following location and hit Enter as shown below
HKEY_LOCAL_MACHINE\SYSTEM\CurrentControlSet\Services\DPS\Parameters

Step 5: In the left-hand side pane, right-click on the Parameters key and choose Permissions.

Step 6: In the Permissions window, click on Add button

Step 7: Now, click on advanced.

Step 8: Now, click on find Now.
Step 9: Now , select your username from the list.

Step 10: Now, click on OK again.

Step 11: Under Permissions for Username section, tick to Allow Full Control.
Step 12: Finally, Click on Apply and then click on the OK button

Step 13: Now, copy-paste the below location in the top bar and press Enter as shown below
HKEY_LOCAL_MACHINE\SYSTEM\CurrentControlSet\Control\WDI\Config

Step 12: Right-click on the Config key and choose Permissions

Step 14: Click on the Add button

Step 15: Under the Enter the object names to select, enter the following and press the OK button
NT Service\DPS

Step 16: Under the Group or usernames section, click on DPS
Step 17: Under Permissions for DPS section, tick to Allow Full Control

Step 18: Restart your System
Check if the issue with DPS has been resolved. If not, try the next fix.
Fix 3 – Edit Diagnostic Policy Service property
1 – Press Windows key + R key together to open run.
2 – Now, type Services.msc in it and click OK.

3 – Now, Locate Diagnostic Policy Service and double click on it.
4 – Click on Log On Tab.
5 – Now, select Local System account.
6 – Now, click on OK and Apply.

Fix 4: Check for Virus or Malware in the System
Sometimes, the viruses and malware in the system can affect the working of the Diagnostic Service Policy.
Step 1: Hold the keys Windows+r and open the Run Window
Step 2: Type ms-settings:windowsdefender and press OK

Step 3: In the settings window, choose Virus & Threat Protection

Step 4: In the window that opens, click on Scan Options

Step 5: Choose Full scan and press on Scan now button

Once the scan finishes, it notifies about any viruses and malware in the system. Take necessary steps to mitigate them.
In case you are still seeing the same error, then try the next fix.
Fix 5: Make Sure DPS is set to Automatic
Step 1: Open Run Dialog (Windows+r)
Step 2: Type services.msc and hit OK

Step 3: In the Services window, locate the Diagnostic Policy Service
Step 4: Make sure the DPS service is running and the Startup type is set to Automatic

NOTE: If the service is not running or the startup type is not Automatic, do the following.
1. Right-click on Diagnostic Policy Service and choose Properties

2. In the Startup type drop-down, choose Automatic
3. Under the Service Status Choose Start
4. Finally, click on Apply and then OK

Check if this fixes the issue. If not try the next fix.
Fix 6: Restore your System
If none of the above fixes work, you can try this fix. If you have created a restore point of the system before the issue was encountered, you can roll back to that restore point.
Refer to How to perform System Restore
That’s All.
We hope this has been informative. Thank you for Reading. Kindly comment and let us know which of the above fixes worked in your case.