Video RAM or the graphics card is undoubtedly the most critical hardware component that has an impact on the overall performance of your PC. If you have a standard graphics card with not so much capabilities, you may not be able to play the latest games or access the newest applications.
But, working with insufficient RAM can lead to a slower system performance, reduced frame-rates and other similar issues. While upgrading the graphics card/Video RAM is an option, it can get expensive for many. So, if you are looking for an alternative, you can increase the dedicated Video RAM in Windows 10 or windows 11using the below method. Let’s see how.
Solution: Through Registry Editor
Before you proceed to increase the dedicated Video RAM, check how much dedicated VRAM is available. To check the available VRAM follow the below steps:
How to Increase the Dedicated VRAM using the Registry Editor
Before you make any changes to the Registry, make sure that you create a backup of the Registry Editor data, so that you can retrieve it back, in case of any loss.
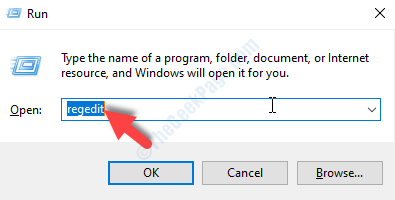
Step 1: Press the Win + R keys together on your keyboard to open the Run command.
Step 2: Now, type regedit in the search field and hit Enter to open the Registry Editor window.

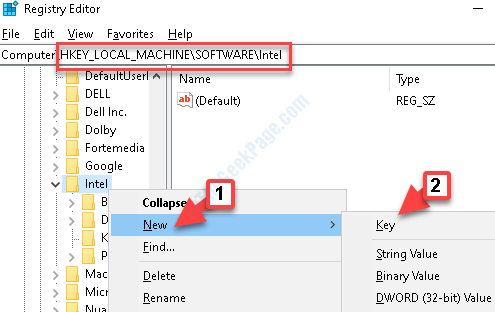
Step 3: Copy the below path and paste it in the Registry Editor address bar to reach the Intel folder:
HKEY_LOCAL_MACHINE\SOFTWARE\Intel
Now, right-click on the Intel folder, select New and then Key.

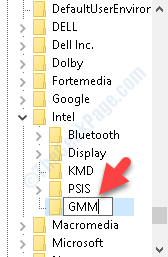
Step 4: Name the key as GMM.

Step 5: Go to the right-side of the pane and right-click on an empty area. Now, from the right-click menu, select DWORD (32-bit) Value.

Step 6: Now, rename the new value as DedicatedSegmentSize.

Step 7: Double-click to open the Edit Value dialogue box. Go to the Value Data field and change the value to
- 256 if you have 2 GB RAM
- 512 if you have 4 GB RAM
- 640 if you have 6 GB RAM
- 1024 if you have 8 GB RAM
- 2048 if you have 16 GB RAM
- 4096 if you have 32 GB RAM
In my computer I have 4 GB RAM , so i am changing it to 512

Now, close the Registry Editor and restart your system for the changes to be effective. Make sure that you do not Shut Down your system, but press the Restart button instead.
You can go back to the Display settings and check the Dedicated Video Memory. It shows an increased VRAM now.
How to Check the Available Dedicated VRAM
Step 1: Right-click on any empty area on the Desktop and select Display settings from the right-click menu.

Step 2: In the Display settings window, go to the right side of the pane and under the Multiple displays section, click on Advanced display settings.

Step 3: Next, under the Display information section, click on Display adapter properties for Display 1.

Step 4: In the Properties dialogue box, under the Adapter tab, go to the Adapter Information section and check the Dedicated Video Memory. This is the available Video RAM for your system.
Here it shows as 128MB.

Now, that you know the dedicated VRAM, move on to the fix: