If you recently upgraded your OS to Windows 10, you may comes across an error “You don’t have permission to open this file. Contact the file owner or an administrator to obtain permission” while accessing a file or folder. This message means you cannot access/delete/rename files or folders.
So, what can be the reason behind this error? It could be either that a user or group got accidentally deleted from the “Group or user names” list, a specific “Deny” function got added by mistake to the group or the user, or it could be because there’s a disparity between the NTFS and share permissions. But, the good news is, it can be fixed. Let’s see how.
Solution: Through File Explorer
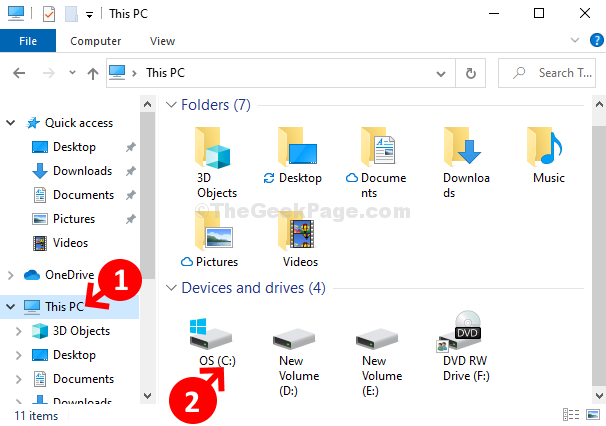
Step 1: Press the Windows key + E together on your keyboard to open File Explorer. Now, click on This PC shortcut on the left side and select the C Drive (OS (C:)) on the right.

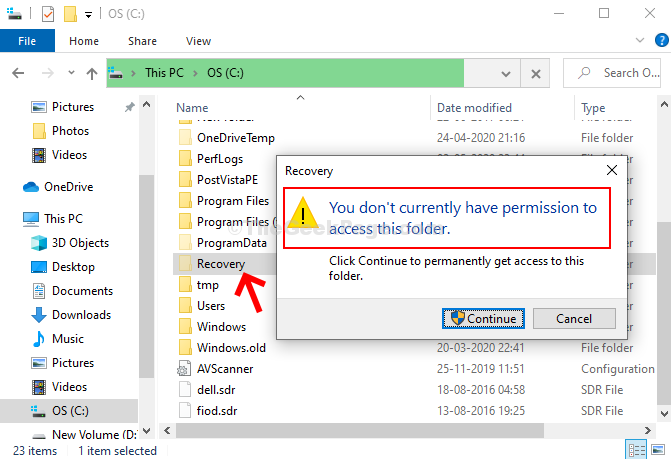
Step 2: Here we want to open the Recovery folder in the C drive, but, it denies access to the folder. For you, it can be any other folder.

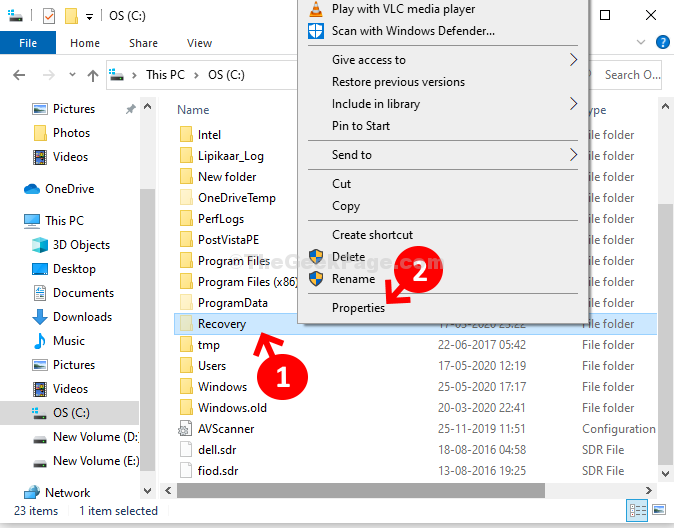
Step 3: To change the permissions, right-click on the folder you want to open (for us, it’s the Recovery folder here), and select Properties from the context menu.

Step 4: In the Recovery Properties dialogue box, click on the Security tab, and then click on the Advanced button.

Step 5: In the Advanced Security Settings for Recovery window, click on the Change link next to Unable to display current owner.

Step 6: In the Select User or Group dialogue box, click on the Advanced button.

Step 7: In the next window, click on the Find Now button. Now, under the Search Results field, look for your User Account, select it and press the OK button to save the changes.

Step 8: Next, press OK again to save the changes and proceed.

Step 9: You are now back to the Advanced Security Settings for Recovery. You can see the Owner name as your your User Account name. Click Apply and OK.

That’s about it. You are done changing the Owner permissions and you can now open the file easily, without any error message.