Microsoft introduced something very interesting off-late with the Windows 10 platform and that’s called WINGET. This is the Windows Package Manager (Linux style) that helps you to install programs by simply executing a command. All you need to do is to open the terminal window (that resembles the usual Command Prompt/Powershell), type for instance, “winget install Notepad++” and it automatically looks up for the program Notepad++ and installs it with no more efforts from you.
That sounds interesting isn’t it? Of course, since it makes your life much easier when it’s about downloading and installing programs. Besides, it’s fun. So, let’s see how to use WINGET to install programs.
How To Use Microsoft 10’s WINGET To Install Applications
Step 1: Go to Google and enter the below web address:
https://github.com/microsoft/winget-cli/releases
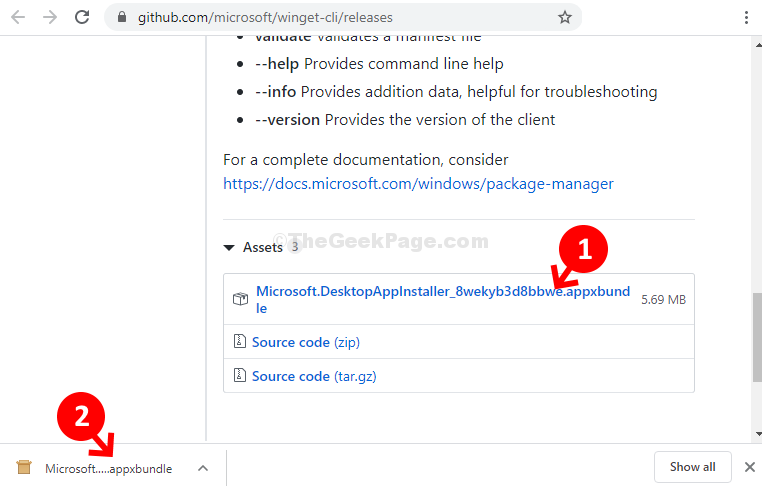
It will open the Github page for WINGET. Scroll down and click on Microsoft.DesktopAppInstaller_8wekyb3d8bbwe.appxbundle to start downloading the package manager.

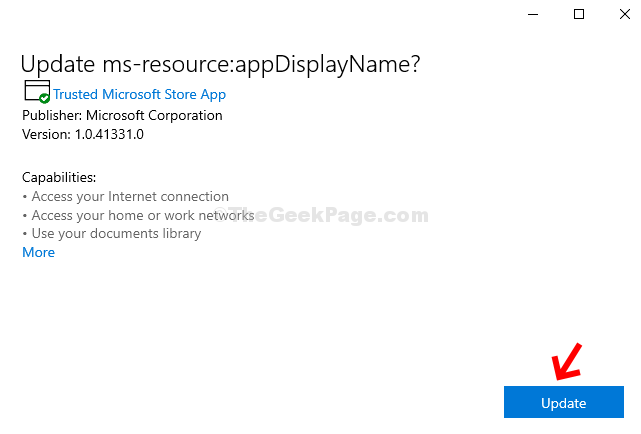
Step 2: The installer window will open. Click on Update here to start the installation process.

Step 3: Now, once WINGET is installed, click on the Start button on your desktop, type Command Prompt in the search box, and hit Enter. Now, right-click on the result and click on Run as administrator to open Command Prompt in Admin mode.
![]()
Step 3: In the Command Prompt window, execute the below command and hit Enter:
winget install

It will display a long list of all the programs that it can install.
Step 4: Now, you can try installing a program. For instance, we tried installing Kindle. So, for that we ran the below command and hit Enter:
winget install Kindle
Now, wait for the download to finish.

Step 5: Once installed, it will display “Successfully Installed” message.

Your programs (here Kindle) is now successfully installed on your Windows 10 PC.