USB ports are one of the very useful connection option in computers that help you to connect your Pen drive or USB drives to the PC and get your work done in minutes. It’s one of the best ways to transfer data to and fro, without needing an active internet connection. However, sometimes, you may realize that the USB ports on your system are being misused. For instance, anyone can get unauthorized access to your PC, connect a pen drive and steal data.
That’s the whole reason why, you may have noticed that in some organizations and educational institutes, it’s prohibited to use the USB ports. In this case, the administrator blocks the access to USB ports, so, anyone trying to use a USB drive is unable to do so.
Therefore, if you want to disable the USB ports in your Windows 11 PC to block unauthorized access, read this post.
Method 1: Through Registry Editor
If you are smart enough as the administrator, you will disable the USB port by making changes to the Registry Settings and that would be a strong way to block unauthorized access to the USB ports. Here’s how:
*Note – Before you make any changes to the registry settings, make sure that you create a backup of the registry data, so, that, in case, you lose any data during the process, it can be recovered easily.
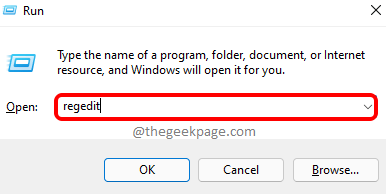
Step 1: Press the Win + R keys together on your keyboard to open the Run command window.
Step 2: In the Run command window, type regedit in the search field and hit Enter to open the Registry Editor window.

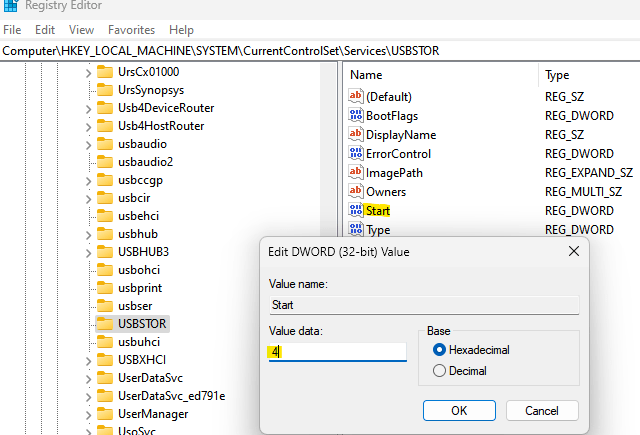
Step 3: Copy and paste the below path in the Registry Editor address bar and hit Enter:
HKEY_LOCAL_MACHINE\SYSTEM\CurrentControlSet\Services\USBSTOR
Now, go to the right side of the window, and double-click on the DWORD Value – Start.
Step 4: In the Edit DWORD (32-bit) Value dialogue box, navigate to the Value data field and change it to 4.
Press OK to save the changes and exit.

Now, close the Registry Editor window and restart your PC to check and the USB port access should be disabled.
*Note – To enable the USB ports back again, repeat the Steps 1 through 3 and then in the Step 4, set the Value data field to 4. Press OK to save the changes.
Method 2: Through Group Policy Editor
Not every one has access to the Local Group Policy Editor on their Windows systems, however, if you are lucky to have access to the same, making changes to the group editor, is a great way to block the USB ports on your Windows 11 PC. Follow the below process to prevent access to USB ports on your PC:
Step 1: Go to Start, right-click on it and select Run from the context menu.
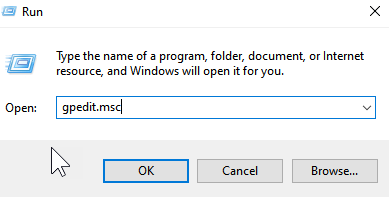
Step 2: This will open the Run command box.
In the Run command search field, type gpedit.msc and press OK to launch the Local Group Policy Editor.

Step 3: In the Local Group Policy Editor window, go to the left side of the pane and Expand Computer configuration.
Now, double-click to expand the Administrative Templates option.
Step 4: Next, double-click to expand the System option.
Step 5: Now, go to the right side of the pane, scroll down and look for Removable Storage Access settings.
Double-click on it.

Step 6: Next, on the right side, scroll down towards the end and look for Removable Disks: Deny execute access.
Double-click on it to open its settings window.

Step 7: In the Removable Disks: Deny execute access settings window, and select the radio button next to Enabled to disable the execute access for removable disks.
Press Apply and then OK to save the changes and return to the Removable Storage Access window.

Step 8: Now, repeat the Step 6 and 7 for Removable Disks: Deny read access and Removable Disks: Deny write access as well and these two settings will also be disabled.
Now, restart your PC and all the USB ports on your PC are completely disabled.
*Note – To re-enable the access to the Removable disks, simply follow the Steps 1 through 5, and then select either Disabled or Not Configured for all the three settings – Removable Disks: Deny execute access, Removable Disks: Deny read access, and Removable Disks: Deny write access to allow execute access for the Removable Storage class.
Method 3: Through Device Manager
However, if you want to disable the USB ports on your PC easily, disabling the ports through the Device Manager is an option. Let’s see how:
Step 1: Navigate to the Start menu, right-click on it and select Device Manager from the context menu.

Step 2: In the Device Manager window that opens, navigate to the Universal Serial Bus controllers section and expand it.
Here, look for all the available USB pots, right-click on each of them one by one and select Disable.

Step 3: You can also check for any possibilities under the System devices section, right-click on the devices and select Disable device.
Now, all the USB ports on your system are disabled.
*Note – You can enable the USB ports back again at any time later by simply following the Step 1 and then go to Universal Serial Bus controllers and System devices sections one by one and right-click on the devices that you disabled previously and select Enable device for each of them.
Method 4: Uninstall USB Mass Storage Drivers
If you are concerned about the system security in your organization or school, you can even uninstall the USB Mass Storage Drivers. Here’s how to do it:
Step 1: Press the Win + R shortcut keys on your keyboard to launch the Run command box.
Step 2: In the search bar, type devmgmt.msc and hit Enter to open the Device Manager window.

Step 3: In the Device Manger window, navigate to the Universal Serial Bus controllers section and click to expand it.
Here, look for the USB Mass Storage Device option, right-click on it and select Uninstall.

Once uninstalled, the USB ports on your Windows 11 PC are all disabled.
*Note – If at any time later, you want to enable the USB ports back again, you would need to re-install the drivers. Simply, connect a USB drive to your PC and Windows will start looking up for drivers and will prompt you to install the drivers. Simply proceed to finish the installation.
However, if none of the above method works, you can use a 3rd party tool that helps you to enable or disable the USB drives on your PC, without any hassles.