Today, let us discuss a common issue that is seen with the Mail application. At times, you might have seen that when you try to attach a file in the email, the file picker opens but freezes, and the only way to close it is by closing the application itself.
We know how annoying this can be. That is why we have come up with fixes that will help you get rid 0f this issue with simple steps.
Fix 1: Re-register the Mail Application
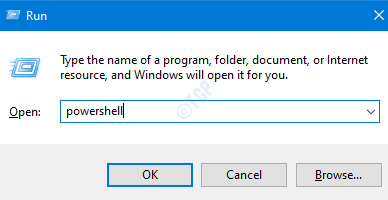
Step 1: Open the Run Terminal in your System with the keys Windows+R
Step 2: Type powershell and press the keys Ctrl+Shift+Enter to open the PowerShell with Admin rights

Step 3: In the User Access control window that opens up asking for permissions, click on Yes.
Step 4: Now type the below command and hit Enter
Get-AppXPackage -AllUsers -Name microsoft.windowscommunicationsapps | Foreach {Add-AppxPackage -DisableDevelopmentMode -Register “$($_.InstallLocation)\AppXManifest.xml” -Verbose}

Step 5: Once the command completes execution, Close the PowerShell
Now, check if the File picker UI starts working
Fix 2:Run the SFC Scan
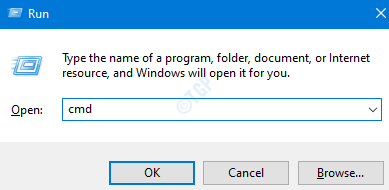
Step 1: Open Run Dialog with Windows Key and R
Step 2: Enter cmd and press the buttons Ctrl+Shift+Enter to open the Command Prompt with Admin Rights

Step 3: In the User Access control window that pops up asking for permissions, click on the Yes button.
Step 4: In the command prompt window that opens, type the below command and hit Enter
sfc /scannow

Step 5: Once the scan finishes, Restart the Computer
See if this helps. If not, try the next fix listed.
Fix 3: Perform a Clean Boot
Many users have reported that performing clean Boot of their system helped them resolve the issue.
For details on how to perform a clean boot, refer to the link How to Restart PC in Clean Boot Mode in Windows 10
Fix 4: Reset the File Explorer
Step 1: Open the Run Terminal
Step 2: Type sysdm.cpl and hit Enter

Step 3: In the appearing window, go to the Advanced tab
Step 4: Under the Performance section, click on the Settings button

Step 5: Now, go to the Advanced tab
Step 6: Under the Processor scheduling section, under the Adjust for best performance of option, choose Programs
Step 7: Under the Virtual memory section, click on the Change button

Step 8: In the appearing window, tick on the Automatically manage paging file size for all drives option
Step 9: Click on the OK button
Step 10: In the Performance Options window, click on the Apply button and then the OK button.
Step 11: In the System Properties window, click on the Apply button followed by the OK button.
Step 12: Restart the System
That’s All
We hope this article has been informative. Thank you for Reading.
It would be great if you could comment and let us know which of the above fix helped in your case.