You are trying to install a certain program and bang comes the error message stating, “Error 1316. The specified account already exists” in your Windows 10 PC. It can be frustrating to the core, especially when you want to install something important related to your work.
However, fortunately, this error can be fixed and you can continue to install the program hassle-free. Let’s see how.
Method 1: By Running the Program As Administrator
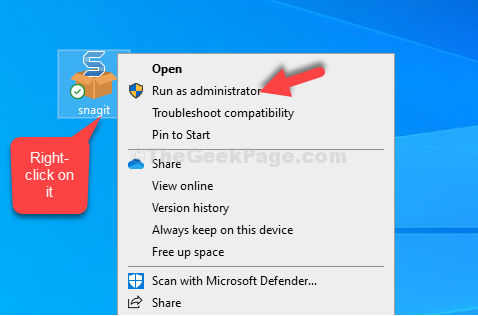
Step 1: Go to the setup file of the program on the desktop and right-click on it. Now, select Run as administrator.
For instance, we selected Snagit’s set up file on the desktop, right-clicked on it and selected Run as administrator. This way, you can complete installing the program easily.

That’s all. The error should no more come up and you should be able to install the program conveniently.
Method 2 – Download and Run Program Install and Uninstall troubleshooter
1 – Go to the official Microsoft Download website and download official Install and uninstall troubleshooter.
2 – Click on the downloaded troubleshooter program from Microsoft to run it.
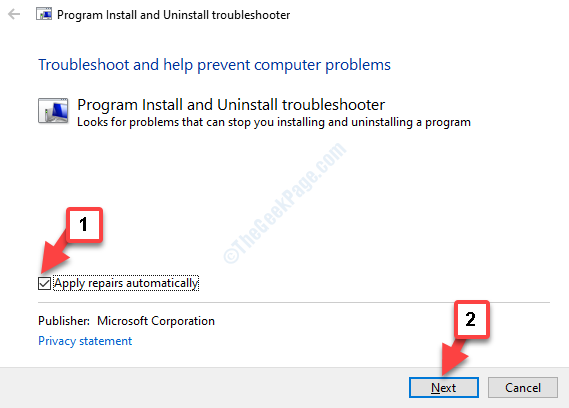
3 – Click on advanced and make sure Apply repairs automatically is checked.
4 – Now, click on Next.

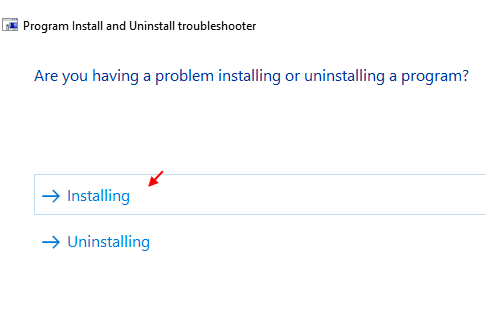
4 – Now, select Installing if you are facing this issue while installing.

5 – After that select the program from the list.
Note: – If it is not in the list, select not listed and choose the program.
6 -Let the troubleshooter fix your issue
Method 3: Using Registry Editor
Step 1: Press the Windows key + R together on your keyboard to open the Run command. Now, type regedit in the search field and hit Enter.

Step 2: In the Registry Editor window, navigate to the below path:
HKEY_LOCAL_MACHINE\SOFTWARE
Search for the program that you are trying to install under the Software key. For instance, we are trying to install Techsmith Snagit, but unable to, so, we will select the entry for Techsmith, right-click on it and click on the Delete button.

Step 3: But, if you do not find the program under the Software key, navigate to the below path:
HKEY_LOCAL_MACHINE\SOFTWARE\WOW6432Node
Or, simply find the WOW6432Node entry under the Software key and click on it to expand. Now, look for the program, select it, right-click on it and click Delete.

Now, you can complete the installation of your program. But, if this does not work, try the 2nd method.
Method 4: Through Services
Step 1: Go to the Start button on your desktop and type Services. Click on the result.

Step 2: In the Services window, on the right-hand side, go to the Name columns, look for Windows Installer and double-click on it.

Step 3: In the Windows Installer Properties dialogue box, check the Service status section. If it shows Stopped, click on the Start button to start the service.
Press the OK button to save the changes and exit.

You can now finish installing the program easily. However, if problem persists, try the 3rd method.
Method 5: Using Command Prompt
Step 1: Go to the Start button on your desktop and type Command Prompt in the search field. Right-click on the result and select Run as administrator.

Step 2: In the Command Prompt window, run the below command one by one and keep hitting Enter each time:
MSIEXEC /UNREGISTER
MSIEXEC /REGSERVER

This should resolve your problem and the error should be gone. If you are still facing a problem, follow the 4th method.