Docker desktop app is pretty famous among the developers who are developing new softwares for the variable Windows systems. The application allows the usage of multiple virtual systems to test out the new builds, patches from just the developer’s system. But what if the Docker shows up “Docker can’t enable Hyper-V” error message out of nowhere? Don’t worry. Just follow these easy fixes to solve the problem very quickly.
Workarounds –
a. Restart your computer and again try to access virtual systems in your system.
b. Disable any antivirus program you are running and check once more.
Fix 1 – Autostart the hypervisor at Boot
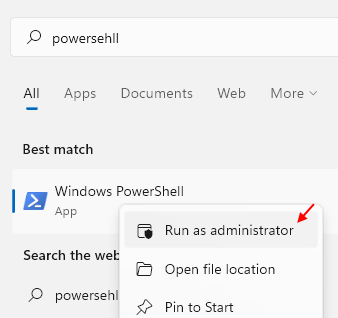
1 – Search Powershell and right click and choose run as administrator.

2 – Now, copy and paste and then hit enter key from the keyboard to run the command given below.
bcdedit /set hypervisorlaunchtype auto
3 -Now, Restart your PC and then try again.
Fix 2 – Enable Hyper-V on your system
Hyper-V is an optional feature that you have to enable manually to work with it.
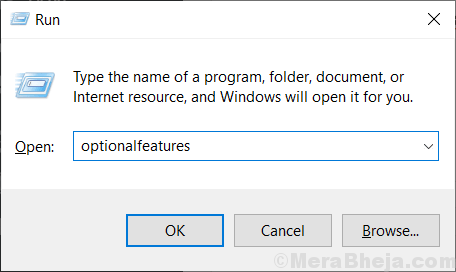
1. At first right-click on the Windows key and after that, click on “Run“.
2. Then, type this command and hit Enter.
optionalfeatures

3. Once the Windows Feature appears, check the “Hyper-V” option from the list of optional features.
4. Once you have done that, click on “OK“.
Windows will now enable the HyperVisor on your computer.
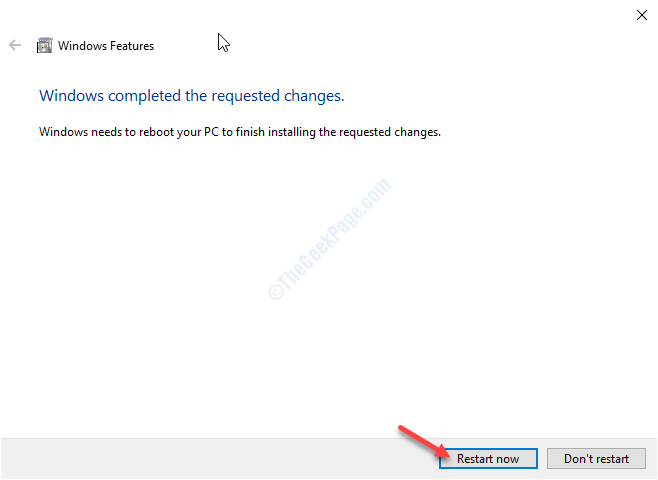
5. Then, click on “Restart now“.

After your machine restarts, Hyper-V will be enabled. This will take some time. Once your machine reboots, open Docker and try to start a virtual machine.
Alternative method –
If the previous method doesn’t work, try this one out.
1. At first, right-click on the Windows icon and click on “Windows PowerShell(Admin)“.

2. Once the terminal appears, type or paste this code from here and hit Enter.
DISM /Online /Enable-Feature /All /FeatureName:Microsoft-Hyper-V

Windows will enable the feature.
Close the PowerShell window and restart your computer, once.
Fix 3 – Enable Virtualization in BIOS
One of the key requirements of Hyper-V is the activation of the Virtualization in the BIOS.
1. At first, shut down your computer.
2. Startup the machine.
3. When the system is booting up, you need to press the “Delete“* key from your keyboard to open the bios setup on your computer.
* NOTE-The particular key may vary from manufacturer to manufacturer. These are the variety of keys-
Esc, F1, F2, F10, F11, F12 or Delete
Pressing the allocated key will bring up the BIOS screen in a while.

3. Once the BIOS setup opens up, go to the “Advanced” tab.
4. Next, select the “Virtualization” from the list and make sure it is “Enabled“.
(In some computers, you may notice ‘SVM Mode’ instead of ‘Virtualization’ settings. Enable it to get the same effect)

5. Again, press the key that is associated with it to save the settings.
[It is the “F10” key for this computer.]

6. After that, select “Yes” to finally save and exit the bios settings on your computer.

Once you have saved the settings, your computer will automatically. Now, open the Docker app on your computer and try to open a new virtual machine.
Fix 4 – Remove and re-install Hyper-V
If the Hyper-V files themselves are corrupted by chance, Docker won’t open.
1. Press the Windows key+X keys together.
2. Then, click on “Windows PowerShell (Admin)” to access it.

3. Copy-paste these codes one-by-one and hit Enter thereafter to execute these codes sequentially.
Disable-WindowsOptionalFeature -FeatureName microsoft-hyper-v -online restart-computer
Enable-WindowsOptionalFeature -Online -FeatureName Microsoft-Hyper-V -All restart-computer
Enable-WindowsOptionalFeature -Online -FeatureName Containers -All

After executing the codes, open Docker once more and check if this solves the issue.
NOTE–
If the problem is still there, try these steps –
a. Open the PowerShell terminal with admin privileges.
2. Thereafter, execute this code and check if this helps.
MOFCOMP %SYSTEMROOT%\System32\WindowsVirtualization.V2.mof

Check if this solves the issue.
Your problem should be solved.