Disable Recent Files and Frequent Folders In Windows 10: – Windows 10 is undoubtedly the best operating system of all ages ,launched by Microsoft. It includes various features and enhancements which has made computing fun with Windows 10. But not all apps and features available by default are appreciated by everyone of us. The Quick Access folder that appears to the left of the This PC, though helps us in easily accessing the frequently accessed and recently worked upon files, will not be required every time for us. Files get added to it each time we navigate to it, or depending upon the number of times we view a particular folder, it gets added into the frequent folders option. There are ways to add or remove files from it, like unpinning the particular folder by right clicking it and choosing the Unpin from Quick Access option, or rather adding it to Quick access by choosing the Pin to Quick Access option.
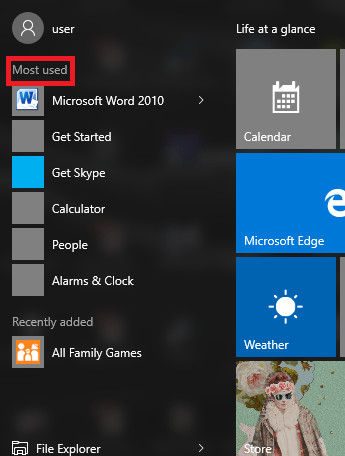
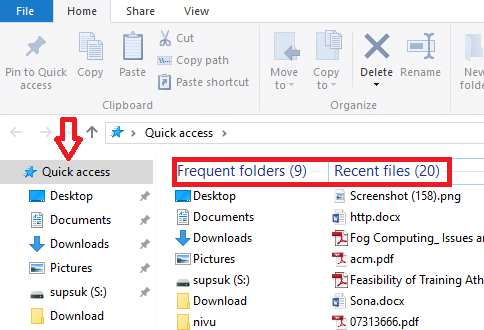
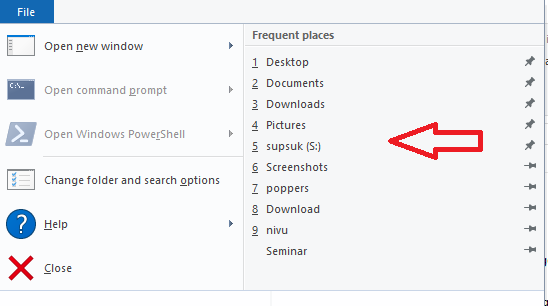
There are various places whereby you can find the frequent folders and recent files.
1.You can find them right from the Start menu.This is how they will look like.
2.You can find them in the taskbar’s jump list.
3. You can find them the Quick Access found in the left pane of the This PC.
4. You can even find them from the menu of File.
But if you really want to get rid of them completely from everywhere, it is quite easy. You don’t need any third party software.Here are the steps to do so.
Steps to Turn Off the Recent Files and Frequent Folders Option
You can do so using Group Policy Editor when you manage the system with multiple users or by using Windows 10 Pro.
Step 1:
Press the Win+ R key that opens up the Run window. Type on the text box “gpedit.msc”.
Step 2:
The local Group policy editor pops up. Now on the left pane, go to User Configuration. Select from its menu, an option named Administrative Templates and from which you can select the option Start menu and Taskbar.
User Configuration/Administrative templates/Start menu and Taskbar
Step 3:
In the right pane choose the option named Do not keep history of recently opened documents and right click on it and open Properties.
Step 4:
Choose the Enable option and click Apply. Do the same for Remove recent items menu from Start menu.
Step 5:
This is also possible in Windows 7 and 8.1 by right clicking on an empty space and choosing Properties.Disable all options under the Jump lists.
Steps to do in Windows 10
- Go to the Settings.
- Navigate to Personalization and choose Start.
- Turn on Show Recently added apps and Show recently opened items in Jump lists on start or the taskbar.
Try the above steps and you wouldn’t ever find the recent items folder again in the recommended places.


