If any windows users want to create, change, delete or clear any hard drives including those USB drives, they tend to use Diskpart commands using the command prompt.
Several windows users have complained that they are facing an error while executing any DiskPart command on their system. They receive the error message that said “DiskPart has encountered an error: Access is denied” and are not able to execute the commands.
The main reason for this error message is the write protection on the selected drive for executing the command and also if the command prompt is not opened as an admin. Therefore, we researched the reasons responsible for causing this problem and compiled a few fixes which will assist the users in resolving it.
If you are also facing such an issue with your system, please continue reading this article to learn more.
Fix 1 – Run the Command Prompt as an admin
Sometimes, the lack of administrative privileges can create such problems while executing most of the commands in the command prompt. So we think running the command prompt with admin privileges can resolve this issue. Some users have claimed to have resolved the problem and were able to run the diskpart commands.
Let us see how this can be done using the steps given below.
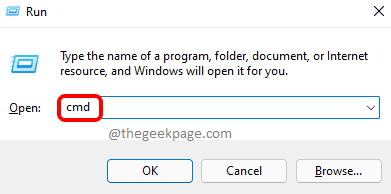
Step 1: Press the Windows+R keys together and type cmd in it.

Step 2: Next press the Ctrl + Shift + Enter keys together.
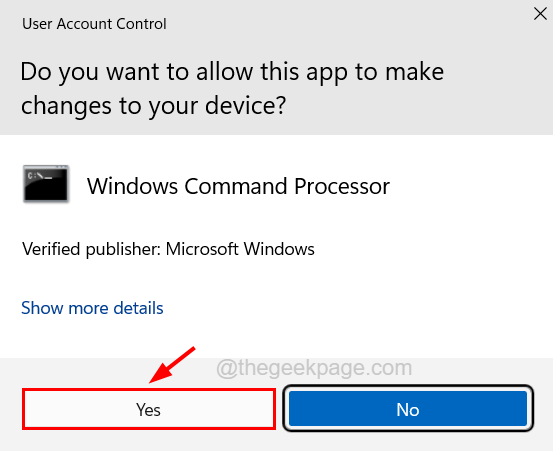
Step 3: This might pop up a UAC prompt on the screen.
Step 4: Now click Yes on the prompt to continue.

Step 5: After accepting the prompt, the command prompt window will be opened as an admin.
Step 6: Now try executing the diskpart commands that you wanted and see if this works.
Step 7: If this is still throwing an error, then continue with the next fix explained below.
Fix 2 – Clear the Write Protection for a Particular drive
When there is write protection for a disk partition or a particular drive like a flash drive or something, this does not allow the disk part commands from modifying the disk or drive.
So we suggest following the steps explained below on how to clear/remove the write protection for a particular drive.
Using Command Prompt
Step 1: Press the Win + R keys together to open its Run command box.
Step 2: Type cmd in it and press Ctrl + Shift + Enter keys together to open an elevated command prompt window on your system.

Step 3: You may have to accept the UAC that will be prompted on the screen by clicking Yes.
Step 4: After the elevated command prompt window opens, type diskpart and press Enter key.
Step 5: Now that you have entered the diskpart mode on the command prompt, type list disk and press Enter again.
Step 6: This will list all the disks available on the system.
Step 7: Among the list of disks displayed, you need to select a particular disk whose write protection needs to be removed.
Step 8: To do so, type select disk <disk number>
NOTE – Replace <disk number> with the disk number. In our example, we have selected the only disk available that is disk 0. You can select any other disks like 1,2, 3, etc.

Step 9: After selecting the disk, execute the below line by typing it on the command prompt and pressing the Enter key.
attribute disk clear readonly

Step 10: This will remove the write protection for that particular disk you had selected.
There is also another method for removing the write protection for a disk on your windows system using the registry editor which is explained below.
Using Registry Editor
While editing the registry file if something goes wrong, it might damage the system completely and it will be very tough to recover so we recommend our users export the registry file before continuing in order to save it as a backup file.
Step 1: Press the Win+R keys together which opens the run box.
Step 2: Next, type regedit in it and press Enter key.

Step 3: Accept any UAC prompted on the screen by clicking Yes to continue.
Step 4: Once the registry editor window appears on the screen, go to its address bar and clear it.
Step 5: Then type the following line and press Enter.
HKEY_LOCAL_MACHINE\SYSTEM\CurrentControlSet\Control
Step 6: This will take you to the Control registry key.
Step 7: If there is no key called StorageDevicePolicies under the Control registry key, you have to create a key now.
Step 8: To do so, right-click on the registry key Control and navigate to New > Key from its context menu as shown below.

Step 9: Now rename it to StorageDevicePolicies.
Step 10: After that, you need to right-click on the StorageDevicePolicies key and select New > DWORD (32-bit) Value from the context menu as shown below.

Step 11: Rename it to WriteProtect and then double-click on it to open its edit properties window.

Step 12: Make sure its Value data is 0 and then click OK.

Step 13: After making these changes, close the registry editor and restart your system once.