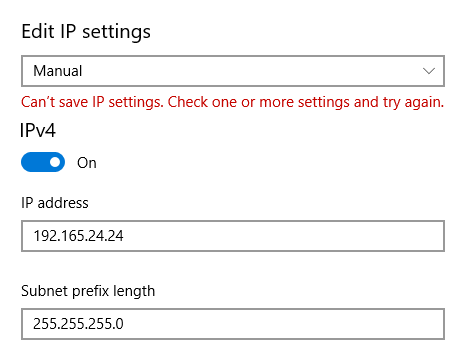
When you try to change the IP settings Manually in Windows 10 or Windows 11, you might have come across an error that says,
Can’t save IP settings.Check one or more settings and try again.
Please check the below screenshot for more details

Technically, this is not an error. If you have encountered this error, there is nothing to worry about. In this article, let us see what can be done to fix this and also look at the alternate ways to set the IP address manually in Windows 10
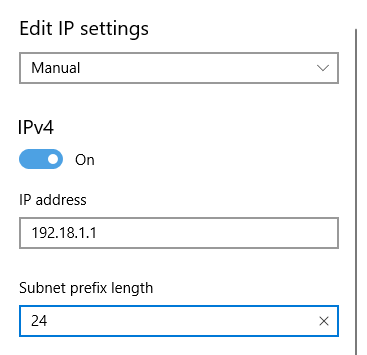
Method 1: Enter Subnet Prefix length instead of Subnet Mask.
Subnet Prefix length and Subnet Mask are actually different ways of specifying the same thing. That is, both specify the subnetting details of the IP address.
In the Edit IP settings window, when we have a clear look, the description asks us to enter Subnet prefix length, when we enter subnet mask instead of prefix length in this box, the error is seen.
Common Prefix Length equivalent of the subnet mask is given below
255.255.255.0 –> 24
255.0.0.0 –> 8
255.255.0.0 –> 16
You can find Subnet mask length in this link here :
For example, if the subnet mask 255.255.255.0 is given, then enter 24, which is its equivalent prefix length.

When an IP address is provided, 90% of the time, it will be given in the format IP Address/Prefix length.
For example, 192.168.1./24. In this example, the numbers after the slash, that is, 24 in this case, specifies the subnet prefix length of the IP.
In case, you are not sure of the Prefix length associated with your IP, it is best to reach out to your Network Administrator or try the below-listed methods.
Method 2: Try to enter it From Network connections panel
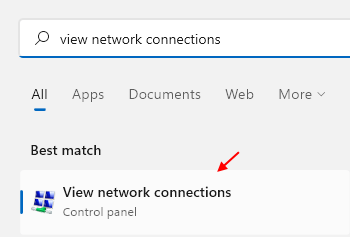
Step 1: Search View network connections in the search box and click on the search result.

Step 4: Right-click on your Adapter. For demonstrating, we are using Ethernet Adapter(Any other adapter should be similar) and then choose Properties

Step 5: Make sure you are in the Networking Tab
Step 6: Under the section, This connection uses the following items, double-click on InternetProtocol Version 4(TCP/IPv4)

Step 7: In the opening window, select Use the following IP address
Step 8: Enter the IP Address and the subnet mask
NOTE: Here Subnet mask is to be entered. Note the format in the screenshot below.
Step 9: Enter the IP address Default Gateway
Step 10: Under the Use the following DNS server addresses section, Enter the DNS Server’s IP Address as shown below
Step 11: Finally, click on the OK button

Method 3: Using Command-line (Command Prompt or PowerShell)
Step 1: Open the Run Window using the Win Key and R at the same time.
Step 2: Open Command Prompt or PowerShell with Admin privileges.
To open Command Prompt with Admin rights, type cmd and hit Ctrl+Shift+Enter

To open PowerShell with Admin rights, type powershell and hit Ctrl+Shift+Enter

Step 3: In the UAC windows that shows up, click on Yes
Step 3: In the command-line window that opens, type the below command and hit Enter
netsh interface ip show config
You will see a list as the output as shown below. Carefully, note the name of the adapter. For example, let’s say we want to edit the IP settings of the interface named “Ethernet”, make a note of the name Ethernet. (The spelling and the cases(lower case, upper case) should be noted)

Step 4: Enter the below command with parameters that matches your network setup and hit Enter
netsh interface ip set address name= "Network Interface Name" static [IP address] [Subnet Mask] [Gateway]
Let’s say, you want to make changes to the interface named Ethernet and change the IP address to 192.168.1.2, Subnet Mask to 255.255.255.0, Gateway to 192.168.1.1. the above command must be tweaked as shown below
netsh interface ip set address name= "Ethernet" static 192.168.1.2 255.255.255.0 192.168.1.1

That’s All
We hope this has been informative. Thank you for Reading.
Kindly comment and let us know if you were able to fix the error.