Is the ShellHost.exe eating up a huge amount of your CPU power? If it is then don’t worry. The problem sometimes occurs due to corrupted installed applications on your computer. Follow these easy fixes to solve the problem easily.
Fix – Rename ShellExperience host folder
Sometimes this problem may occur due to a corrupted ShellExperince host folder. Renaming it will solve this issue.
Step- 1 Safe boot your device
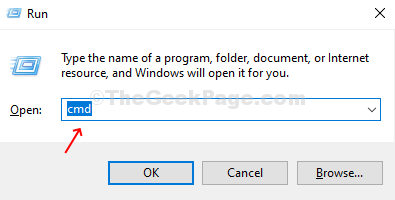
1. Press the Windows key along with the “R” key.
2. After that type this code. To access the CMD terminal, press ‘Ctrl+Shift+Enter‘ keys together.
cmd

3. To create a new user named as ‘administrator’, you need to copy-paste this line in the terminal and then hit Enter.
net user administrator /active:yes

Once you see that ‘The command completed successfully.’ has appeared on your screen, close the terminal.
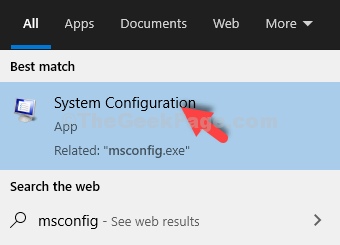
4. After that, type “System Configuration” in the search box.
5. Click on the “System Configuration” to access it on your computer.

6. When the System Configuration appears on your screen, click on the “Boot” tab.
7. Then, check the box beside “Safe boot“.
8. After that you need to click on the radio button beside the option “Minimal“.

9. To boot your computer in safe mode, click on “Apply“. Then click on “OK“.

You will see a prompt has appeared. Simply click on “Restart” to restart your device.
10. You will be automatically logged in to your current account. To sign out, right-click on the “Windows icon“.
11. Then, click on the “Shut down or sign out“. Then click on “Sign out“.

12. You will see the list of available users on your computer.
13. Click on “Administrator” on the bottom-left corner.

14. After that, click on “Sign in” to sign in to the account.
This will take several minutes.
Step-2 Renaming a specific folder
1. Once you have logged in to your device, press Windows key+E.
2. After that, in the File Explorer window, click on “View“.
3. Then click on “Options“.

4. When the Folder Options window appears, click on the “View” tab.
5. After that, scroll down to check the option “Show hidden files, folders and drives“.

6. Finally, click on “Apply” and then on “OK“.

7. Now, simply copy-paste this line in the address bar. After that, press ‘Enter‘.
C:\Users\%username%\AppData\Local\Packages

8. Once you are in the specified folder, scroll down to find the “Microsoft.Windows.ShellExperienceHost_cw5n1h2txyewy” folder.
9. What you need to do is to right-click on that folder and then click on “Rename” to rename it.

10. Attach “.BAK” beside the name. So the new name will be “Microsoft.Windows.ShellExperienceHost_cw5n1h2txyewy.BAK“.
Once you have done this, close the File Explorer.
11. Again, press Windows key + R to open up the Run window.
12. To access the System Configuration menu, write this code, and hit Enter.
msconfig

13. At first, in the ‘General‘ tab, click on the radio button beside the “Normal Startup“.

14. After that, go to the “Boot” section.
15. Then, uncheck the “Safe boot” checkbox.

16. Finally to save the new boot configuration, click on “Apply” and on “OK“.

As soon as you saved the settings, a prompt will appear. You need to click on “Restart” to restart your computer.
Step 3 – Logging back to your account
After restarting your device, you will be back to the ‘Administrator’ account.
1. Right-click on the Windows icon which is on the bottom-left corner and then click on “Shut down or sign out“.
2. After that, you need to choose the “Sign out” from the list of options.

3. Now, choose your main account to log in to your system.
4. Once you have logged in to your system, type “cmd” in the search box.
5. Then, click on “Run as administrator” on the right-pane.

6. It is time to delete the ‘administrator’ account from your computer. To do so, type this code in the CMD window and hit Enter.
net user administrator /active:no

Once you press ‘Enter’ you will see ‘The command completed successfully’ message has appeared.
Close the CMD terminal. The issue of ShellHost.exe eating up too much of the CPU power is solved.