While accessing a newly installed application on your computer sometimes you may see a rare error message stating ‘Configuration system failed to initialize’ on windows 11 or windows 10 PC. This problem may occur due to corrupted system files or due to wrong configuration files. We have discussed some easy solutions. Simply go through these and the problem will be solved in no time at all.
Fix 1 – Run SFC scan through PowerShell
Running an SFC scan through PowerShell should fix this issue for most of the users.
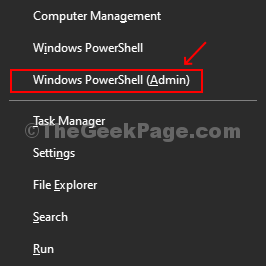
1. Right-click on the Windows icon and then click on the “PowerShell (Admin)“.

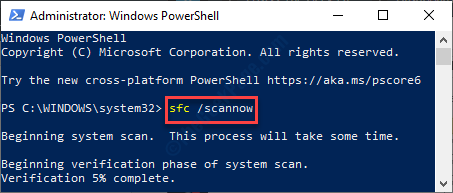
2. Once you reach the PowerShell window, type this code and press ‘Enter‘ to run the System File Checker scan on your computer files.
sfc /scannow

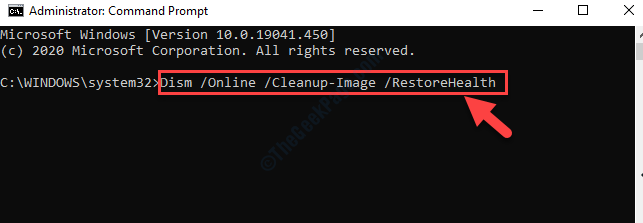
3. In case of sfc scan doesn’t detect any error, run this scan on your computer.
DISM /Online /Cleanup-Image /RestoreHealth

This process will take 5-10 minutes. Wait patiently.
Fix 2 – Deleting the configuration file of the problematic application
Sometimes corrupted configuration file of the particular application may cause this issue.
1. At first, you need to access the File Explorer on your computer.
2. After that, you need to paste this location in the address bar and hit Enter.
C:\Users\%username%\AppData\Local

3. When you reach the Local folder, Go inside the folder associated with the application you are facing trouble with.
“Delete” The config file from there
(Like- If you are facing trouble with the ‘Adobe Reader‘,Just locate the config file in Adobe folder and delete it.)
4 -Now, Restart your PC
5. Once you have done that then, write this location in the address bar and press Enter.
C:\Users\%username%\AppData\Roaming

5. Just like the previous step, here you also need to delete the config file inside the folder associated with the application.
Once you have done this, reboot your computer.
After rebooting your device, check the status of the issue.
Fix 3 – Check the configuration file
Many Windows 10 applications depend upon the configuration files. Sometimes corruption in the file may cause this issue.
1. Right-click on the “Windows icon” and then click on “Run“.
2. When the Run window opens up, type this address and click on “OK“.
C:\Windows\Microsoft.NET\Framework64\

3. After that, you need to double click on the folder “v4.0.30319“).
(The name of the folder may change Windows version to version.)

4. After that, double click on the “Config” folder.

5. In the list of files locate the “machine.config” file.
6. After that, double click on the configuration file.

7. Then, click on “More apps“.

8. Then, choose “Notepad” or “Notepadd++” whatever is available on your computer.

9. When the file appears on your computer, check if any lines are written between “<configuration>” and “<configSections>“.
If there are any lines, delete them.

10. Don’t forget to press Ctrl+S to save the changes in the file.
Reboot the device and check if this helps or not.
Fix 4 – Clean boot and remove apps
Clean booting your computer can solve this issue on your computer.
1. Right-click on the “Windows icon” and then click on the “Run“.
2. After that, type this in the Run panel and click on “OK“.
msconfig

3. Once you reach the System Configuration window, visit the “General” section.
4. Here you need to select the “Selective startup” option.
5. Next you need to check the box beside the “Load system services.

6. Soon after that, go to the “Services” tab.
7. After that, click on the “Hide all Microsoft services“.
8. Then, to disable the third-party services you have to click on “Disable all“.

9. Simply, go to the “Startup” panel in the same window.
10. Then, click on the “Open Task Manager“.

Task Manager will open up.
11. Here disable all the services. To do so, right-click on each one-by-one and then click on “Disable” these all.

Close the Task Manager window.
12. Coming back to the System Configuration panel, just click on “Apply” and “OK”.

Restart your PC to boot it with only necessary drivers.
Check if you are still facing the issue or not. If the issue stops then the problem was happening due to any third-party application on your device.
Fix 5 – Make a new local account
If nothing is working out for you, try to create a new local account on your computer and try to access the application again.
If you don’t know how to create a local account on your computer, follow this guide on how to create a local account without Email.
Check if this works.