In sleep mode the PC goes to a low power consuming state, turn off the display and goes to what known as sleep mode. You can resume your work on your PC or wake up your PC by hitting any key or your mouse. Normally the default time when a PC goes to sleep mode is set to 15 minutes. Although its a useful process which saves your battery and save power loss, but can be troublesome if you are downloading a large file over internet and the download disrupts due to loss in internet connection due to sleep mode. It is better to turn off sleep mode in these cases for an uninterrupted PC activity. Lets us see how to disable sleep mode in windows 10.
Also read: Fix Windows 10 Going to sleep after few minutes of inactivity
how to disable sleep mode in windows 10
Step 1 – Press windows key + i to open settings panel.
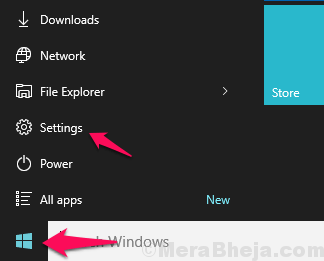
Or , click on windows icon and then click on settings.

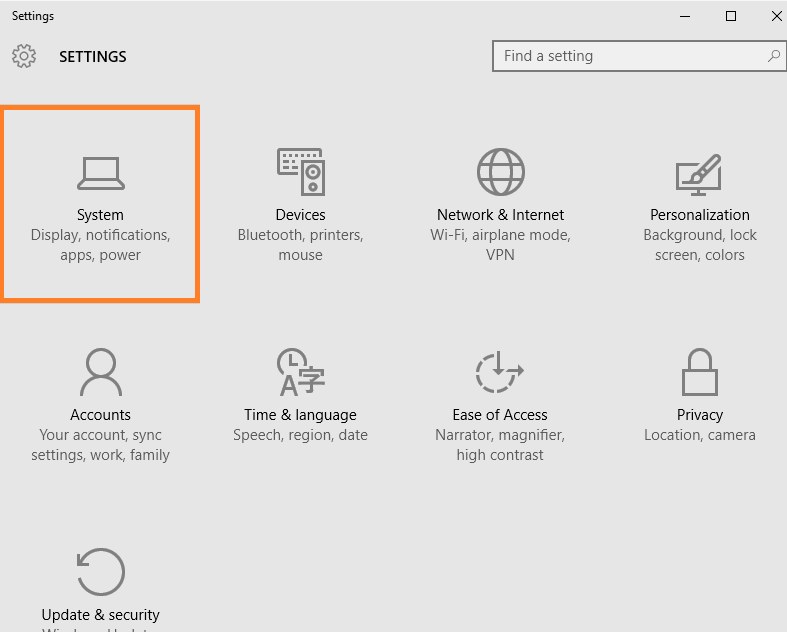
Step 2 – In the popped up system panel, click on system
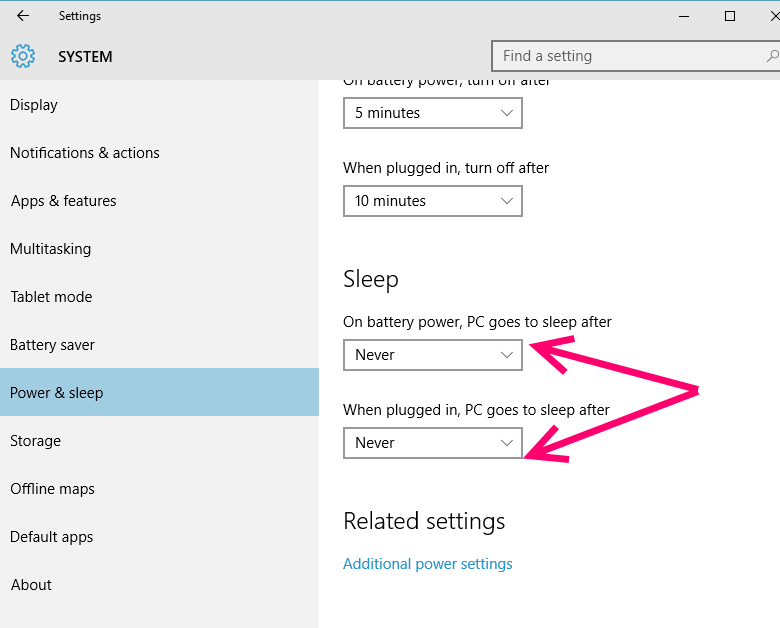
Step 3 – Now, in the left menu panel, click on power & sleep.
Step 4 – In right side in sleep section, just click on timing options and select never from drop down.

Alternate Method to Disable Sleep Mode in Win10
Step 1 – First of all search power options in search box of taskbar.

Step 2 – Now, click on power options from the search results you get.
Step 3 – In the window opened, click change when the computer sleeps in left menu.

Step 4 – Just select Never from both the dropdowns next to where it says put the computer to sleep.

Note: – One important thing to note here is that these settings work as per the plans you are currently in. If you are in a power saver mode currently, these settings will work only on power saving mode. If you are in balanced mode these settings will be effective in balanced mode only. To change the battery plan, just click on the battery icon in the taskbar and repeat the same steps for the plan you wish the setting to get effected.
How to disable Hibernation Mode in Windows 10
You can also disable hibernation feature completely to disable hibernation feature in windows 10 PC. The only downside is that fast startup will be disabled also.
1. Search cmd in windows 10 search box.
2. Right click and choose run as administrator.

3. now, copy and paste the command given below and hit enter key.
powercfg.exe /h off
Thats it, hibernation has been disabled on your system.
To enable it again, just open command prompt with admin rights again and run powercfg.exe /h on .
