uffling of any sound or audio file is a special effect. Once this effect is applied the sound appears to be coming from underwater. You can get this adorable effect by using open-source software called Audacity, which can be easily available over the internet. You can use this software to add any kind of special effects to any audio file it supports. Sound muffling may be seen in a variety of movies and it may also benefit many artists who want to employ them in their work. This article specially focuses on how to muffle your audio file using Audacity.
Applying Underwater / Muffle effect with Audacity
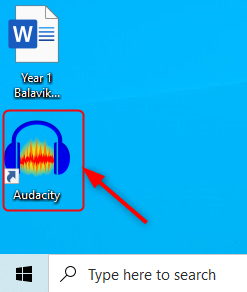
Step 1: Double click on the shortcut Audacity icon present on your screen.

If you do not have the Audacity app, Click on download to download and install it.
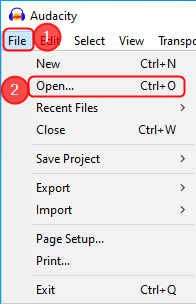
Step 2: Now, click on the File from the menu bar and select the Open( Cltr+O) option.

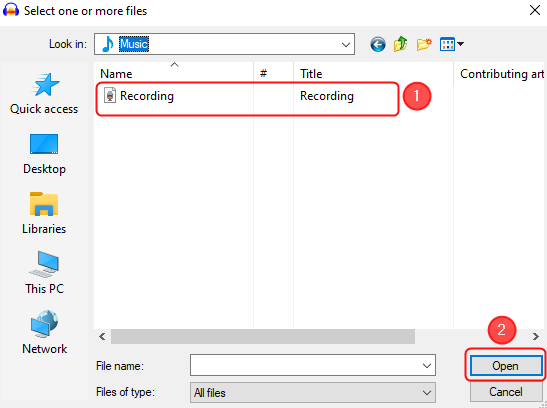
Step 3: Now, select the audio file you want to apply the Muffling effect and click Open.

NOTE: Audacity will support WAV, MP3, or AIFF formats. Make sure the audio is in the required format.
Step 4: Now, select the audio file and click on Effect > Low Pass Filter.

Step 5: Next, the low pass filter window opens. Follow the below steps.
1. Set the dB value to 24 from the drop-down list of Roll off.
2. You can now click on the Preview button to check if you got the desired output. If not you can change the dB value and check again.
3. Once you got the desired output, click OK.

Step 6: Finally, the audio file is modified using the Muffling / Underwater Effect.
That’s all.
Hope this article is informative. Try this method and let us know your experience.
Thanks for Reading.