Your Windows 10 PC already comes with built-in antivirus protection called the Windows Defender. However, even that antivirus can be under threat, if any external harmful apps make changes to it. Yes, that is highly possible. Hence, activating the Tamper Protection features in Windows 10 is extremely important. Therefore, by enabling the feature, you add an additional layer of protection to the Windows Defender antivirus.
Note: Please remember, that if you are also using a third-party antivirus, the tamper protection that you enable for Windows Defender, won’t work for this. To enable Tamper Protection for the third-party antivirus, you will have to do that separately. Also, Tamper Protection can interfere when trying to change any security settings using Command Prompt, PowerShell, and Command-Line.
Let’s see how to activate Tamper Protection for Windows Defender.
Method 1: How to Enable Tamper Protection in Windows 10 Using the Settings App
Step 1: Click on the Windows icon on your Desktop, and type Windows Security in the search box. Click on the result.
![]()
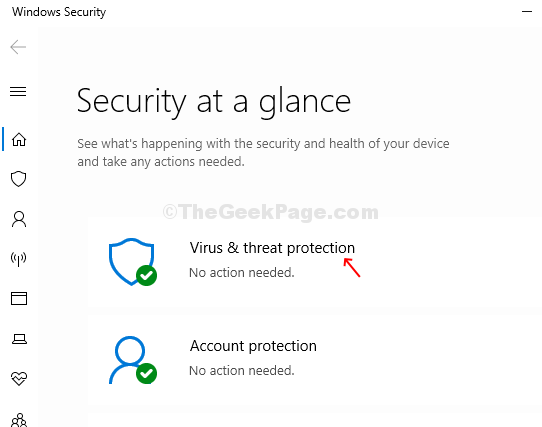
Step 2: In the Windows Security window, click on Virus & threat protection option.

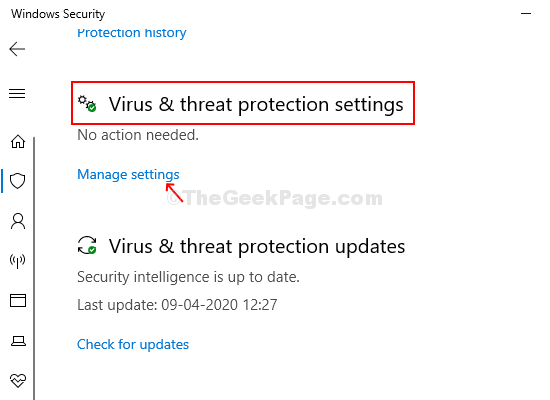
Step 3: In the next window, scroll down and find Virus & threat protection settings. Click on Manage Settings link in blue located below it.

Step 4: In the next window, under Virus & threat protection settings, scroll down and find Tamper Protection. You will notice a slider button below it. Move the slider button to the right to turn on the Tamper Protection.

And, the Tamper Protection feature for your Windows Defender antivirus is enabled now using the Settings app. Follow the same process to turn it off if you ever want to.
Method 2: How to Enable Tamper Protection in Windows 10 Using the Registry Editor
Step 1: Press the Windows key + R together on your keyboard to open the Run box. Type Regedit in the search box and hit Enter to open the Registry Editor.

Step 2: In the Registry Editor, navigate to the below path:
HKEY_LOCAL_MACHINE\SOFTWARE\Microsoft\Windows Defender\Features

Note: If it doesn’t take you to Windows Defender and Features directly, but only till the expanded Microsoft key name, simply find Windows Defender, expand it, then find Features and select it.
Step 3: Double-click on the Tamper Protection [Dword (32-bit) value] on the right side of the pane.

Step 4: It will open the Edit window. Change the Value Data field to 1 to enable the Tamper Protection feature. Press OK to save the changes and exit.

*Note – To disable the protection back again if required, change the Value Data back to 0 and press OK to save the changes and exit.
Just remember, that if you have a third-party antivirus, make sure to enable the Tamper Protection for it separately through the Settings app.