When a device stops working and reset due to a major failure, you may see this error message on the Device Manager screen – ‘This device has failed and is undergoing a reset. Error code 54’. Though this error code can come up with any device, it is prevalent with the network card. Follow these easy fixes to solve the problem very quickly.
Workaround –
Just restart your computer once. In normal cases, a simple reboot of your device should fix this problem in the Device Manager.
Fix 1 – Reset the network configuration
Try resetting the network configuration on your computer.
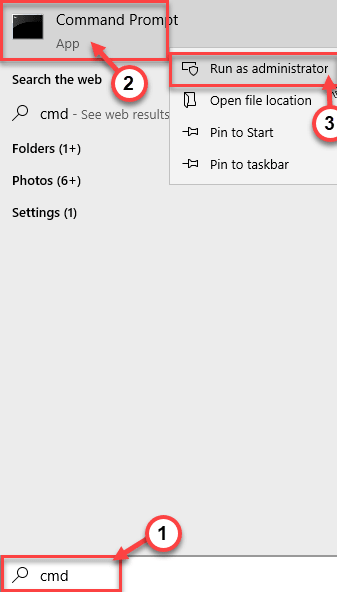
1.Just press the Windows key+S keys together. Write “cmd” in the search box.
2. Next, simply right-click on the “Command Prompt” and click on the “Run as administrator“.

3. When the Command Prompt window appears on your screen, execute these codes one-by-one to reconfigure the network settings.
netsh winsock reset
netsh int ip reset
ipconfig /release
ipconfig /renew
ipconfig /flushdns

Once the network is re-configured, check the status of the issue in the Device Manager.
Fix 2 – Troubleshoot the network
You can troubleshoot the network issue.
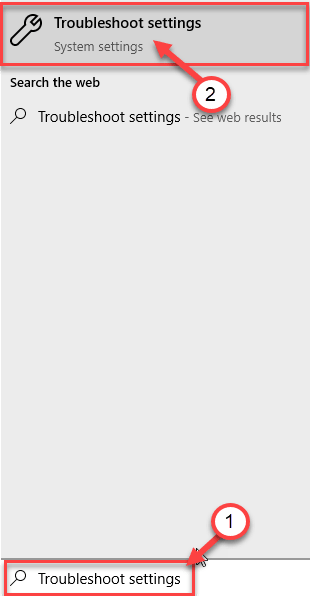
1. First of all and write “Troubleshoot settings” in the search box.
2. AFter that, click on the “Troubleshoot settings” from the search result.

3. Locate the “Internet Connections” from the list of troubleshooters.
4. Then, to run the troubleshooter, click on the “Run the troubleshooter“.

Now Windows will automatically attempt fixes for your problem.
5. Next, you have to click on “Close“.

Now, try to connect to the internet again.
If you still seeing the error code 54, there may be something wrong with the adapter. Try troubleshooting it-
6. Scroll down in the same Settings window, click on “Network Adapter“.
7. Just like the previous one, click on the “Run the troubleshooter” to run the troubleshooter.

In a while, Windows will check for errors in the network adapter.
Fix 3 – Rollback the network driver
You can rollback the network driver from your computer.
1. At first, press Windows key+R to launch Run.
2. Then, write “devmgmt.msc” and hit Enter.

2. Then you need to expand the “Network adapters“.
3. After that, right-click on the network adapter driver on your computer and then click on “Properties“.

4. Go to the “Driver” tab.
5. After that, click on the “Rollback driver“.

Once you have rolled back the driver, you will be required to reboot your computer to complete the process. Open the Device Manager and check the status of the error.
Fix 4 – Reset the network
If nothing is working out, you can reset the network and fix the issue.
NOTE –
Resetting the network will remove and reinstall all the network adapters. All the network settings will be deleted from your computer and set to the default configuration.
1. Open the Settings window.
2. After opening the Settings screen, you have to click on the “Network & Internet“.

3. Then, click on “Status“.
4. After that, on the right-hand side scroll down to click on “Network reset“.

5. Then, click on “Reset Now” to reset the adapter.

6. Finally, click on “Yes” to reset the network.

After resetting the network, restart your computer.
Once you have restarted, configure the network settings and check if you are still seeing the error code 54.
How to fix Error code 54 for Bluetooth device
As we have discussed, this error code is prevalent with the Error code 54. There are two fixes –
Fix 1 – Uninstall the Bluetooth device
Uninstalling the Bluetooth device from your computer and restarting the device may help.
1. Just right-click on the Windows icon and click on “Device Manager“.

2. Look for the Bluetooth device you are seeing the error code.
3. Right-click on it and click on “Uninstall device” to uninstall the device from your system.

Once you have uninstalled the device, close the Device Manager.
Now, you have to install the Bluetooth driver.
Case 1 – Just restarting the system should install the missing driver on your computer. After restarting the system, check the error status once more.
Case 2 – At first, download the latest update for the Bluetooth driver from the manufacturer’s website. Install it on your computer.
This should solve the problem.
Fix 2 – Download and use HP assistant (only For HP users )
If you are seeing this error code on an HP laptop, try using the HP assistant on your computer.
Step 1 – Check for Windows Update
1. Open the Windows Settings by pressing the Windows key+I keys together.
2. Click on the “Update & Security“.

3. After that, click on “Windows Update“.
4. Therefore, click on “Check for updates“.

Windows will check for updates and install them on your computer.
NOTE–
You may notice there are additional updates for your drivers. Those are usually listed in the’ Optional update’ section. Follow these steps-
a. You need to click on “View optional updates” to view the list of drivers.

b. Here you will notice some driver updates are pending. Simply, check all the updates.
c. Finally, click on “Download and install“.

d. After downloading the updates on your device, click on “Restart Now“.

This should install the Bluetooth drive update and fix the problem.
Step 2 – Download and install HP Support Assistant
1. Go to the HP Support Assistant on your system.
2. Once you have downloaded the HP Support Assistant, close the browser.

3. Go to the location where you have downloaded the setup file.
4. Then, double click on the “sp112635“.

5. Now, click on “Next” and follow the on-screen instructions to install the HP Support Assistant on your computer.

Now, wait for the installation process to be complete.
Then, follow these steps –
1. At first, double-click the HP Support Assistant icon  on your desktop.
2. Next, go to the My devices section in the top menu.
3. After that, click on Updates in the My PC or My notebook pane.
4. Click Check for updates and messages to scan for new updates.

5. Here you have to just review the list of updates.
(NOTE – Updates with a yellow information icon are recommended. Updates with a blue information icon are optional updates.)
6. Select the box next to any updates you want to install.
7. Finally, click “Download and Install” to download and install the updates on your computer.
This will install the crucial updates on your computer.