Some Windows 10 users have complained about an where the Windows is crashing every time they are trying to use the Task Manager on their systems. If you are also facing a similar kind of issue on your computer, don’t worry. Just follow these detailed instructions to fix the problem quickly.
Fix 1 – Run Basic Windows commands
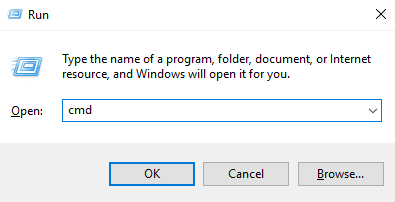
1 . Press Windows key + R key together to open run.
2. Now, write cmd in it and press CTRL+SHIFT+ENTER keys together from your keyboard to open cmd as administrator.

3. Now, run the command given below in command prompt window.
DISM.exe /Online /Cleanup-image /Restorehealth
4. After that run the command given below and wait for it to get executed.
sfc /scannow
Now, close the cmd window.
Fix 2 – Alter the registry
Alter the Registry to re-enable the Task Manager.
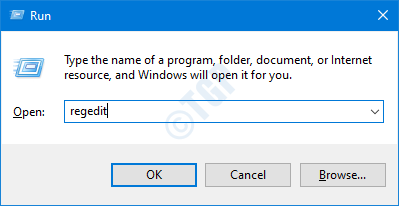
1. At first, right-click on the Windows key and click on “Run“.
2. Then, type “regedit” and click on “OK“.

Important– As the Registry is a sensitive location, before altering the registry, we request to make a backup of the existing registry on your computer.
After opening the Registry Editor, click on “File“. Then click on “Export” to make a new backup on your computer.

3. When the Registry Editor opens up, on the left-hand pane. expand this way –
Computer\HKEY_CURRENT_USER\Software\Microsoft\Windows\CurrentVersion\Policies
4. On the right-hand side, right-click on the “New>” key and click on “DWORD (32-bit) Value“.
5. Set the name of value as “DisableTaskMgr“.
6. Then, double-click on the value to edit it.

7. Then, write “0” in the ‘Value data:’ box.
8. After that, click on “OK“.

This will save the alteration in the Registry Editor. Close the window and reboot your computer to let this change take effect.
Fix 3 – Check the Local Group Policy settings
Check if your system administrator has disabled the Task Manager using the GPO.
1. Simply by pressing the Windows key+R you can open up a Run instance.
2. In that terminal, type this simple code and then hit Enter.
gpedit.msc

This will open up the Local Group Policy Editor.
3. Once you see that the Local Group Policy Editor window has appeared on your screen, go here-
User Configuration > Administrative Templates > System > Ctrl + Alt + Del Options

4. On the right-hand side, double click on the “Remove Task Manager” policy.

6. In the Remove Task Manager window, select “Not Configured” option.
7. Now, click on “Apply” and then click on “OK“.

Close Local Group Policy Editor window.
Fix 4 – Uninstall the NVIDIA drivers
Some users have ascertained the fact this issue is occurring due to some NVIDIA drivers.
Step 1 – Uninstall
1. Press the Windows key+S. Type “Device Manager” in the box.
2. Next, tap on the “Device Manager“.

3. Click on the “Display adapters“.
4. Then, right-click on the NVIDIA graphics adapter and click on the “Uninstall device“.

5. Click on “Yes” to uninstall the driver from your computer.

Step 2 – Uninstall the NVIDIA graphics driver
1. You have to press the Windows key+R keys together.
2. Write “appwiz.cpl” and then click on “OK“.

3. In the Program & Features window, check out the list of the NVIDIA drivers.
4. Right-click on the first NVIDIA app and then click on “Uninstall“.

Follow the on-screen instructions to uninstall the NVIDIA app from your computer.
After uninstalling the NVIDIA, uninstall other apps associated with NVIDIA in the same list.

close the Control Panel window.
5. Press the Windows key+R.
6. Copy-paste this location and click on “OK“.
%programfiles(x86)%/NVIDIA Corporation

7. After that, locate the GeForce Experience folder.
8. Select it and right-click on the “Delete” to remove the folder from your system.

After doing all these, reboot your system and check if the task manager is still crashing or not.