The main highlight of any document whether it is an article, essay or tutorial is the headings and of course the table of contents. It describes the outline structure of the document so the users can get to the point where and what they are looking forward to reading from the document.
It is also a best practice to add the table of contents to most of the documents for making them look professional. Nowadays everything is carried out online and people make use of google docs for creating most documents.
Many users are still not sure how to insert or add the table of contents in google docs. Therefore, we have come up with this article for explaining how to create or insert the table of contents in google docs.
How to Insert a Table of Contents in Google Docs
Step 1: Go to Google Docs online by clicking here.
Step 2: If you haven’t signed in, then please go ahead and sign in with your Google account credentials.
Step 3: After you have signed in, open the saved google docs file where you need to insert the table of contents.
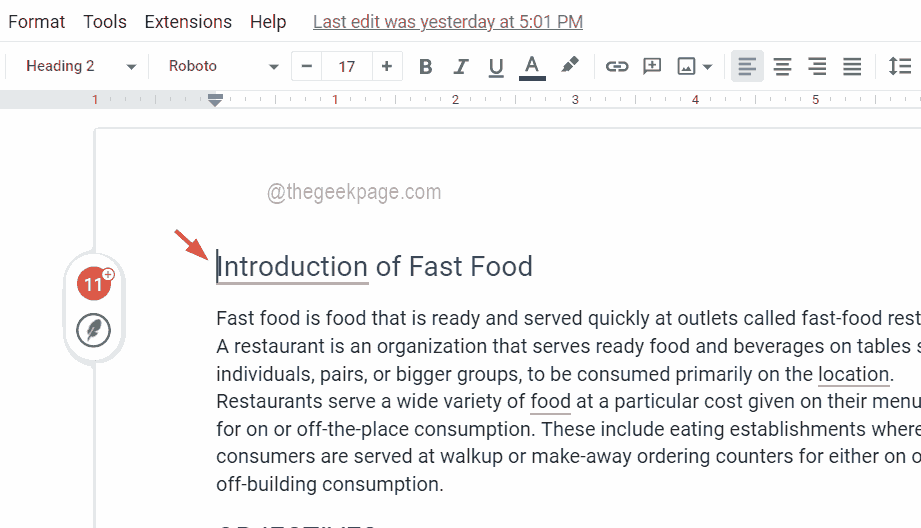
Step 4: In the google doc file, the table of contents section should be ideally placed on the first page.
Step 5: Therefore, if the first page is not blank, you can create one by simply placing the cursor at the beginning and pressing CTRL + ENTER keys together.

Step 6: Now the first page is blank and the contents of the first page are shifted to the second page and the rest of the pages are also shifted accordingly.
Step 7: To insert the table of contents, you once again need to make sure the cursor is on the first page where you want to see the table of contents.
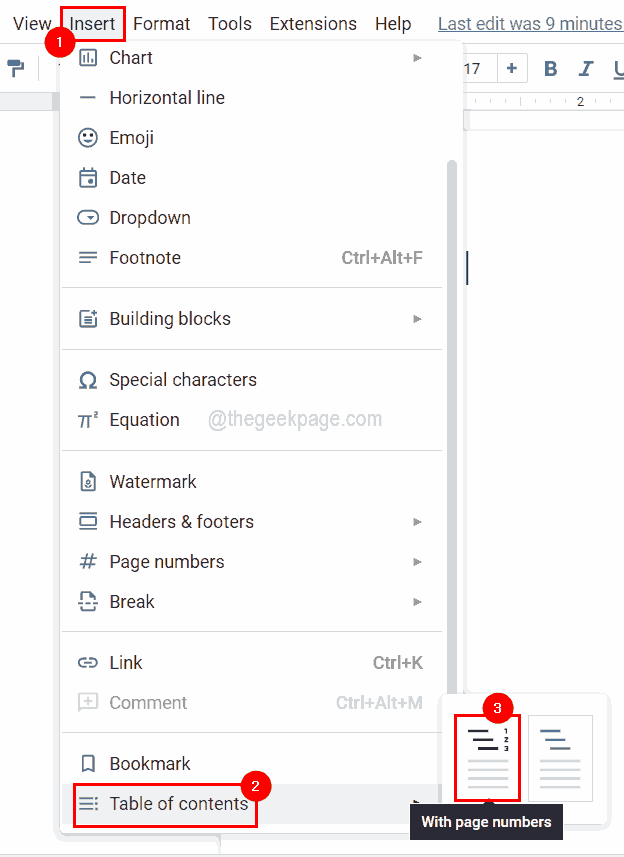
Step 8: Then go to the Insert option from the top bar and select Table of contents from the dropdown menu.
Step 9: Next, the table of contents has two options. One with page numbers and another with Blue coloured links.
Step 10: Choose either of the options to place the table of contents in the first place.

Step 11: After placing the table of contents, if you get to see this message that says “Add Headings (Format > Paragraph styles) and they will appear in your table of contents.“, then it is probably because there are no headings in the document.
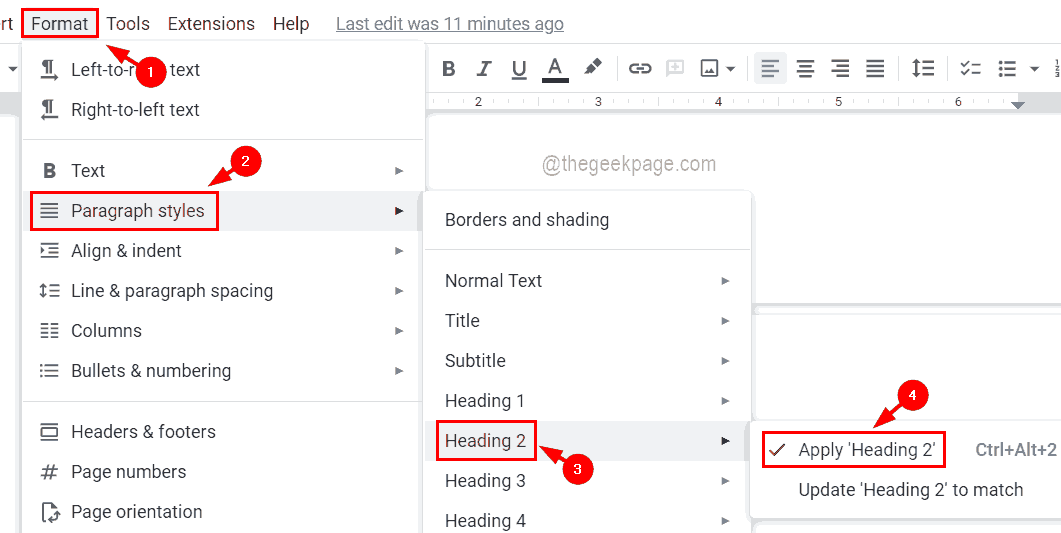
Step 12: Make sure you have given sufficient headings to the document by selecting the line and then you need to select Format > Paragraph styles and select any heading from the list and apply them.
NOTE – Keyboard shortcut to apply heading 1 is CTRL + ALT + 1, heading 2 is CTRL + ALT + 2, so on.

Step 13: After you have made changes in the document by applying the headings, you should update the table of contents. To do so, you need to click on the table of contents box and click the update icon that appears on the left side of the table of contents box.

Step 14: Now you can see all the headings in the table of contents box.