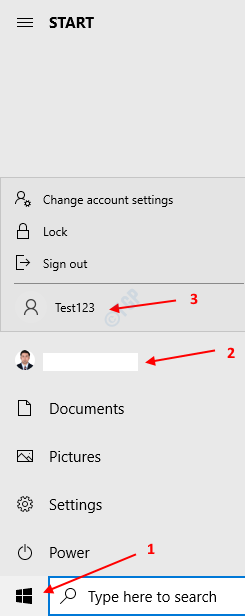
When there are many users using the same PC, we can create several accounts in Windows 10 and each user can access his own account to work. Usually, the option to switch the Users will be seen at the left bottom corner of the Logon-screen.In case you are logged in, then you can switch users by pressing on the Windows button, click on the Current User, you can see the Users accounts to which you can switch.

For some reason, if you do not see this option, it is because
- Another user account is not configured in the system
- FastUser Switching has been Disabled.
Note: – Press Ctrl+Alt+Del and click on Switch User
In this article, let us look at two ways to fix the No “Switch User” Option because of the above-listed reasons.
Method 1: Enabling Fast User Switching
NOTE: You must be logged in as an Administrator to do this change.
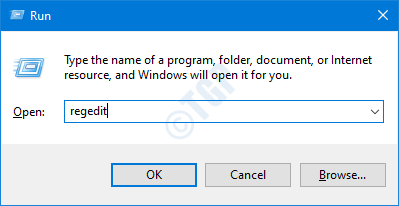
Step 1: Open run window holding Windows+r keys
Step 2: Enter regedit and press Enter

Step 3: If you see the User Account Control window popping up, click on the Yes button
NOTE: Registry editing can have an adverse effect on the system even with the slightest mistake. It is advised to take the backup of the registry before proceeding. To take a backup, In the Registry Editor–> Go to File –> Export –> Save your Backup file.
Step 4: In the top bar, copy-paste the following location and hit Enter as shown below
HKEY_CURRENT_USER\Software\Microsoft\Windows\CurrentVersion\Policies\System

NOTE: If the subkey/subfolder named System is not present within the Policies folder, create one using the following steps.
Right-click on the Policies key, Select New and Key.
Name the newly created subkey as System

Step 5: Within System, we have to create a new DWORD. So Right-click anywhere on the right-hand side
Step 6: Click on New and choose DWORD (32-bit) Value

Step 7: Name the newly created DWORD as HideFastUserSwitching.
Step 8: Double click on HideFastUserSwitching in order to modify its value.

Step 9: In the Edit DWORD window, Set the value to 0 and press OK

Step 10: Restart the system
Method 2: Creating another User Account
1 – Press Windows key + I key together to open settings.
2 – Now, Click on Account from the left menu and click on family & Other users from the right.

3 – Now, Click on Add account.

4 – Now, create an account on your windows 11.
That’s All
We hope this has been informative. Thank you for Reading.
Kindly comment and let us know if this helped.