As we all know it is a good practice to keep our PC updated. Sometimes, when you update your system, you can see that some kind of application file(.exe) is downloaded into the system. One such file is Sedlauncher.exe. This file gets downloaded when you update your system with Windows 10 patch KB4023057.
What is Sedlauncher.exe?
As per Microsoft, the purpose of the KB4023057 is to enhance the reliability and User experience in Windows 10 Update Service Components by speeding up the update process. This is where Sedlauncher.exe plays its role.Sedlauncher.exe is basically an application file located in the ‘C:\Program Files\rempl‘ location. The primary purpose of this file is to enhance the speed and safety of the Windows 10 update process. Although this is designed to speed the process, at times, it causes a High disk usage issue in the system and this, in turn, reduces the speed of the system.
How to Fix sedlauncher.exe Full Disk Usage Issue
If you are experiencing a Sedlauncher.exe Full Disk Usage issue on your system, then don’t worry. In this article, we will be discussing different ways to fix this issue.
Fix 1: End the Sedlauncher Task from the Task Manager
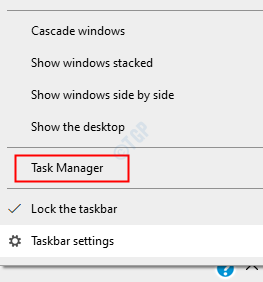
Step 1: Right-click anywhere in the blank area on the taskbar. From the context menu that pops up, click on Task Manager

Step 2: In the window that opens, Make sure you are in the Processes tab
Step 3: Windows Remediation Service contains the Sedlauncher task.Scroll down to locate Windows Remediation Service (WRS)
Step 4: Now right-click on it and choose End Task
Step 5: Restart the system and check if the issue has resolved.
Fix 2: Turning off Windows Remediation Service in Services
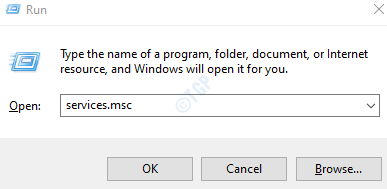
Step 1: Open Run Dialog (Windows+r)
Step 2: Type services.msc and hit OK

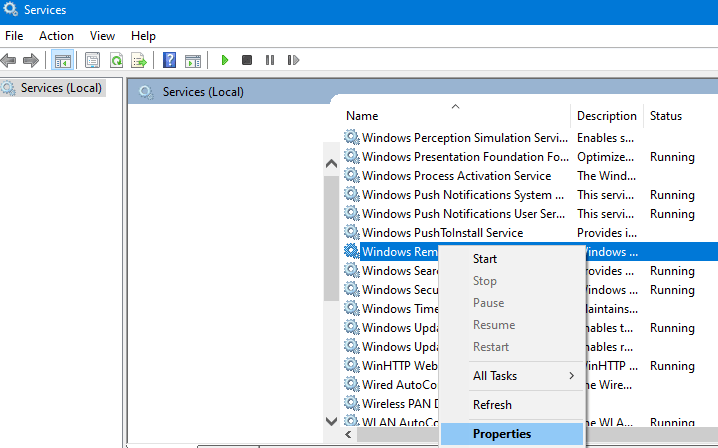
Step 3: In the Services window, scroll down to find Windows Remediation Service
Step 4: Right-click on it and choose Properties

Step 5: In the Properties window, From the Startup type drop-down choose Disabled
Step 6: Under the Service status section, click on the Stop button
Step 7: Finally, click on Apply followed by OK

Step 8: Restart the system
Check if the Sedlauncher.exe is running in the background. If it is, try the next fix.
Fix 3: Block Sedlauncher.exe with Windows Firewall
Step 1: Open the Run window using Windows + R
Step 2: Type control firewall.cpl, and hit the Enter key

Step 3: From the left-hand side menu, click the Allow an app or feature through Windows Defender Firewall option

Step 4: In the Allowed apps window, click on the Change Settings button. You must be logged in as an Administrator to do this change
Step 5: Click on Allow another app button at the bottom-right corner as shown below

Step 6: Add an app window opens, click on the Browse button

Step 7: In the address bar, copy-paste the location C:\Program Files\rempl and hit Enter
Step 8: Click on sedlauncher.exe
Step 9: Click on the Open button

Step 10: Untick the sedlauncher and click on the OK button as shown below.

With this, the Sedlauncher.exe will be blocked and will not run henceforth.
Fix 4: Uninstall the Update
With this method, all the updates that are part of this patch will be missed.
Step 1: Hold the keys Windows+R and open the Run Dialog
Step 2: Type appwiz.cpl and press Enter

Step 3: In the window, click on “Update for Windows 10…” or Windows Setup Remediation and choose Uninstall.

This will uninstall the update and hence sedlauncher would not run.
Fix 5: Deleting the Task Schedule
Step 1: Press Windows+r keys together to open the run command box and type taskschd.msc to open Task Scheduler

Step 2: In the task scheduler window that opens, double-click on the Task Scheduler Library located at the left-hand side of the window

Step 3: Navigate to Microsoft –> Windows –> rempl folder as shown below

Step 4: Now on the right side , right-click on the task named shell and delete the scheduled task as shown below

With this, the sedlauncher won’t be able to run as the scheduled task is canceled.
Fix 6: Uninstall Windows Setup Remediations Program
Step 1:Hold Windows+I to open the Settings window
Step 2: Click on Apps Tile

Step 3: In the Apps & features window, scroll down to the Search bar and type Update for Windows 10, and hit Enter
Step 4: Now, click on the Uninstall button under Update for Windows 10 for x64-based Systems(KB4023057) as shown below

Step 5: Repeat steps 3 and 4 for Windows Setup Remediation Program as well.
Fix 7: Rename or Remove REMPL Folder
Step 1: Hold the keys Windows+E and open the Windows Explorer window
Step 2: In the address bar, type C:\Program Files and press Enter key
Step 3: Scroll down and locate the rempl folder
Step 4: Right-click on the folder and choose to rename or delete the folder

Check if this works.
If none of the above methods work, try restoring the system to the previous restore point.
That’s All
We hope this article has been informative. Thank you, for Reading.
Kindly comment and let us know which fix did the trick in your case. Also, let us know if you run into any issues. We will be glad to assist.