One of the most useful security features introduced by Microsoft for Windows 10 in the recent times, would be the option to sign in to Windows 10 with a PIN. Yes, this is available as an option to the Windows 10 users and is pretty useful, especially if you want to add that extra security layer to your privacy.
However, sometimes, you may encounter, “Something happened and your PIN isn’t available” error in your Windows 10 PC while logging in. The complete message says, “Something happened and your PIN isn’t available. Click to set up your PIN again“.
The good thing is, this issue can be fixed and you can log back in to continue with your back. Let’s see how to work it around.
Method 1: When You Know the Microsoft/Local Account Password
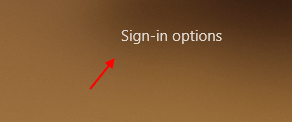
Step 1: When you see the error message, below it, you can also see option as given below:
- Sign-in options

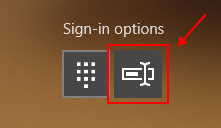
Step 2: As you know the account password, click on the Sign-in options and two options will appear. Just select the password option as shown.

Step 3 : Enter the password and Log in to the system.
Step 4 : Now, Press Windows key + I together to open settings.
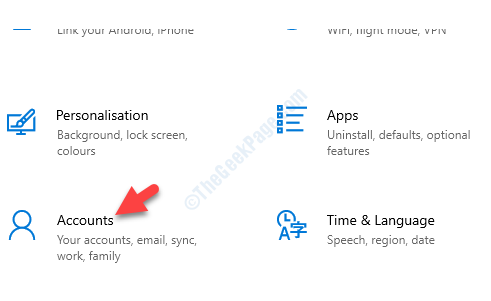
Step 5 : Now, Click on Accounts.

Step 5 : click on Sign in Options in the left.
Step 6: Scroll down and click on windows hello PIN in the right.
Step 7 : Click on remove to remove the PIN.
Step 8: Now. go ahead and create a new PIN.

*Note: – If the above method does not work, restart your PC and keep pressing the Esc key or F12 continuously till it reaches the BIOS settings. Here, check that the secure boot is enabled and the legacy boot is disabled. This can help you get rid of the error instantly.
But, if you do not remember the password, follow the 2nd method.
Method 2: When You Forgot the Microsoft/Local Account Password
Solution 1: By Booting in Safe Mode
1. Switch off your computer.
2. Then, start your computer by power button.
As soon as something appears on screen, just press and hold the power button for 5 secs to force shutdown your device.

3. Keep repeating this process of 2–3 times until you see Automatic repair screen.

4. Then, click on “Advanced options“.

5. After that, you need to click on “Troubleshoot“.

6. Then, click on the “Advanced options“.

7. To access the “Startup Settings“, click on it.

8. Then, click on “Restart” to restart your computer in safe mode.

9. Some Startup settings options will be visible.
10. Press “4” to ‘Enable Safe Mode‘ .

Your computer will be booted into Safe Mode .
Now proceed to delete the NGC Folder in safe mode
Step 1: Press Win +E keys together on your keyboard to open the File Explorer.
Just click on View and make sure hidden items option is checked.

Now, In the File Explorer, navigate to the below path to reach the NGC folder:
- C:
- Windows
- ServiceProfiles
- LocalService
- AppData
- Local
- Microsoft
- NGC

Step 2: Select the NGC folder and hit the Delete button on your keyboard. Now, exit the File Explorer, and restart computer and boot normally.
Method 3: If this does not work Reset your PC
1. Switch off your computer.
2. Then, start your computer by power button.
As soon as something appears on screen, just press and hold the power button for 5 secs to force shutdown your device.

3. Keep repeating this process of 2–3 times until you see Automatic repair screen.

4. Then, click on “Advanced options“.

5. After that, you need to click on “Troubleshoot“.

6. Now, click on Reset this PC

7. Now, choose to keep your files.

Now, your PC will be reset.