Looking for options to prevent users from deleting printers from Devices and Printer View in Control Panel? As an Administrator, there might be a need to provide access grants to a particular set of users and restricts others from doing the action. Let’s see in this article how to prevent users from deleting the printers from the Control Panel.

Method 1: Using Group Policy Editor
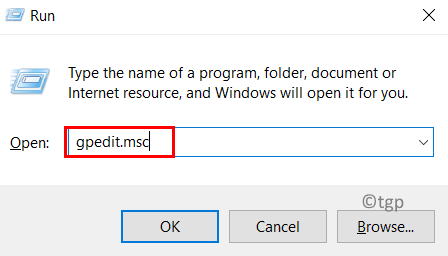
Step 1: Press Win + R then type gpedit.msc and press Enter. Press Yes if you are prompted UAC (User Account Control) popup.

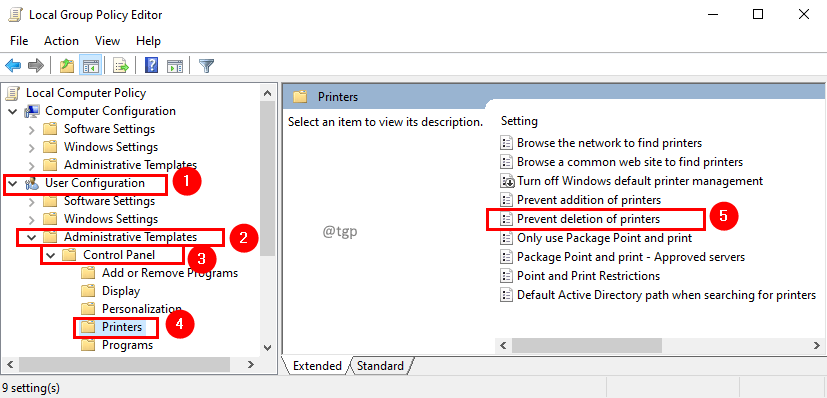
Step 2: Navigate to the below location in the Local Group Policy Editor window
User Configuration\Administrative Templates\Control Panel\Printers
Step 3: Double click on Prevent deletion of printers.

Step 4: In the Prevent deletion of printers window, select Enabled and click Apply followed by OK.

Step 5: Now restart your system to make changes effective.
Note:
- This Policy setting will restrict deleting printers from the Devices and Printers view only. One can still delete printers using Print Management Console, PowerShell, WMI interfaces, and any utility to perform the printer removal task.
- If this policy setting is enabled, it prevents users from deleting local and network printers.
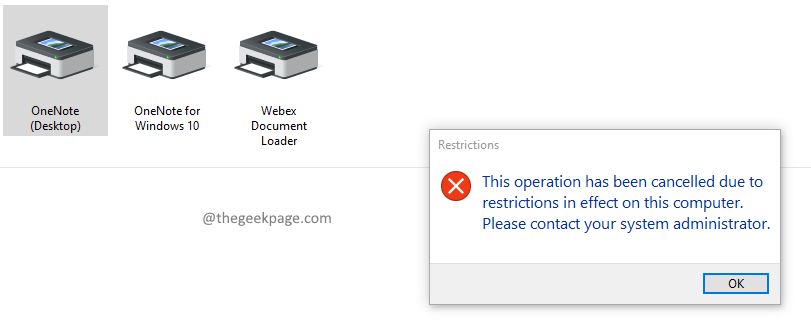
- If a user tries to delete a printer, such as by using the Delete option in Printers in Control Panel, a message appears explaining that a setting prevents the action.
Method 2: Using Registry Editor
Step 1: Press Win+R, then type regedit and click OK. Press Yes if you are prompted UAC (User Account Control) popup.

Step 2: Navigate to the below registry key.
Computer\HKEY_CURRENT_USER\Software\Microsoft\Windows\CurrentVersion\Policies\Explorer
Step 3: If you don’t find Explorer in the path, add the key. Right-click on the Policies folder and select New from Context Menu. In Submenu of New, select Key.

Step 4: New folder will be created under the Policies folder. Give Explorer as a name for the new folder.

Step 5: Now add a DWORD value to Explorer. To do that, right-click and select New on the context menu. From the submenu of New, select DWORD (32-bit) Value.

Step 6: Give Dword value name as NoDeletePrinter.

Step 7: Double click on the NoDeletePrinter value to edit it. In the Edit DWORD (32- bit) Value window, set the Value data to 1 to restrict the user from deleting the printer from the Control Panel. Click OK.

That’s All
We hope this article has been informative. Thank you for Reading.
Kindly comment and let us know if you have found this helpful.