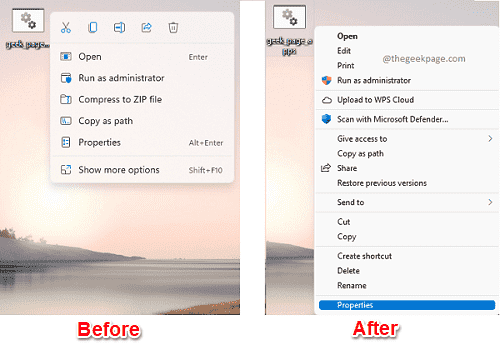
With the new user interface enhancements in Windows 11, what has come into the picture along with, is the brand new Windows 11 right-click context menu. It looks very sleek and compact as well. But since the right-click context menu is something that everyone is so used to using all the time, it might be a little annoying for users who have been using Windows for a long time. In this article, we have explained in some very easy steps how you can easily bring your classic Windows style right-click context menu in your Windows 11.
How to Restore the Classic Right Click Context Menu
In this method, we are going to make changes to your registry settings. Before making any changes to your registry settings, it is always recommended to take a backup of your existing registry entries.
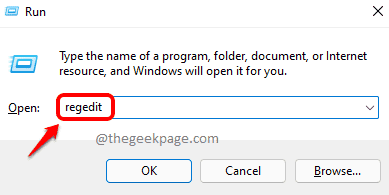
Step 1: Launch the Run window by pressing the Win + R keys together. Type in regedit and hit the Enter key.
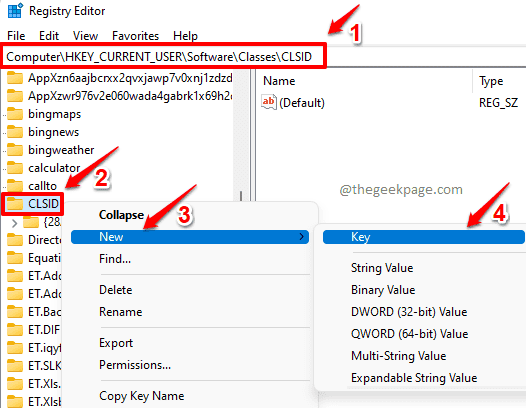
Step 2: In the Registry Editor navigation URL, copy & paste the following URL and then hit the Enter key.
HKEY_CURRENT_USER\Software\Classes\CLSID
Now, right-click on the folder CLSID, click on the New option and then click on Key option.
Step 3: As next, right-click on the newly created key and then click on the option named Rename.
Step 4: Give the new name of the key as {86ca1aa0-34aa-4e8b-a509-50c905bae2a2}. After renaming, your folder should look like in the following screenshot.
{86ca1aa0-34aa-4e8b-a509-50c905bae2a2}
Step 5: Now, right-click on the newly created key, click on the New option and then click on the Key option once again.
Step 6: Press on the newly created key and then press the F2 button to rename it. Give the new name as InprocServer32.
In the right window pane, double click on the value Default.
Note: You can also see that the Data field for the Default value is set as (value not set).
Step 7: In the Edit String window, leave the Value data field as empty and then click on the OK button.
Step 8: You will be able to see that the Data field of the Default value is now set to empty as shown in the screenshot below.
You now need to reboot your machine. When the machine restarts, right-click on any file and you can see that your classic Windows context menu is restored. Enjoy!
How to Get the Windows 11 Right Click Context Menu Back
It is highly likely that you might want to get your Windows 11 style context menu back after some time. In that case, you can follow the steps below to get back your Windows 11 style right-click context menu.
Step 1: Launch Registry Editor again and then navigate to the following URL.
Computer\HKEY_CURRENT_USER\Software\Classes\CLSID\{86ca1aa0-34aa-4e8b-a509-50c905bae2a2}\InprocServer32
Now, right-click on the InprocServer32 folder and click on the Delete option.
Step 2: When the delete confirmation window opens up, click on the Yes button to proceed.
The changes would be instant this time. You can right-click on any of the files to see your Windows 11 style right-click context menu back in action.
Hope you found the article useful.


